Saving data to a system of record
Archived
3 Tareas
10 minutos
Escenario
The program manager for the roadside assistance service wants to provide users with an option to enroll when requesting service rather than automatically rejecting unenrolled users. Configure the Approval Rejection process to update the membership status of a customer record if the customer decides to enroll in the roadside assistance program. Create a data transform to copy the customer record to a savable data page and update the membership status and coverage level. Then, add a Save data page step to update the customer record in the database.
The following table provides the credentials you need to complete the challenge.
| Role | Operator ID | Password |
|---|---|---|
| Application Developer | author@gogoroad | pega123! |
Recorrido del Reto
Tareas detalladas
1 Create an Update customer enrollment data transform
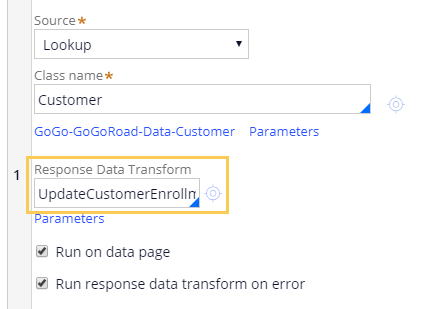
- In Dev Studio, from the Navigation pane, click Data types.
- Expand Customer and click Savable Customer to open the Savable Customer data page.
- In the Data Sources section, in the Response Data Transform field, enter UpdateCustomerEnrollment.
- To the right of the Response Data Transform field, click the crosshairs icon to open the Create Data Transform field.
- Click Create and open to create the data transform.
- Delete any existing rows.
- In the first row, keep the default Action value as Set.
- In the Target field, enter or select Primary.Enrollment.
Tip: Use Primary to explicitly set the context for the step to the data page that called the data transform.
- In the Source field, enter or select true.
- Click Add a row.
- Keep the default Action value as Set.
- In the Target field, enter or select Primary.CoverageLevel.
- In the Source field, enter or select pyWorkPage.CoverageLevelElected.

- Click the Pages & Classes tab.
- In the Page name field, enter pyWorkPage.
- In the Class field, enter or select GoGo-GoGoRoad-Work-AssistanceRequest.
- Click Save to save the data transform.
- Return to the Savable Customer data page.
- Click Save to save the data page.
2 Add a Save data page automation to the Approval Rejection process
- From the Navigation pane, click Case types.
- Click Assistance Request to open the Assistance Request case type.
- In the Approval Rejection process, click Configure process.
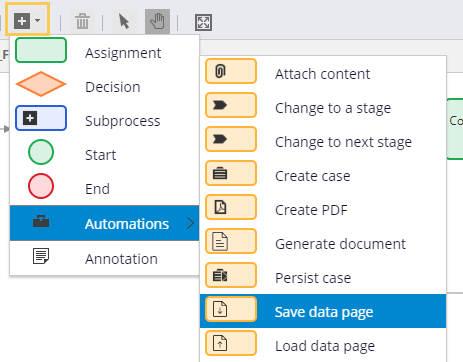
- Click Add a flow shape > Automations > Save data page.
- With the Save data page automation selected, in the properties pane, enter or select D_CustomerSavable.
- In the Parameters section, in the pyGUID field, enter or select .CustomerID.pyGUID to pass the unique identifier for the current customer record to the savable data page.

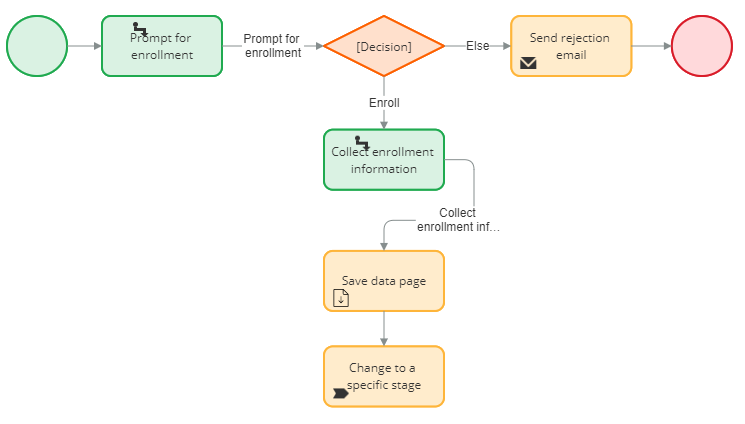
- Click and drag the Collect enrollment information connector to the Save data page automation.
- Hover over the Save data page automation and drag the connector to the Change to a specific stage step.
- Click Save to save the Approval Rejection process.
- Click Stages & steps to return to the Assistance Request case type.
3 Confirm your work
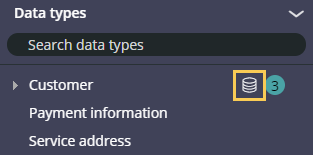
- In the Navigation pane, click Data types.
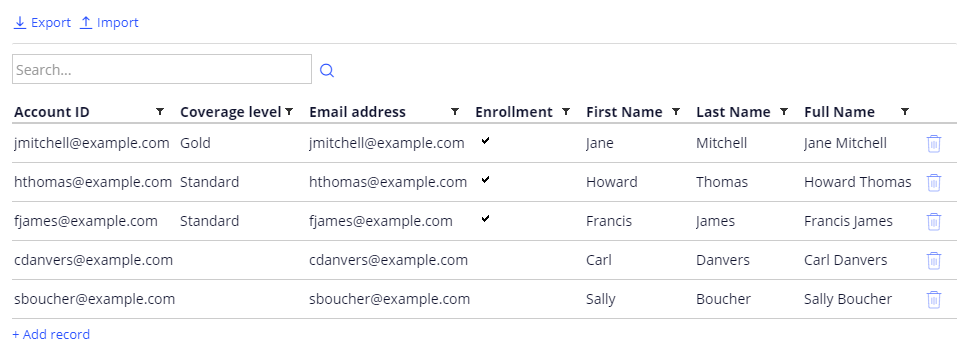
- Click the Record icon to the right of Customer to open the records of the Customer data type.
- For testing, identify a Customer record that is unenrolled.
- Click the Assistance Request tab to return to the Assistance Request case type.
- Click Save and run.
- Advance past the Create view.
- In the Enter customer information view, select the Account ID of the unenrolled customer you identified.
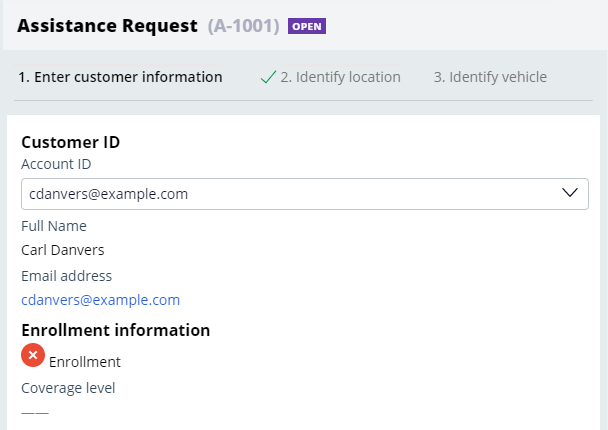
- Advance the case to the Approval view.
- Click Reject. The Prompt for enrollment view is displayed.
- In the Prompt for enrollment view, click Yes, I want to enroll, then click Submit.
- In the Collect enrollment information view, select a coverage level, then click Submit.
- Click the GoGo-GoGoRoad-Data-Customer tab to return to the list of Customer records.
- Click Actions > Refresh to refresh the information.
- Verify the customer is enrolled with the coverage level you selected.
