InvoiceTableDataSln-v22.zip
(2.1 KB)
Accessing PDF data with automations
5 Tasks
15 mins
Intermediate
Robotic Process Automation
English
Scenario
The billing department of the Astend Technology company receives invoices in PDF file format and must parse specific data to another system for proper processing. You will create a PDF document type for the invoice to ensure that it is identifiable and its values are available in an automation. The automation passes in a file location parameter to open the document. From the lookup table, the automation loops through the table to retrieve the data subtotal, sales tax, and total values, and then stores them into the global variables as a Double data type.
Complete the following tasks:
- Add the PDF file connector to Globals.
- Configure the PDF file document type.
- Configure a lookup Table and global variables to store the automation data.
- Create an automation that opens the PDF document file and updates the lookup table.
- Loop through the table to extract data values for Subtotal, Sales Tax, and Total to global variables, and change the data type from String to Double.
Starting project:
Download, the following solution zip file and extract it to extract it to C:\Users\<yourLogin>\Documents\Pega Robot Studio\Projects.
Download the sample PDF file. Save it to the Desktop.
Detailed Tasks
1 Add the PDF connector to Globals
- On the Project tab, click Globals.
- In the Toolbox, in the search field, enter PdfConnector.
- Drag the PdfConnector to the Globals.
- On the Property Grid of the PdfConnector, change the Name property to Invoice.
- Save the changes on the Globals tab.
2 Add and configure a document type
- In the Globals, right-click the Invoice, and then select Add Document Type.

- Select the PDF file sample document on the Desktop from the Open dialog box.
- In the Add New Document Type window, in the Document type name field, enter Astend Invoice.
- In the Threshold configuration pane of the dialog box, in the Line menu, click to highlight lines in the preview area on the right.
- Adjust the Line threshold to ensure correct line identification in the PDF file document type. The following figure shows an example of the lines:

- In the dialog box, in the Table configuration section, select Include rectangles in selection.
Tip: This feature increases the number of tables recognized in the document, matching tables based on intersecting lines.
- Click to open the Identifiers section.
- In the Identifiers section, click Add > Text to configure a unique document type identifier.
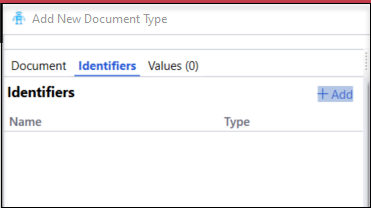
- In the Identifier name field, enter Invoice for.
- In the upper-right corner, click the blue rectangle to configure the identifier. The rectangle changes to orange when activated.
- Draw a rectangle around the Invoice for: text.
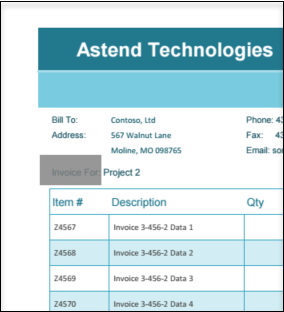
- Click , and then click .
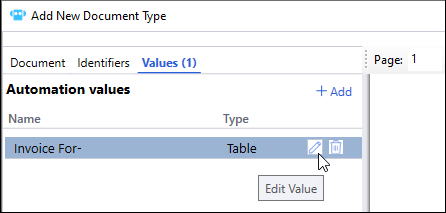
- In the Automation values section, select Add > Table.
- Confirm the blue selection rectangle in the right corner is highlighted.
- Draw a rectangle around the Invoice for: text in the PDF image.
- In the Table name field, enter tblInvoice.
- Click Validate to confirm the selected landmark and to highlight the Invoice Item table.
- In the Table fill option list, select Compact to remove empty cells and move data to the left.
- In the Select Table section, click the blue rectangle to highlight.
- In the PDF image, click the Invoice Item table to highlight.
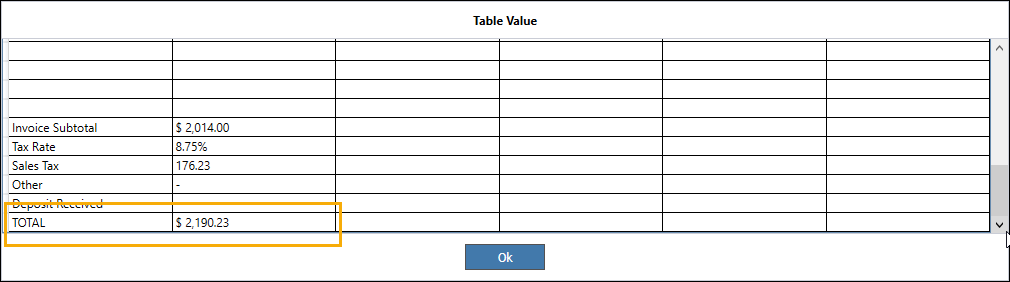
- Click to see the table data output.
- In the last row, notice that the Total field is off by one column. Also, notice that the Subtotal and Total values have a currency symbol.
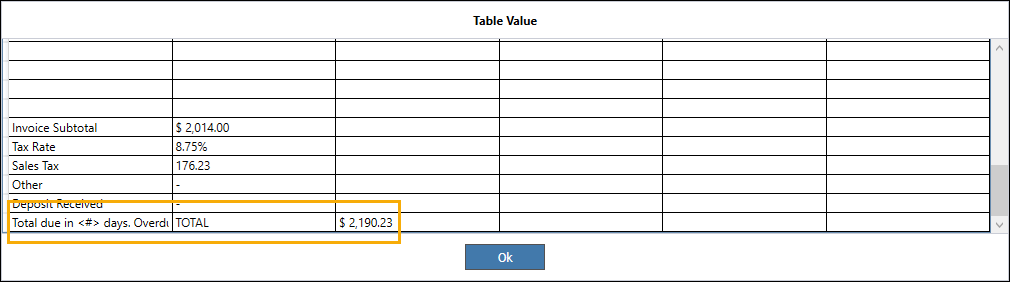
- On the dialog window, click OK.
- Click Save, then click Back twice to return to the Document tab.
- Click Modify, and then accept the change message.
- Clear the Include rectangles in selection checkbox, and then click twice to return to the Values tab for table definition.
- On the Values tab, click the icon on the Invoice For table.
- In the Select Table area, click the blue rectangle, and then click the Invoice Item table.
- Click the Show value to confirm the correct table structure, and then click OK to close the dialog window.
- In the Select Table section, select My table has headers in row.
- Select Advanced column options, and then configure the columns based on the following table.
Column name New column name Filter results Remove spaces from lines Remove all blank lines Remove these characters Col1 Item True True True Col2 Description True True True $, Col3 Qty True True True Col4 Unit Price True True True $, Col5 Discount True True True $, Col6 Price True True True $, - Click Save, and then click Done to finish the Document Type configuration.
- Click File > Save all to save the changes made in the project.
3 Configure a Lookup Table and add global variables
- In the Globals tab, select the lktblInvoice lookup table to access its Property Grid.
- In the Fields property in the Property Grid, click to open the LookupField Collection Editor.
- In the LookupField Collection Editor, click the Add icon to add the following fields to the lookup table:
FieldName Key Type Key True System.Int32 Item False System.String Description False System.String Quantity False System.String Unit Price False System.String Discount False System.String Price False System.String Tip: The Description column is set to a String data type, but we will have to convert the three integers of Total, Subtotal, and Sales Tax as a Double data type later. - In the Toolbox, expand the Variables section.
- Add three Double variables to Globals, and then enter the following names:
- decTotal
- decSubtotal
- decSalesTax
- Select File > Save all to save the changes made in the project.
4 Create a sub-automation to open the file location and populate the lookup table
- On the Project tab, click Add > Automation.
- On the Add new automation dialog box
- In the Automation name field, enter Invoice Data Pull.
- Deselect Empty Automation checkbox.
- Click Add.

- On the Run block, add a String parameter named fileLocation.
- In the Globals section on the Palette, click and drag Invoice to the automation, and then add the FileName property.
- From the Invoice.FileName block, add the Invoice.Open method to the automation.
- In the Globals section on the Palette, click and drag Invoice > Astend_Invoice > tblInvoice to the automation, and then add the Table property.
- On the Jump to Error block, rename the errMessage parameter to Not able to access PDF document.
- In the Globals section on the Palette, click and drag lktblInvoice to the automation, and then add the ReplaceTableAutoKey method.
- Connect the design blocks as shown in the following figure.

- Click Save all.
5 Loop through the lookup table and store data to global variables
- In the search field on the Toolbox, enter ForLoop. Drag the ForLoop to the Designer windows to add a loop to the automation.
- Connect lktblInvoice.ReplaceTableAutoKey design block with the ForLoop1 design block.
- In the Globals section of the Palette, click and drag lktblInvoice to the automation, and then add the RowCount property.
- Connect lktblInvoice.RowCount property output with the ForLoop1.Limit input.

- In the Toolbox, expand the Variables section, and then drag the Integer to the Designer windows.
- On the Integer1 design block, double-click Interger1 and enter intIndex.
- In the Palette, click and drag lktblInvoice, and then add the GetRecord method to the automation.
- On the automation surface, right-click, and then add Jump To > Error, and then in the errMessage parameter enter Not able to access Data Table.
- In the Search field on the Toolbox, enter Switch, and then click and drag the Switch component to the automation.
- On the lktblInvoice.GetRocord block, draw a data connector from the Item parameter to the Input port of a Switch1 component.
- On the Switch1 design block, click (Not Defined), and then enter TOTAL.
- On the Switch1 design block, click the Plus icon twice, and then add Invoice Subtotal and Sales Tax.
- On the automation, copy and paste intIndex.Value block three times.
- On the Switch1 block, draw a connector from each output parameter to an intIndex.Value property design block.

- In the Globals section on the Palette, click and drag lktblInvoice to the automation, and then add the GetRowColumn method.
- On the lktblInvoice.GetRowColumn block, click columnName, and then enter Description.
- In the automation, right-click lktblInvoice.GetRowColumn block, and then copy and paste the block twice.
- In the Search field on the Toolbox, enter change, and then click and drag the ChangeType method to the automation.
- On the Convert.ChangeType block, click typeCode, and then select Double.
- On the automation, copy the Convert.ChangeType block, and then paste it two times.
- On the Palette, click and drag the following variables to the automation, and then add its Value property.
- decSalesTax
- decSubtotal
- decTotal
- Connect the design blocks as shown in the following image.

- Confirm the automation links from the following image.

- Click Save all to save the changes made in the automation.
This Challenge is to practice what you learned in the following Module:
If you are having problems with your training, please review the Pega Academy Support FAQs.
Want to help us improve this content?