Advanced automation techniques - Start.zip
(452.75 KB)
Applying advanced automation techniques and best practices
5 Tasks
35 mins
Beginner
Robotic Process Automation
English
Scenario
While running the Robotic Banking automation, you decide that reorganizing the project will improve efficiency and better align with best practices. Updating the project also allows your team to organize and categorize error messages in preparation for deployment, making error messages easier to track in Production.
Complete the following tasks:
- Add a Message Manifest to the Robotic Banking project with message definitions that categorizes all error messages
- Refactor the Pega login and customer search automations into application methods
- Create an automation to use new application methods and message manifest capabilities
Detailed Tasks
1 Add the message manifest
- Download and unpack the folder containing the Advance automation techniques zip file and move it to C:\Users\<username>\Documents\Pega Robot Studio\
- Open the RoboticBanking.pegaProject in Pega Robot Studio.
- In the project explorer, click the Information icon next to the Robotic Banking to display the properties grid.
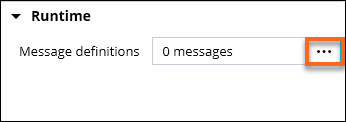
- In the section, click the More icon to open the Message manifest dialog.
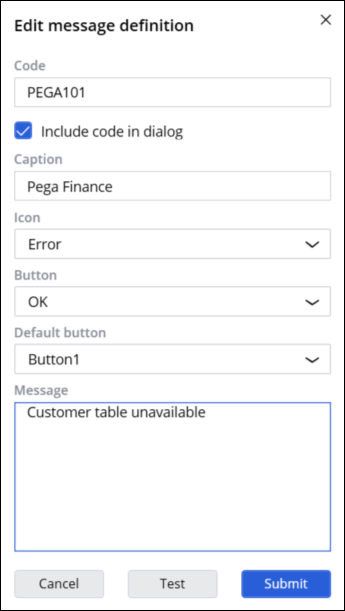
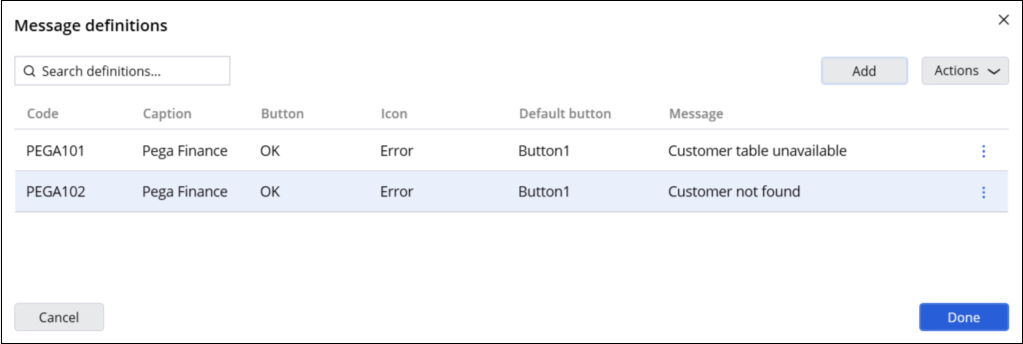
- In the Message definitions window, click Add and then add the following parameters to a new message definition:
Variable
Value
Code
PEGA101
Include code in dialog
Checked
Caption
Pega Finance
Icon
Error
Button
OK
Default button
Button1
Message
Customer table unavailable
- In the Edit message definition window, select the Submit button to add the Message manifest definition.
- In the Message definitions window, click to add another message definition.
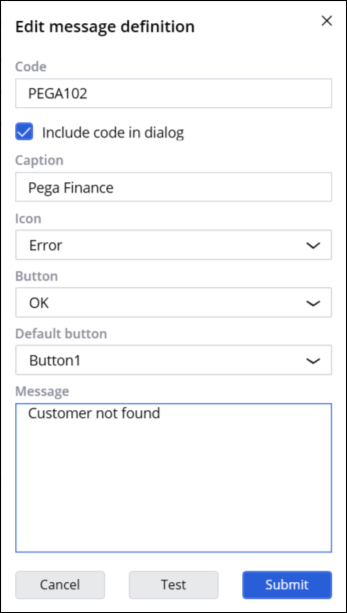
- In the Edit message definition dialog box, click .
- In the Message definitionswindow, click Done.
2 Edit automations to use the new message manifest
- On the Project Explorer, right-click the Finance_CustomerSearch automation and click Open.
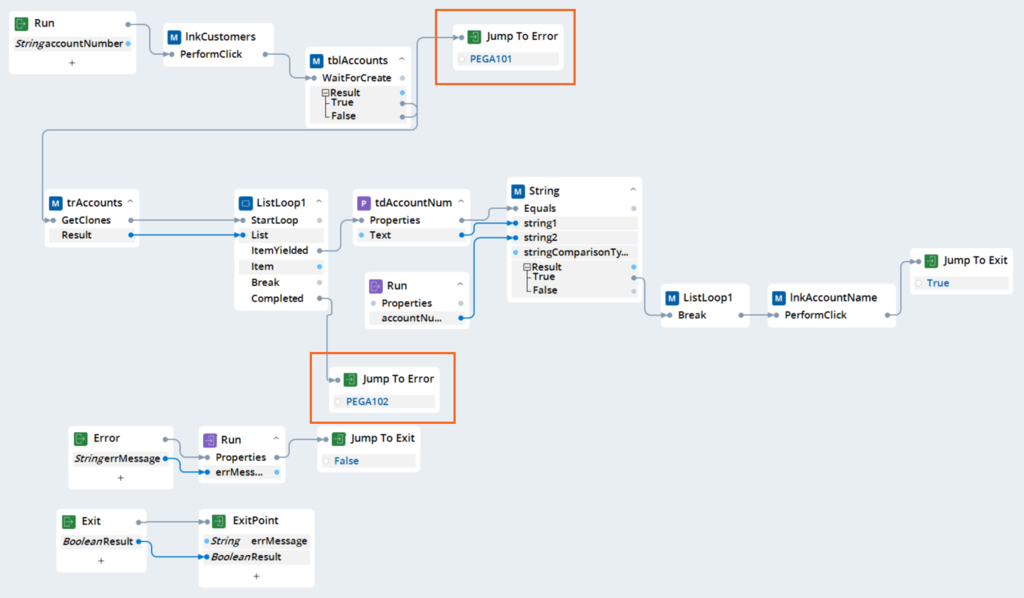
- Click the inside each of the Jump To Error blocks and replace the error text with the matching Message manifest code, as follows
Old Error
Message manifest code
Customer table unavailable
PEGA101
Customer not found
PEGA102
- On the Toolbar, click to save the automation.
3 Refactor automations into application methods
- In the Project Explorer, select BillPaySystemDiscount to open the automation.
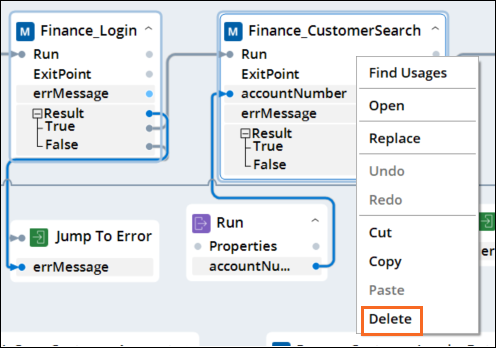
- Hold Ctrl on your keyboard and then select theFinance_Login and theFinance_CustomerSearch design blocks.
- Right-click to display the context menu and then click Delete to remove Finance_Login and theFinance_CustomerSearch design blocks from the automation.
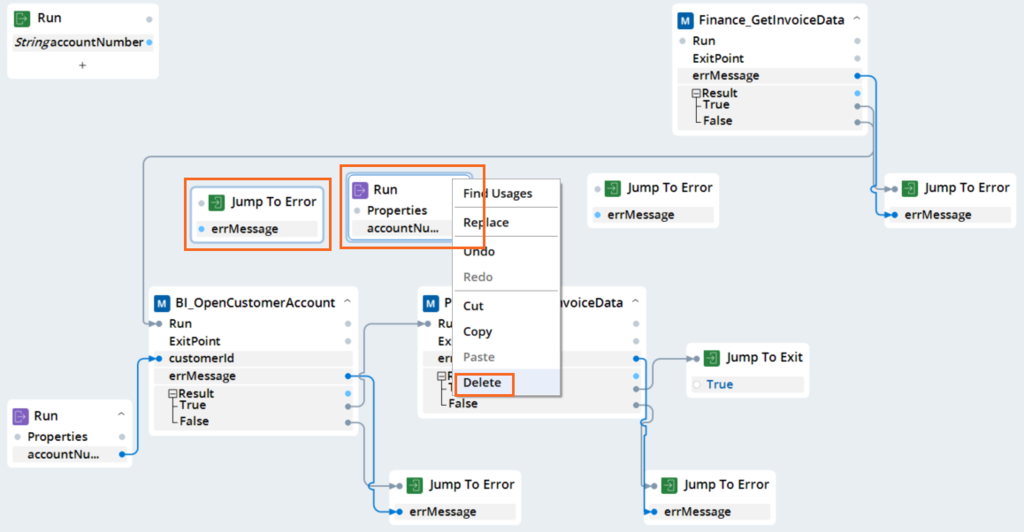
- On the automation surface, delete Jump To Error, and accountNumber design blocks.
- In the toolbar, click the Include button and unselect the Finance_Login automation to remove the references from the automation.
- Repeat step 5 to remove references to the Finance_CustomerSearch automation.
- Click Done to save your changes

- In the toolbar, click the Project tab to open the Project explorer.
- Click and drag the Finance_Login automation and place it on top of the Pega Finance application, to add it as an application method
- Click and drag the Finance_CustomerSearch automation and add it as an application method.
- Right-click the Finance_CustomerSearch application method, click Rename and change the name to CustomerSearch.
- Right-click the Finance_Login application method, click Rename and change the name to Login.
- In the list of project items, click the Pega Finance application to open the application in a new tab.
- On the Pega Finance tab, click the Interface tab, and then select the CustomerSearch method.
- Click the Visibility type list and then select Public to change the method visibility.
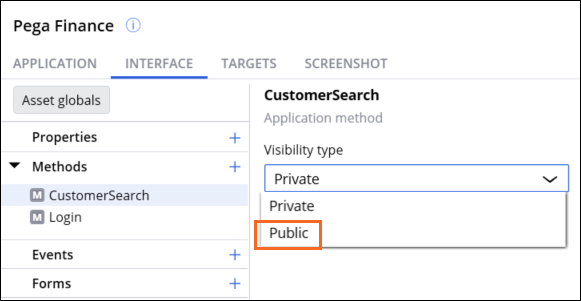
- On the Interface Tab, select the Login method and update its visibility setting to Public.
- At the top of the toolbar, click Save to save your application changes.
4 Create a new automation with application methods
- In the toolbar, click the Project tab and navigate to the project explorer.
- In the toolbar, click Add > Automation to create a new automation, and name it Finance_RetrieveCustomerData.

- In the toolbar, click the Include button, click the Application tab, and then add the Pega Finance application to the automation.
- Add the following design blocks to the automation surface:
Design block name
Actions
Login application method
- In the palette, expand the Applications section, and drag the Pega Finance application onto the automation surface.
- In the dialog box, click More and select Method.
- In the Search box, enter Login, and then select the Login method.
- In the dialog box, click the Add button.
CustomerSearch application method
- In the palette, click the Pega Finance application and drag it onto the automation surface.
- In the dialog box, click More and select Method.
- Select the CustomerSearch method.
- In the dialog box, click the Add button.
Entry point
- Right-click the automation surface and then click Add > Entry Point.
- In the Run design block, click the + icon.
- Click String parameter > param1 and then enter accountNumber.
Exit point
- Right-click the automation surface and then click Add > Exit Point.
- Click inside the exit point and rename it to Exit Point.
- On the exit point, click the + icon.
- Click String parameter > param1 and then enter errMessage.
- Click Void and change the type to Boolean.
Exit label
- Right-click the automation surface and then click Add > Label.
- Click inside the label and rename it Exit.
- On the Exit label, click the + icon.
- Click String and change the type to
Boolean. - Click param1 and then enter Result.
Error label
- Right-click the automation surface and then click Add > Label.
- Click inside the label and rename it Error.
- On the Error label, click the + icon.
- Click param1 and then enter errMessage.
errMessage property - On the palette, expand Locals > Run section, and then drag the errMessage parameter to the automation surface.
Jump To Exit
- Right-click the automation surface, and then select Jump To > Exit.
- Click the Result, and then select False.
Two Jump To Error design blocks
- Right-click the automation surface, and then select Jump To > Error.
Jump to Exit - Right-click the automation surface, and then select Jump To > Exit.
- Click the Result, and then select True.
- Connect the design blocks as shown in the following figure:
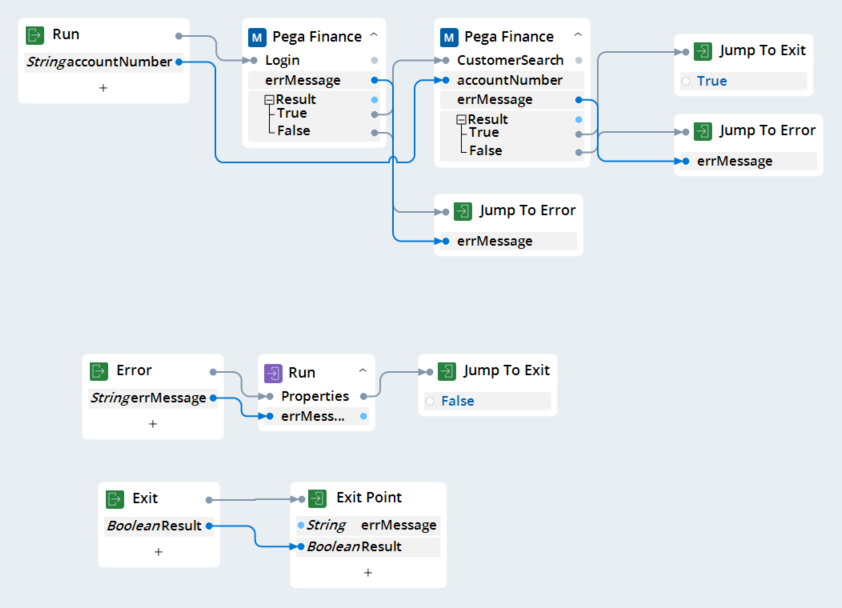
- On the toolbar, click to save the automation.
5 Set up BillPaySystemDiscount to use a new subautomation
- Click the Project tab and navigate to the Project explorer.
- In the project items list, select the BillPaySystemDiscount automation.
- In the toolbar click .
- In the Include in palette dialog box, next to Finance_RetrieveCustomerData, click Add to add the automation.

- In the window, click Done to return to the automation.
- In the palette, click and drag the Finance_RetrieveCustomerData automation onto the automation surface.
- In the window, select the Run method, then click Add.
- In the Toolbox, click Accelerators > MessageManifest.
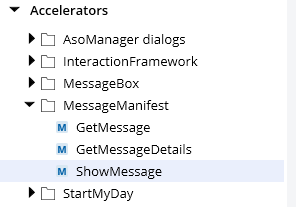
- In the the Toolbox, in the section, click and drag the ShowMessage block onto the automation surface.
- In the window, select the first option and then click Submit.

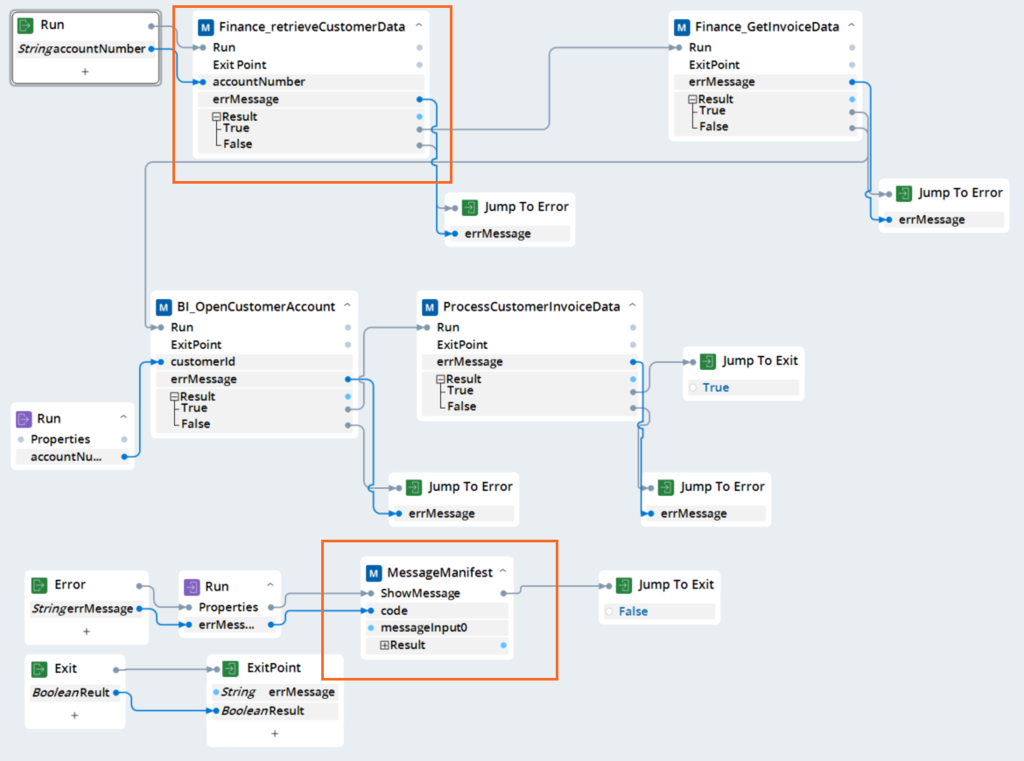
- On the automation surface, connect the links as shown in the following figure:
Available in the following mission:
If you are having problems with your training, please review the Pega Academy Support FAQs.
Want to help us improve this content?