
Configuring the Cosmos Home page
Archived
5 Tasks
30 mins
Pega Platform 8.5
Beginner
User Experience
English
Scenario
The MyTown311 design team wants you to customize the curated Home page. Use App Studio and advanced features of Dev Studio to:
- Create a new design template with a two-column layout with a 70/30 split.
- Move the welcome widget and worklist to the left column and move Pulse to the right column.
- Configure the out-of-the-box (OOTB) welcome widget with a custom cityscape background image.
- Configure the worklist to allow for viewing team assignments.
- Configure the worklist to render in tabular format.
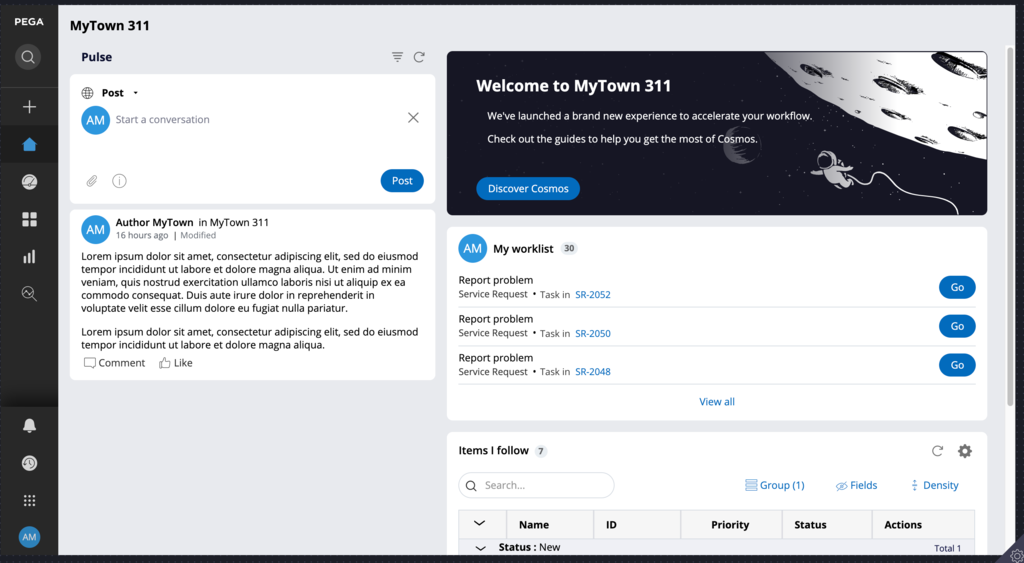
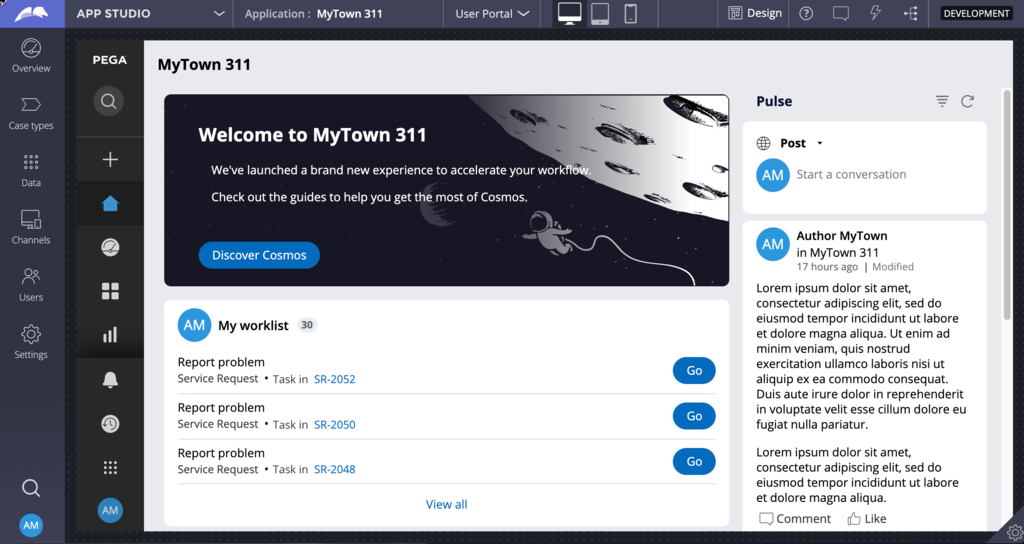
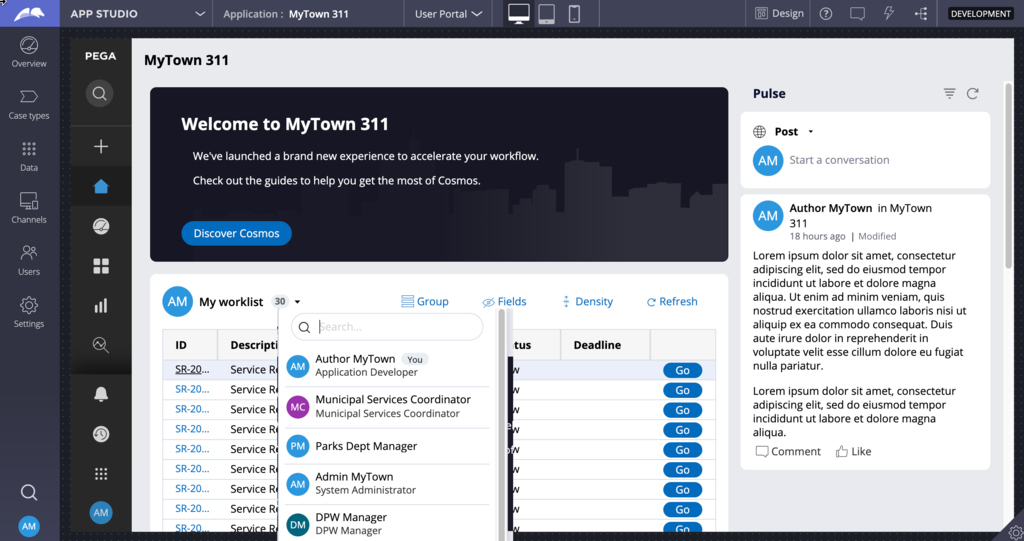
For comparison, the following image shows the default Cosmos home page that you will replace.
The following table provides the credentials you need to complete the challenge.
| Role | User name | Password |
|---|---|---|
| Application Developer | author@mytown | cosmos123! |
Detailed Tasks
1 Reverse the order of the widgets
The new design uses the same widgets but renders them in opposite columns. Begin by moving them to the opposite columns.
- In to App Studio, click to navigate to the Home page.
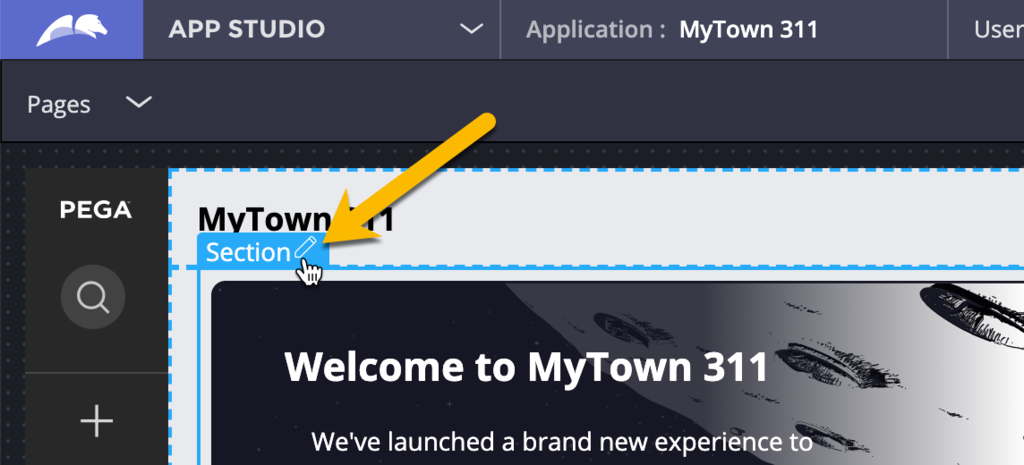
- In the header of App Studio, click Design to enter Design mode.
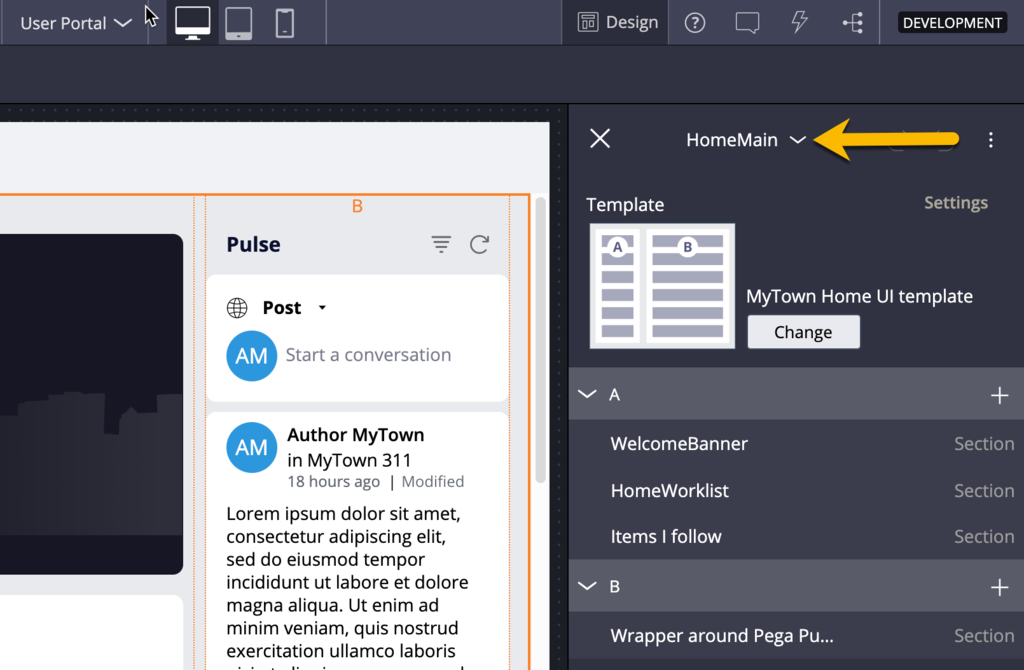
- Hover over the main page and click Edit to begin moving the widgets in the HomeMain pane.
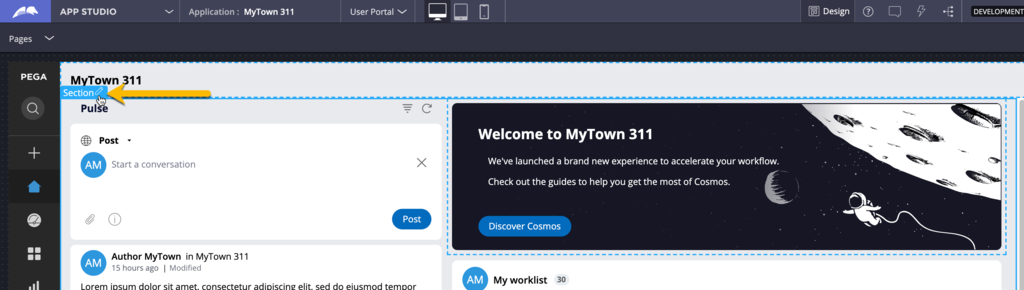
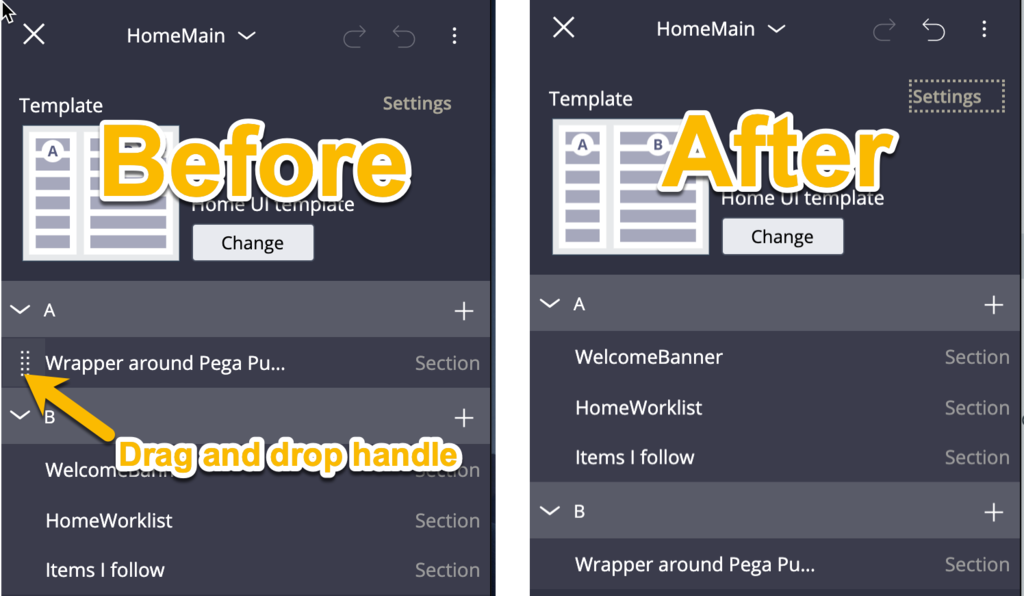
- In the HomeMain pane, under region A, click the drag handle to drag the Wrapper around Pega Pulse section to region B.
- Under region B, drag the WelcomeBanner, HomeWorklist, and Items I follow sections to region A.
- In the header of App Studio, click Design to exit Design mode.
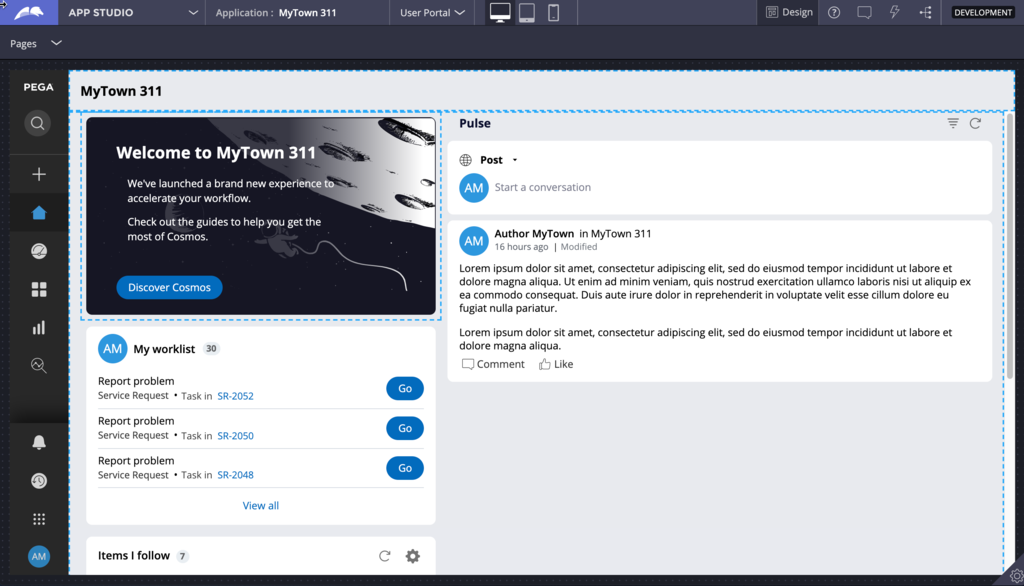
- Verify the Home page now looks like the following image.
2 Create a new design template for 70/30 layout
- In the header of App Studio, click Design to enter Design mode.
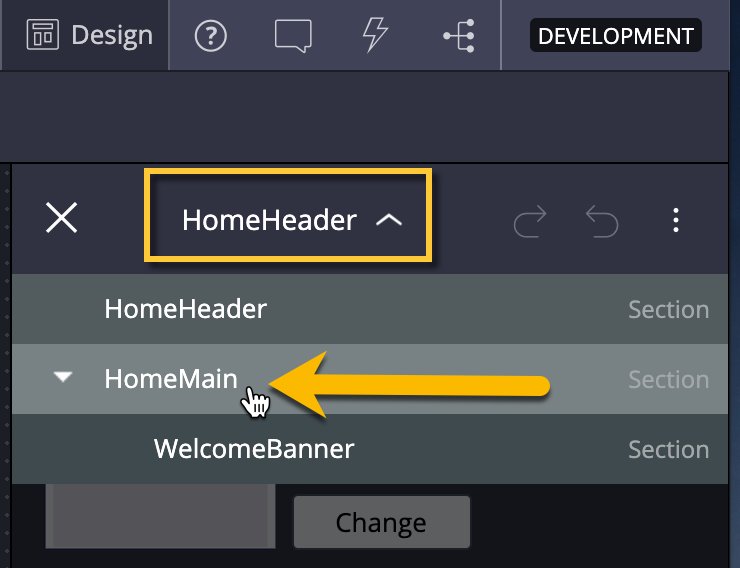
- Hover over any editable region and click the Edit icon to reveal the contextual pane on the right.
- In the drop-down menu, select HomeMain.
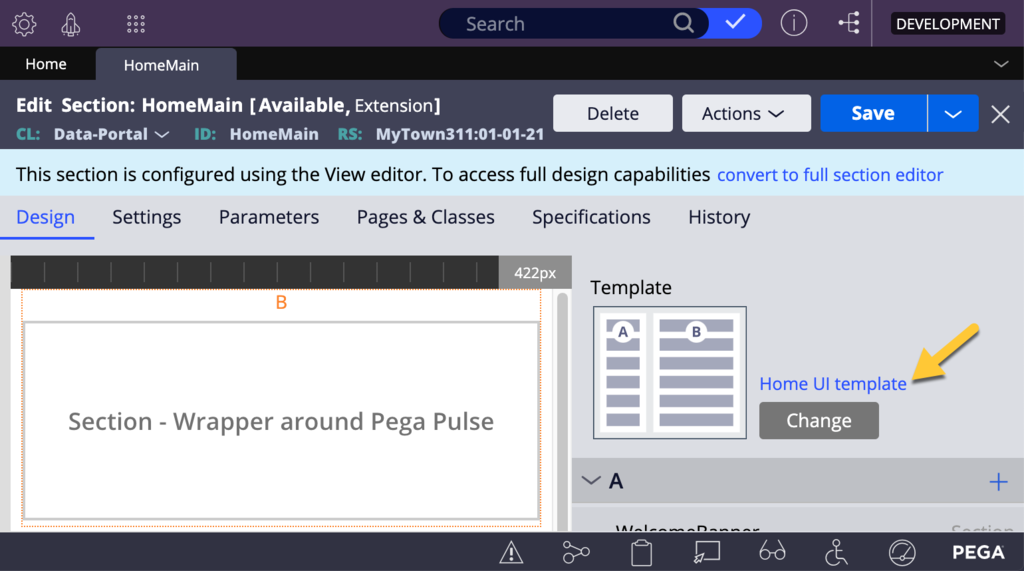
- Click More options > Open in Dev Studio to open the HomeMain section rule in Dev Studio.

- In the HomeMain section rule, click Home UI template to open the HomeUITemplate section rule from the Theme-Cosmos:02-01-01 ruleset.
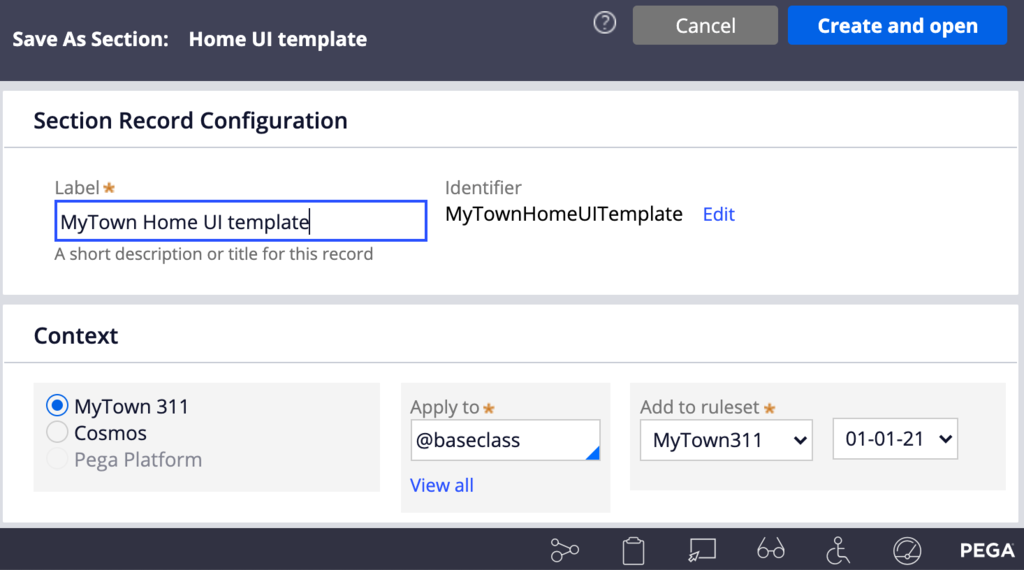
- In the section rule, click to create a copy of the design template section rule into the application ruleset.

- In the Label field, enter MyTown Home UI template.
- Click .
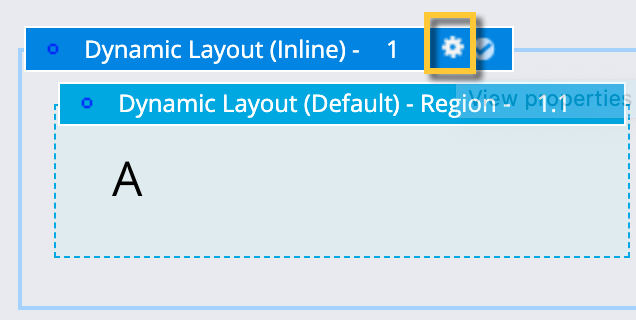
- In the MyTownHomeUITemplate section rule, select the Dynamic Layout (Inline) section.
- Click to open the Dynamic layout properties dialog box.
- In the Dynamic layout properties dialog box, on the Presentation tab, in the Content CSS class field, replace flex-col-40-60 with flex-col-70-30,and replace home-ui-template with mytown-home-ui-template.
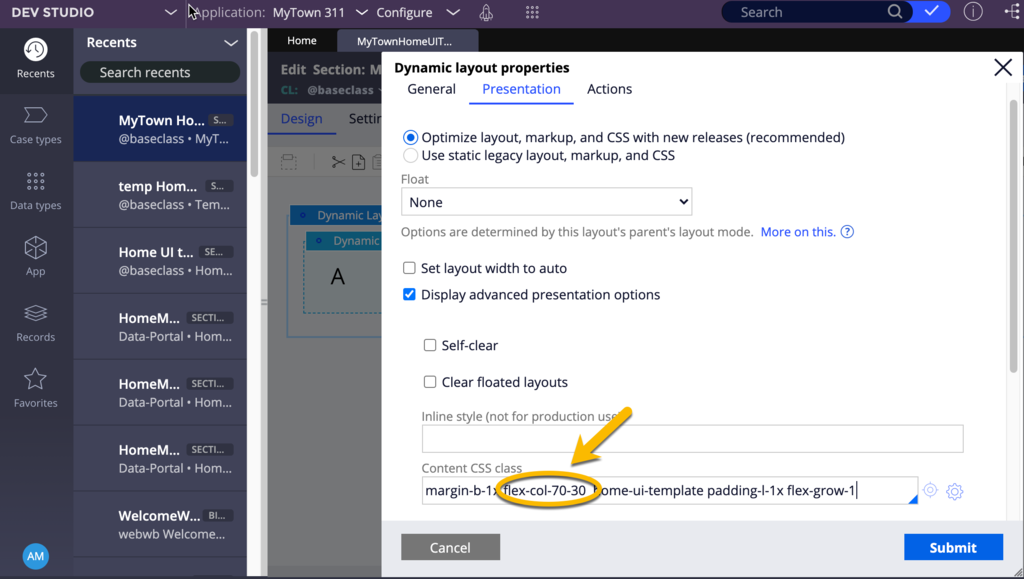
- Save your changes.
- In the header of Dev Studio, click Dev Studio > App Studio to return to App Studio.

- In App Studio, navigate to the Home page.
- In the header of App Studio, click Design to enable Design mode.
- Hover over any editable region and click the Edit icon to reveal the contextual pane on the right.
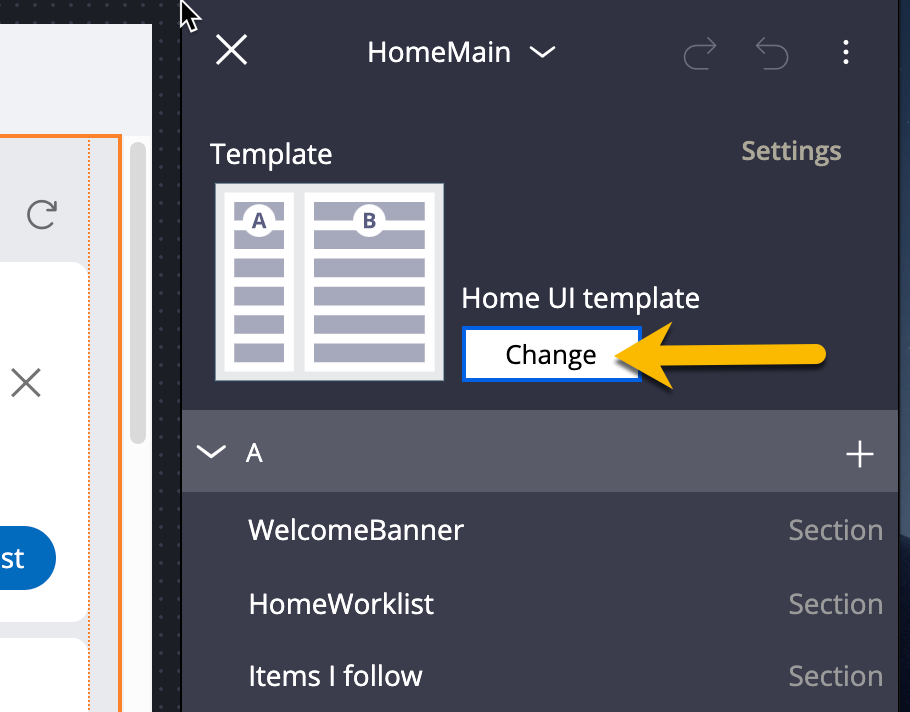
- In the drop-down select HomeMain to edit the section.
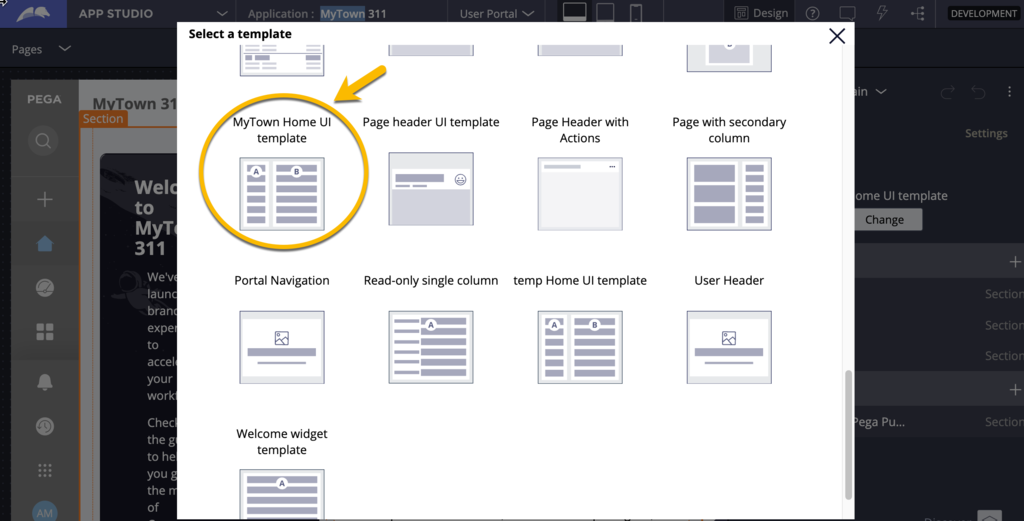
- In the HomeMain pane, click to change to the new MyTown Home UI template.
- In the Select a template dialog box, select MyTown Home UI template.
- Close the right pane and exit Design mode.
- Verify the home page reflects your changes as shown in the following image.
3 Customize the Welcome widget with custom background image
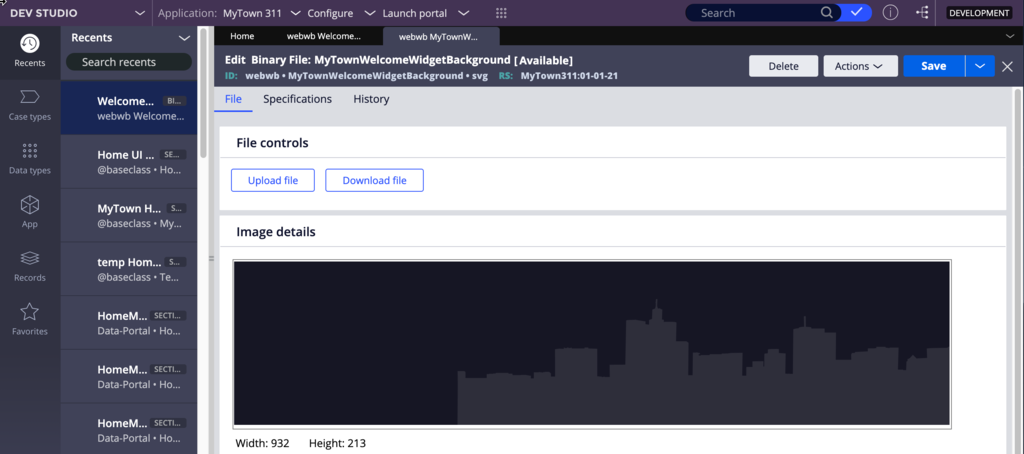
The background image is defined in a Binary file rule named WelcomeWidgetBackground. Cosmos uses this rule as the background for the widget.
- In Dev Studio, use the Search field to locate and open the MyTownWelcomeWidgetBackground svg binary file rule.
- In the upper right, click the drop-down next to the Save button.
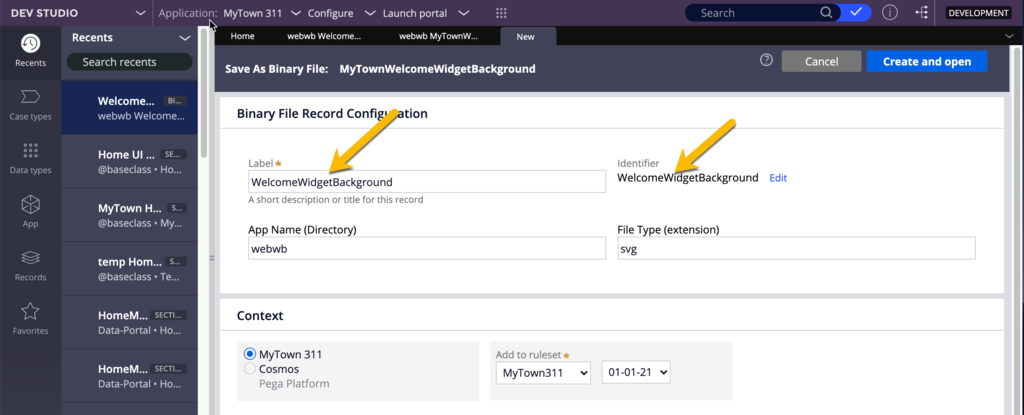
- Select Save As to rename the record configuration.

- In the Label field, enter WelcomeWidgetBackground to update the Identifier.
- In the upper right, click Create and open.
- In the header of Dev Studio, click Dev Studio > App Studio to return to App Studio.
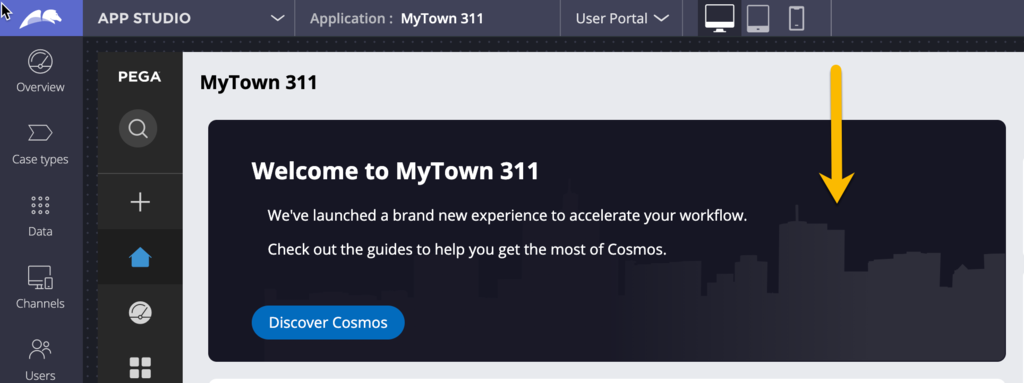
- In the navigation pane of the Home page, click the Home icon to refresh the home page.
- Verify that the welcome widget now displays a cityscape as the background image.
4 Render worklist in tabular format and enable viewing team assignments
- In to App Studio navigate to the Home page.
- Enter Design mode.
- Hover over any editable section and click Edit section to open the contextual pane on the right.
- In the contextual pane on the right, expand HomeMain to begin editing.
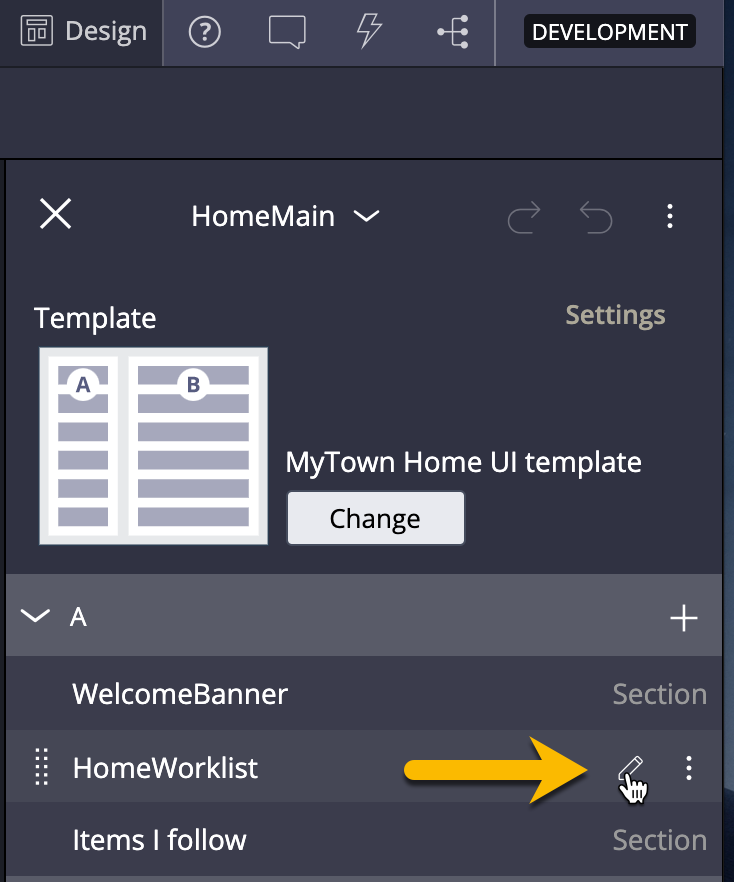
- To the right of HomeWorklist, click Edit.
- In the HomeWorklist section, click Settings.

- Select the Show team assignments check box.
- Select the Display as table check box.
- Verify that Preserve Parameter state on section refresh check box is selected.

- Click Apply.
- Exit Design mode.
- Verify that the final Home page looks like the following image.
5 Customize the welcome widget text
- In App Studio navigate to the Home page.
- Enter Design mode.
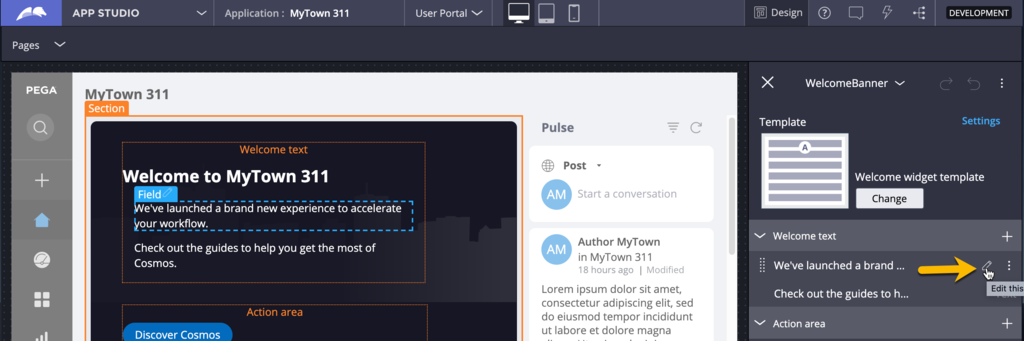
- Hover over the Welcome widget, and then click Edit to open the contextual pane on the right.
- In the contextual pane on the right, in the Welcome text region, hover over the first Text control, and then click Edit to edit the text.
- In the Value constant field, enter We're glad you're here. Use this app to create service requests.

- Click Apply to see your changes.
- Click the Close icon to dismiss the Text edit pane.
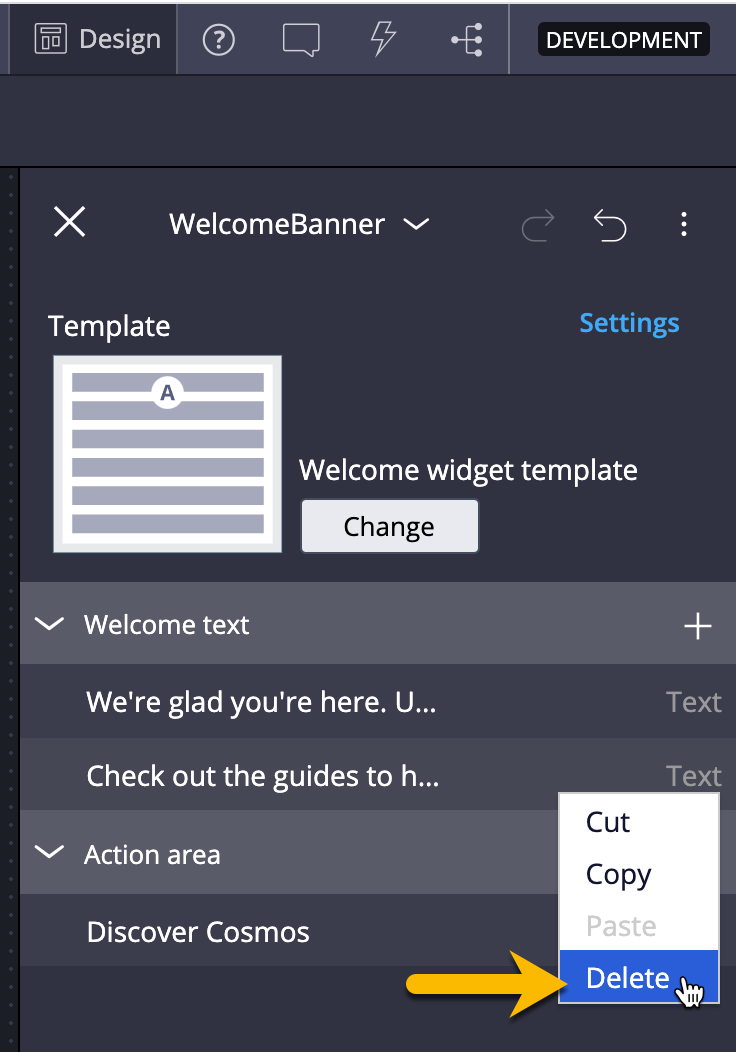
- In the Welcome text region, click the More icon, and then select Delete to remove the second Text input.
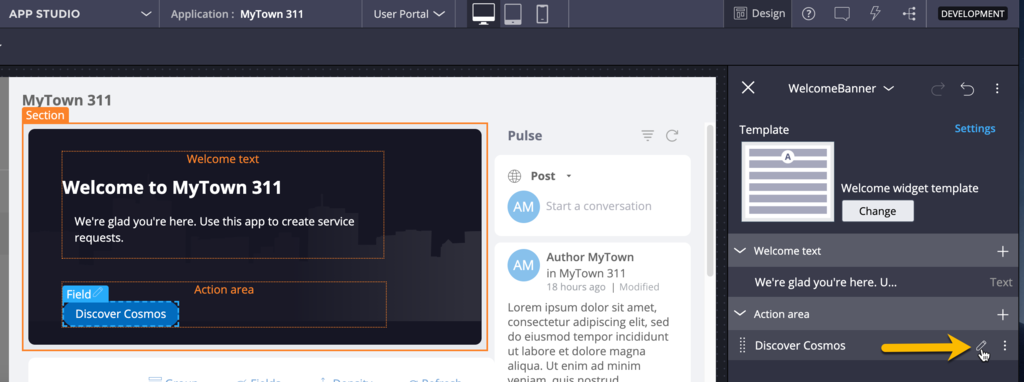
- In the Action area region, hover over the Discover Cosmos, and then select Edit.
- In the Text field, enter or select Visit town website.
- Click Apply to view the changes.

- Verify that your changes are displayed in the welcome widget.
