Configuring the view of a case
Archived
4 Tasks
45 mins
Pega Platform 8.5
Intermediate
User Experience
English
Scenario
Caseworkers who process a service request case need an optimized information architecture to understand and process the case quickly.
Using App Studio, configure the view of a case by mapping case data into regions defined in the Cosmos template-based architecture. Further refine the information architecture of the case by creating case tabs to explore other case details.
The following table provides the credentials you need to complete the challenge.
| Role | User name | Password |
|---|---|---|
| Application Developer | author@mytown | cosmos123! |
Challenge Walkthrough
Detailed Tasks
1 Configure summary panel case details
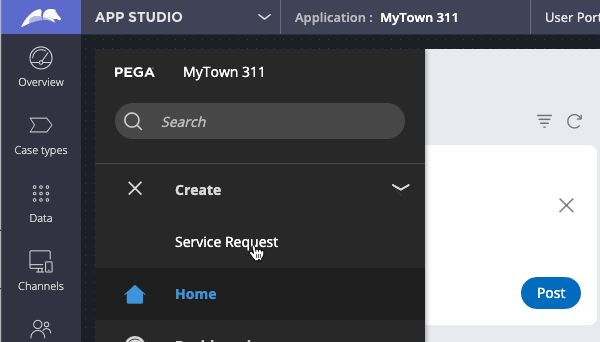
- In the header of App Studio, click .
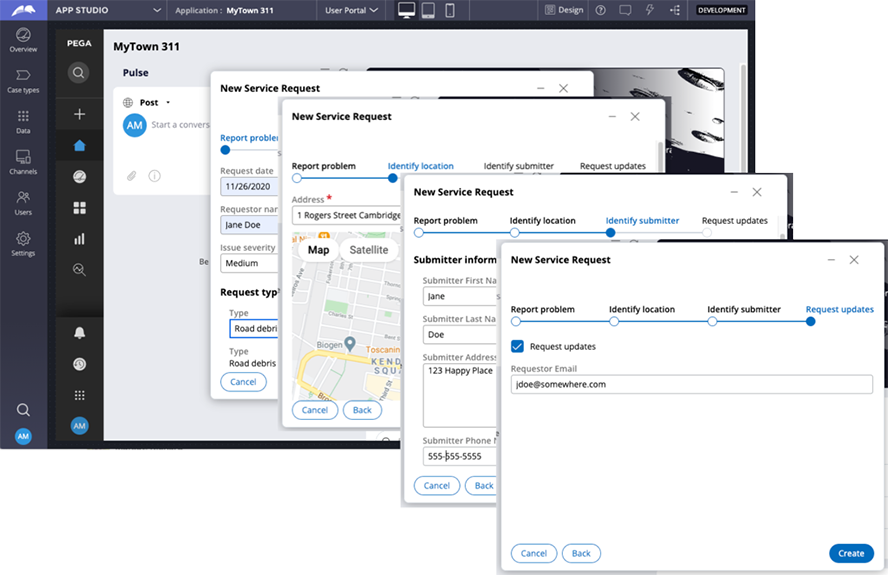
- In the navigation pane on the left, click Create > Service Request to create a new Service Request case.
- In the new case creation modal, continue through the workflow, entering data for all fields.
- On the Request updates step, click .
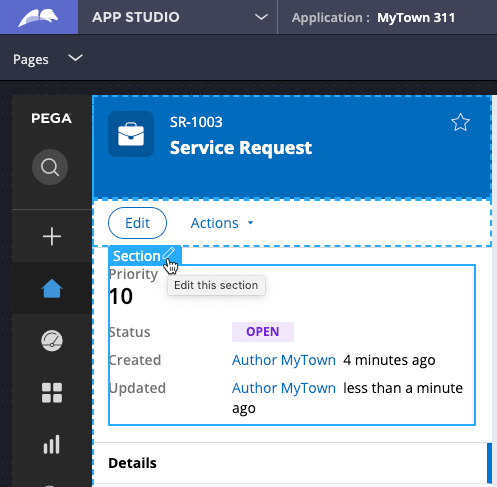
- On the new case, in the header of App Studio, click to enable Design mode.
- In the Summary pane, hover over the case details section, and then click Edit this section.
- In the configuration pane on the right, in the Additional critical details region, click the Add icon to add fields to the region.

- In the Add pane, in the Fields menu, click Add to view for the Issue severity and Requestor name fields.
Tip: Click the Add icon to the right of each field to add it to the region.
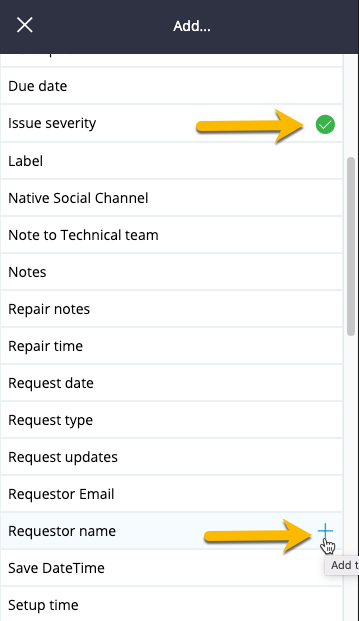
- Close the Add pane.
Tip: Click the X icon in the upper-left corner of the configuration pane to close open panes.
- Repeat steps 7-9 for the Primary case data region to add the Request date and Requestor Email fields.
- In the configuration pane, hover over Requestor name to reveal the field drag handle.
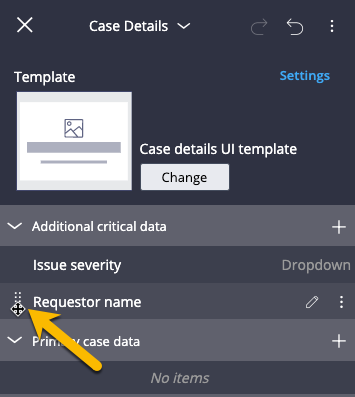
- Drag Requestor name and drop it above Issue severity.
- Hover over Requestor name, and then click the Edit icon to display the field property panel.
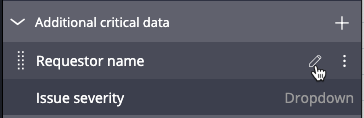
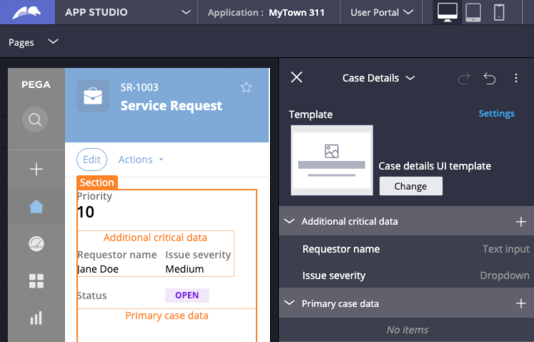
- On the Presentation tab, in both the Cell read-write classes and Cell read-only classes fields, enter or select the urgency-cnt out-of-the-box (OOTB) Cosmos helper class to increases the font size and font weight of the field.
Tip: Cosmos includes many out of the box helper classes for customizing text styling.
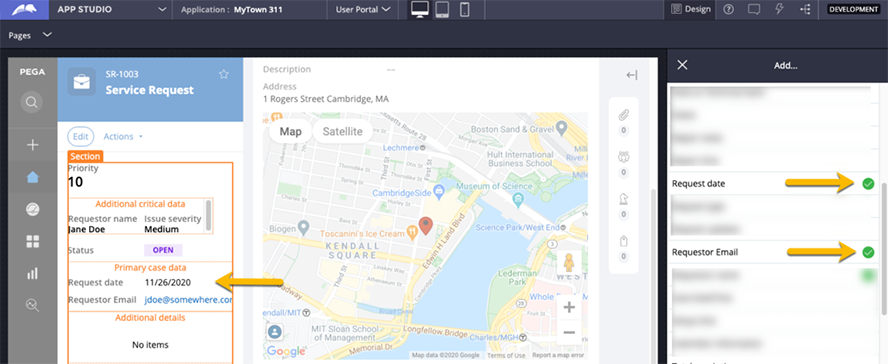
- Exit Design mode to verify that the case details area of the summary pane reflects the changes in the following image.
 Note: In addition to the fields that you mapped into regions, notice that the case details section displays other fields by default, including Priority, Status, Created, and Updated. You can remove some default fields as required.
2 Configure default case details fields
- In the same case, enter Design mode to enable or disable default fields in the preconfigured case details area.
- Hover over the case details section of the Summary pane, and then click Edit this section.
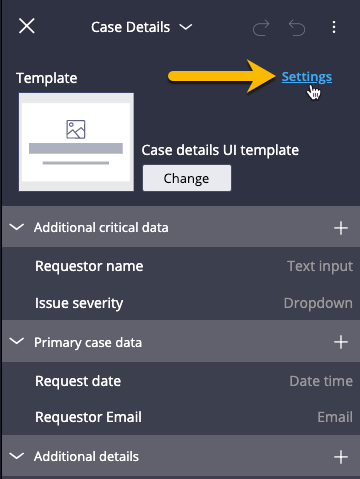
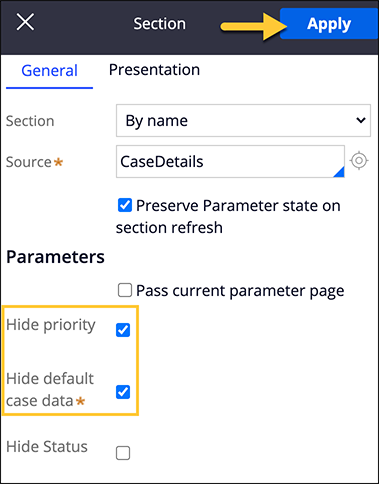
- Click Settings.
- Select the Hide priority and Hide default case data checkboxes.
- In the header of the configuration pane, click to display the Summary pane case details without the Priority, Created, and Updated fields.
- Clear the Hide default case data check box.
- In the header of the configuration pane, click to display the Created and Updated fields.
- Exit Design mode.
Note: The CaseDetails section rule copied into your application ruleset and specialized by the class of your case type is based on a Cosmos detail template. Review the rules in your application ruleset list to view the copy of the CaseDetails section rule.
3 Customize the details tab
- In a new or existing Service Request case, click the Details tab in the Summary pane to open the details screen in the work area.
- Enable Design mode.
- In the work area, hover over the case details section, and then click Edit this section.
- Verify that the section is using the Case information UI template design template.
- In the Primary information region, add the Note to technical team and Repair notes fields.
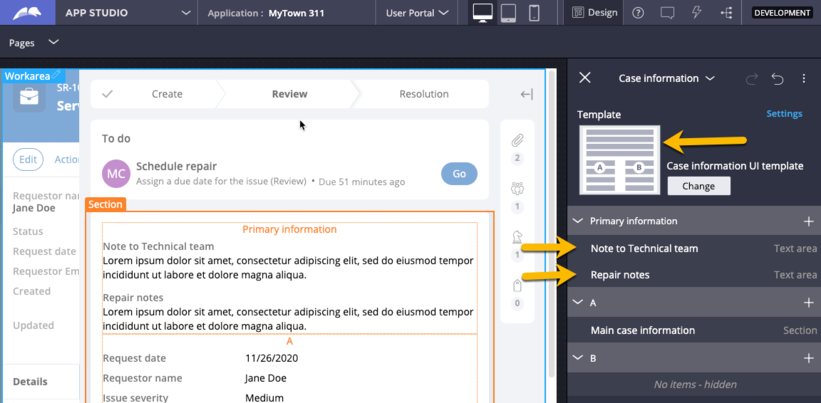
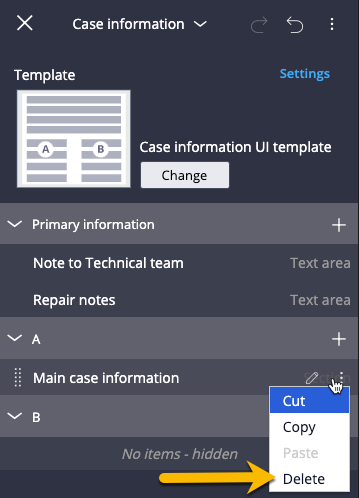
- In region A, hover over the Main case information, and then click to delete the default embedded section dynamically displaying all case data.
- Map fields to regions A and B according to the following table.
Region A Region B Requestor Email Create Date/Time Issue Severity Update Date/Time Due date Update Operator Name 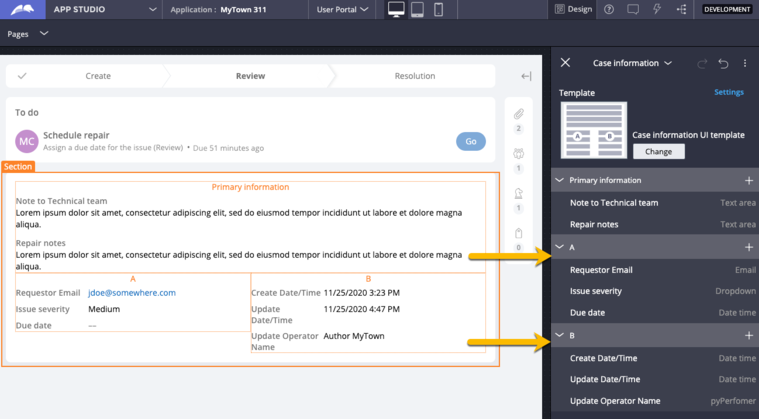
- Exit Design mode.
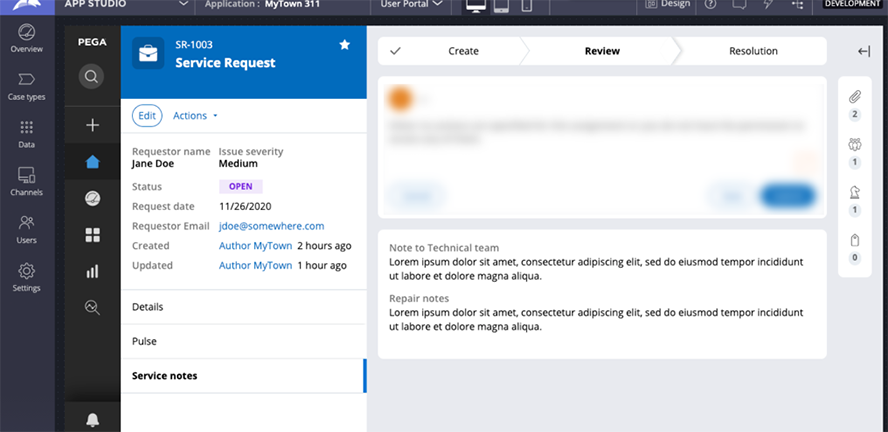
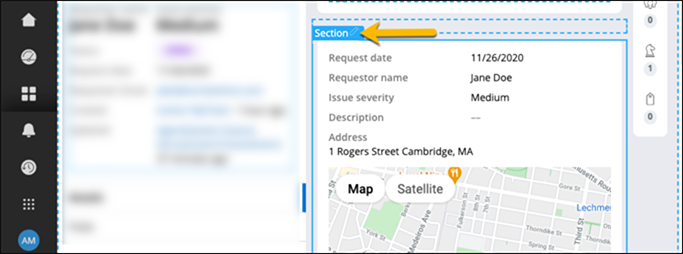
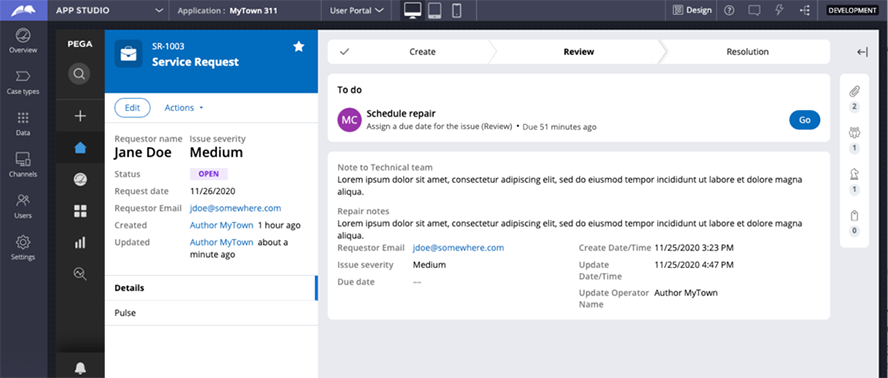
- Verify that the Details tab matches the following image.
 Note: As you reduce the size of the browser window, the default responsive features of the Case Details UI Template stacks region A on top of region B and may change the way the regions are displayed.
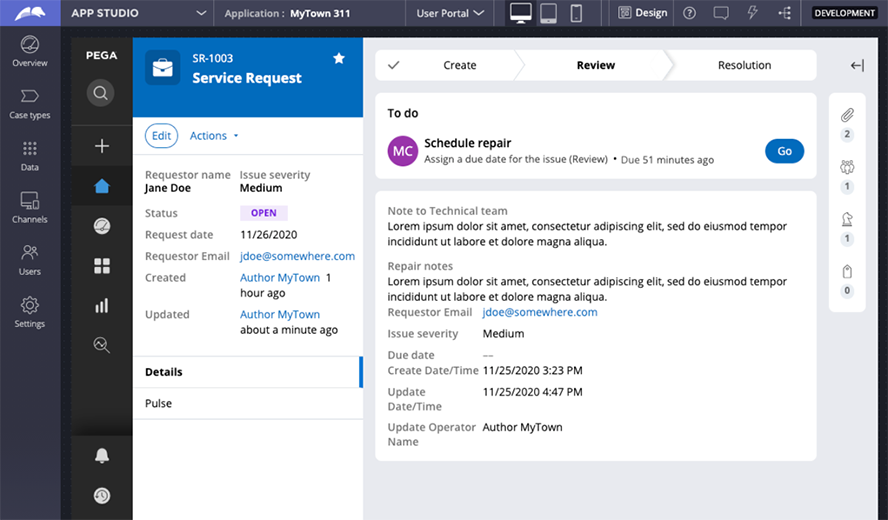
4 Configure additional tabs and tab content
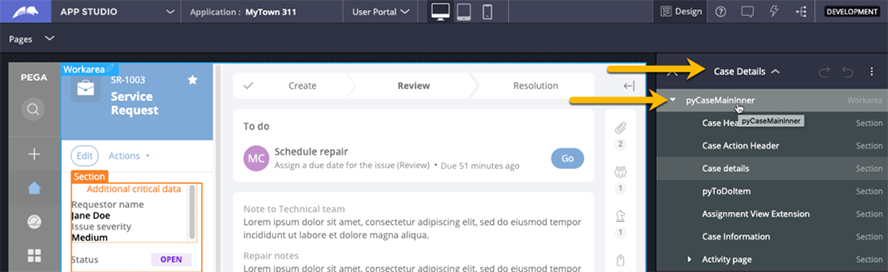
- From a new or existing Service Request case, enter Design mode.
- Hover over any editable area, and then click Edit to edit the region.
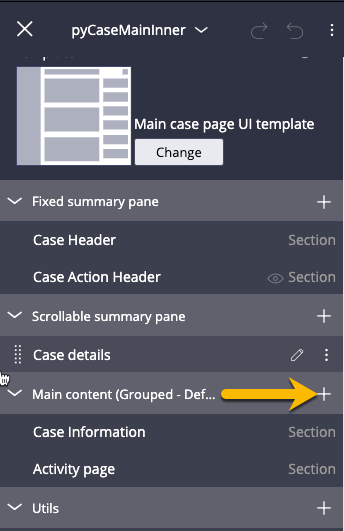
- In the contextual pane on the right, use the drop-down menu to locate and select pyCaseMainInner from the nested page structure.
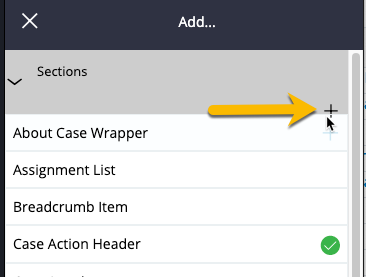
- In the Main content region, click the icon to display the list of existing sections.
- In the Add pane, under Sections, click to add a new tab and section.
- In the Create new section dialog box, enter Service Request Notes.
- Click .
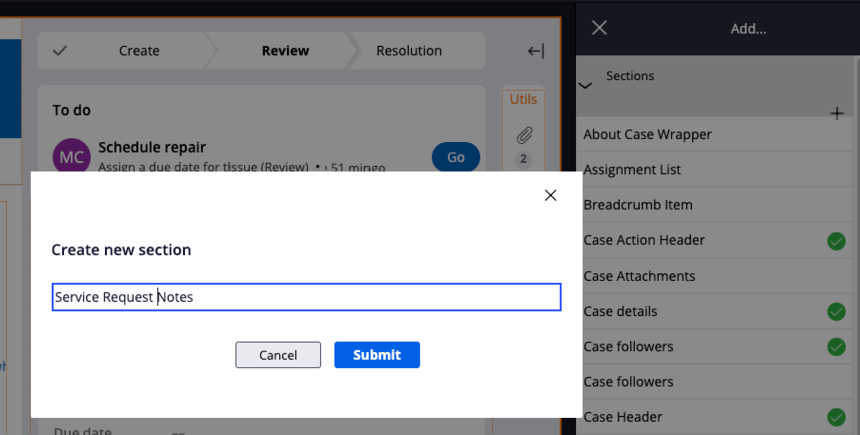
- Verify that the Add pane now displays the Service Request Notes section and the Summary pane displays the New items tab.
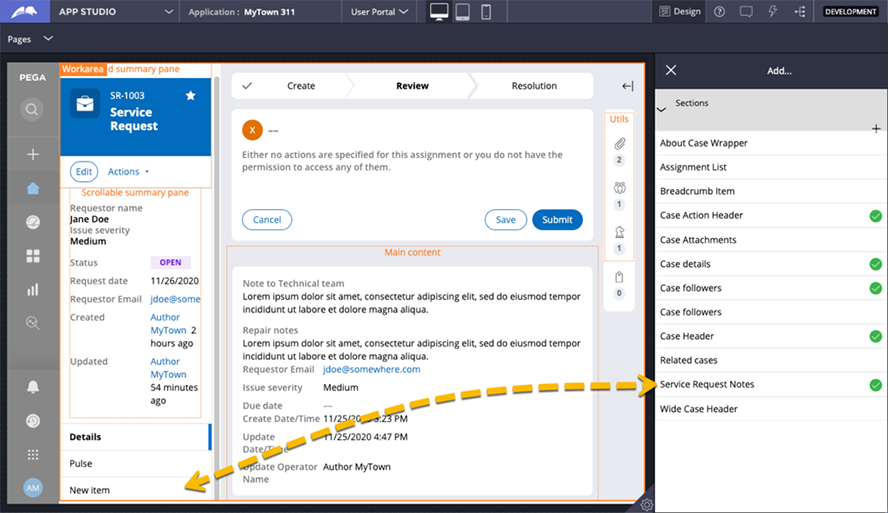
- Close the Add pane.
Rename the tab
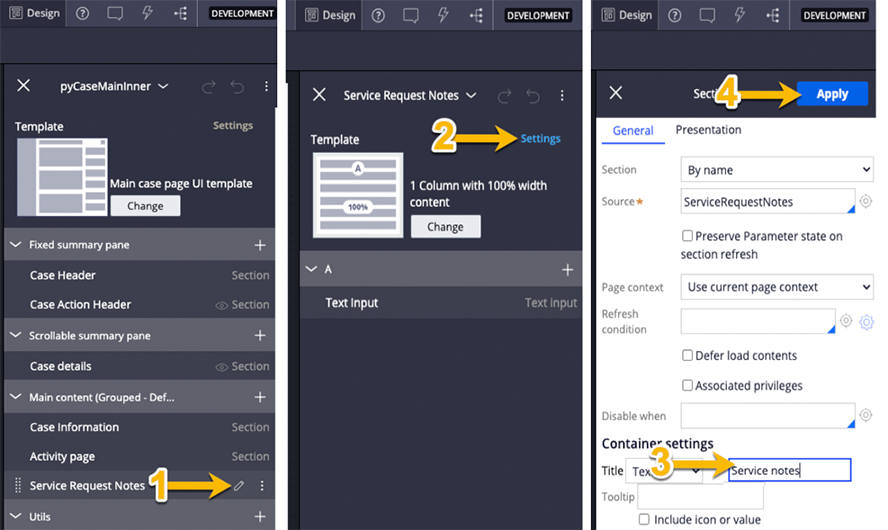
- In the in pyCaseMainInner pane, edit the settings for the Service Request Notes section.
- In the Title field, enter Service notes.
- In the header of the configuration pane, click .
- Close all open panes.
- Verify that the new Service notes tab displays in the Summary pane and a new section displays at the bottom of the Work area.

Populate the content of the tab
- In App Studio, in Design mode, click the Service notes tab.
- In the work area, hover over the New section, and then click Edit.

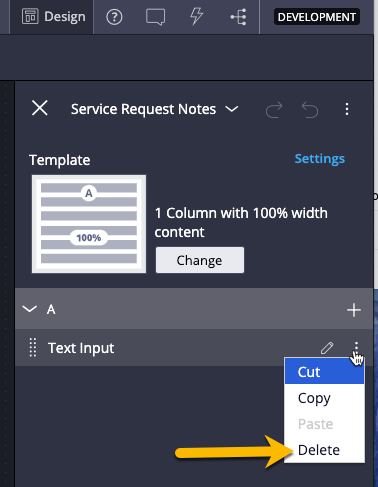
- In region A, hover over the default Text Input tab, and then click More options > Delete.
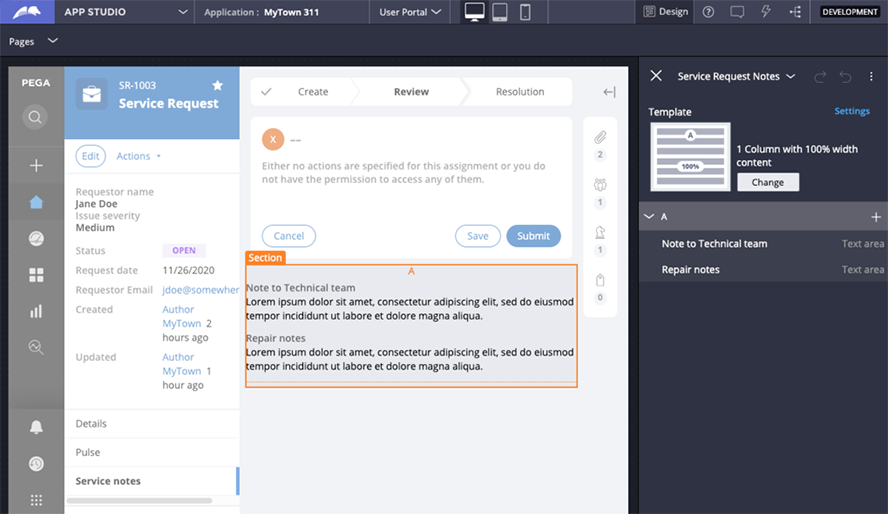
- In region A, click and map in the Note to technical team and Repair notes fields to the section.

- Close the Add pane.
- Verify that the new fields are displayed in the section.
Make the tab content a card
- Hover over region A, and then click the Edit icon.
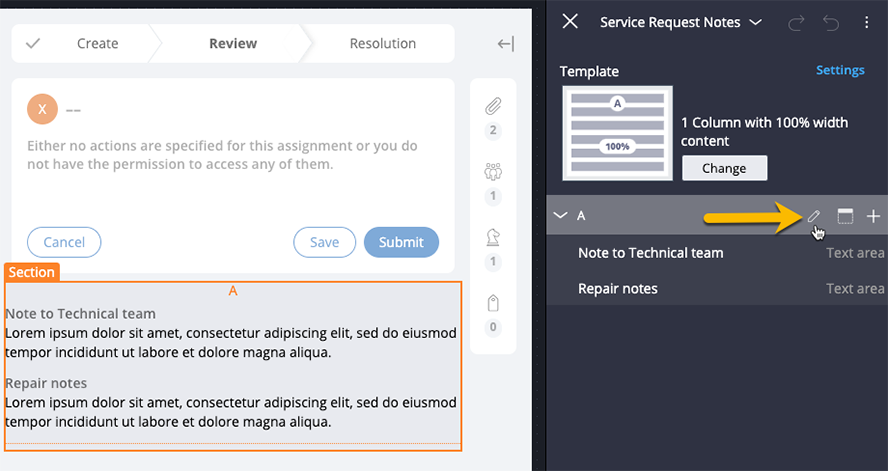
- In the Region properties dialog box, select the Override default region settings check box.
- In the Container format list, select Default.
- Click to submit the region properties.

- Close the section pane.
- Exit Design mode.
- In the work area, verify that the Service notes tab is displayed as a card.