RoboticBanking-Debugging_and_Diagnostics.zip
(111.84 KB)
Debugging and diagnosing automation issues
3 Tasks
40 mins
Beginner
Robotic Process Automation
English
Scenario
The testing team receives a timeout error when testing the login automation using incorrect credentials. To better inform the user and display a user-friendly message, use the debugging and diagnostics tools to add robust error handling, including a specific error message for when someone enters the wrong credentials added to the Pega Runtime log.
Complete the following objectives:
- Edit the Main Automation, run in Test mode, add breakpoints to the BI_Login automation, and follow the data values to view the error.
- Add error handling to capture and display the error in the logs.
- Ensure the project demonstrates the appropriate logging message when testing for incorrect login credentials.
Challenge Walkthrough
Detailed Tasks
1 Reproduce the issue in the Banker Insight application
- Download the Robotic Banking project:
- Open the project in Pega Robot Studio.
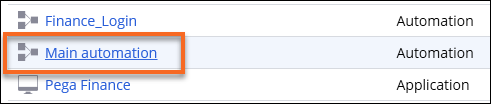
- On the tab, click to open the automation.
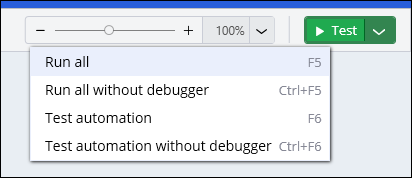
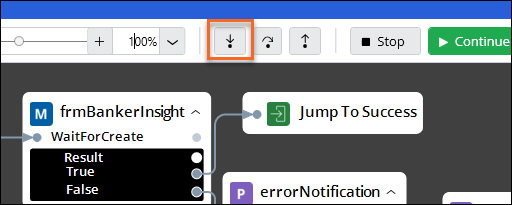
- In the upper-right corner of the standard toolbar, expand the Test button, and select Run all to begin the debugging process.
- Once the login popup is visible, watch the login process and wait until you see a message that reads: Application Timeout.
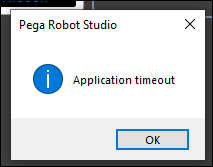
- Click OK to close the timeout message.
- In the upper-right corner of the standard toolbar, click Stop to end debugging of the automation.
2 Turn on logging and add error handling to log the error message
- In the top menu of Robot Studio, click .
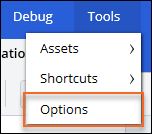
- In the Options pop-up window, on the Runtime diagnostics tab, in the Automation list, select Error to turn on logging only for errors in the Automation category.
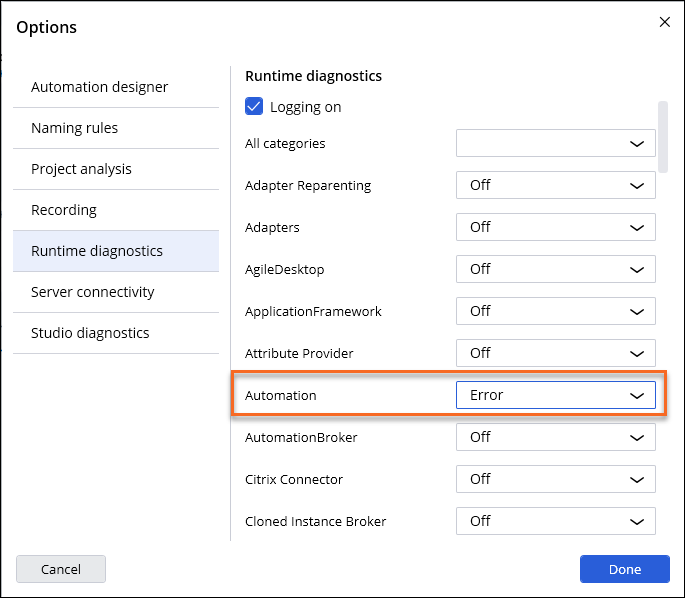
- Click Done to close the Options pop-up window.
- Navigate to the project screen and click to open the automation.
- Between the frmBankerInsight design blocks and the JumpTo design block, click the connector to select the data link, and then press the Delete key to remove the link.
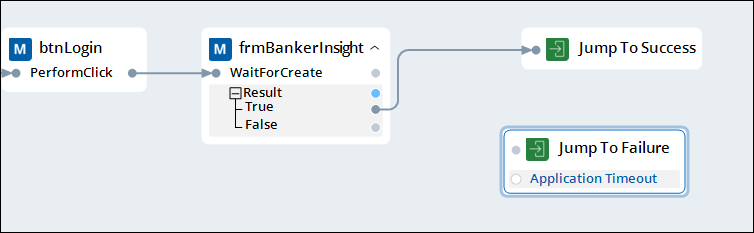
- Drag the JumpTo design block off to the side of the automation to make more room for the next steps.
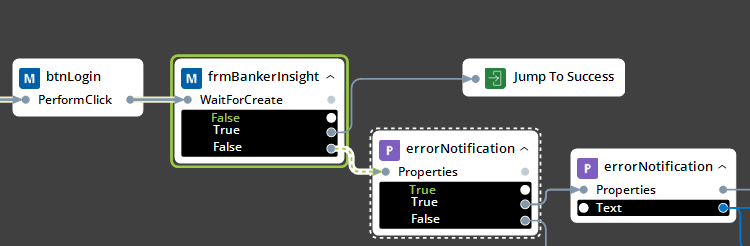
- On the Palette, open and drag the label to the automation design area.
The system displays the dialog box. - In the dialog box, click , and then click Add to add the Text property to the automation design area.
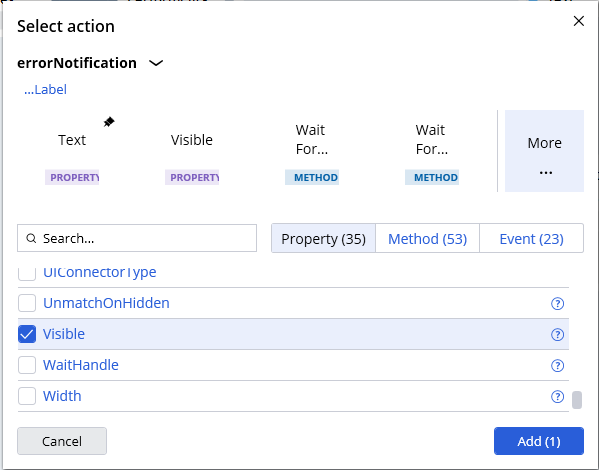
- In the Palette, drag the label onto the automation design area, click , and then click Add to add it to the automation.
- In the toolbox, select to open the logging options.

- Select the Log Error utility, then drag it onto the automation surface to add it to the automation.
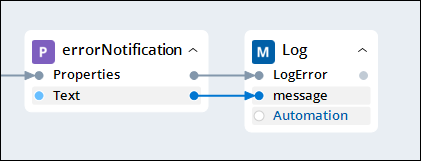
- Once you add the Log design block to the automation, click the Category field and enter Automation.
- Edit the following design blocks:
|
Failure label |
|
-
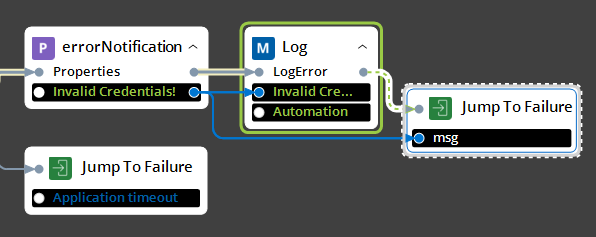
On the automation surface, right-click the automation surface to add another Jump To Failure design block next to the Logtext block.
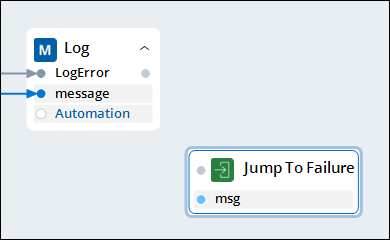
- In the block connected to frmBankerInsight , click msg and enter Application timeout to set an error message.
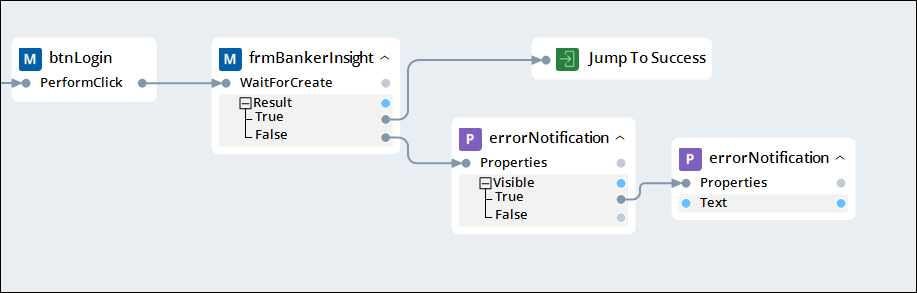
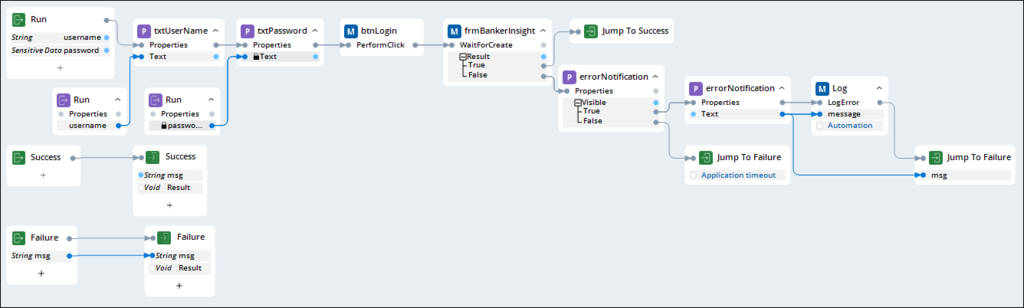
- Ensure that you have connected the design blocks, as shown in the following image:
- In the upper-left corner of the standard toolbar, click Save to save your changes.
3 Test and debug the automation
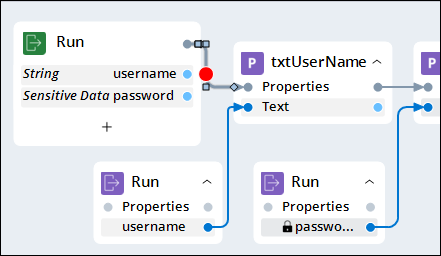
- In the automation, click the connector to select the data link between the block and the txtUserName design block.
- On the automation surface, right-click the data link, and then select Toggle breakpoint to add a breakpoint to your automation.
- In the upper-right corner of the standard toolbar, click Test to begin the debugging process in Test mode.
- In the dialog box, enter the following variables:
|
Username |
Password |
|
pega |
sega |
- Click Test.
- In the upper-right corner of the standard toolbar click the Step-Into icon to view the username data value update in the design block.
Tip: Instead of clicking the Step-Into icon, you can press the F11 key on your keyboard.
- Click the Step-Into icon once again to advance past the btnLogin PerformClick block.
- Once the frmBankerInsight block proves false, verify that the errorNotification property is .
- Click the Step-Into icon until you can verify that the Log block contains the error text.
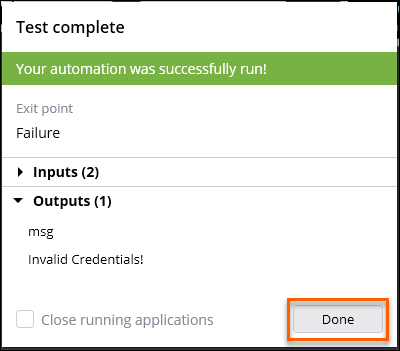
- Click Continue to advance to the label and end the testing.
- Click Done to end Test mode.
Available in the following mission:
If you are having problems with your training, please review the Pega Academy Support FAQs.
Want to help us improve this content?