Preparing for data migration
Archived
5 Tasks
25 mins
Beginner
English
Scenario
U+ Bank, a retail bank, plans to prepare its systems to generate the artifacts and configure the settings that are required to migrate sampled data from the production environment to the business operations environment (BOE).
Use the following credentials to log in to the exercise system:
| Role | User name | Password |
|---|---|---|
|
System Architect |
SystemArchitect |
rules |
Your assignment consists of the following tasks:
Task 1: Create and add a new ruleset to the application ruleset stack
Create a new ruleset to host all artifacts that are generated by the system, such as data sets and data flows, and then add that ruleset to the application stack.
Note: In standard use cases, you complete this task in the development environment that acts as the system of record and contains the product rule that defines the application package. For training purposes, you perform the tasks in a single environment.
Task 2: Configure data migration settings
Configure data migration settings to define the inbound (20%) and outbound (20%) sample size, and then generate the data migration artifacts.
Note: In standard use cases, you complete this task in the development environment that acts as the system of record and contains the product rule that defines the application package. For training purposes, you perform the tasks in a single environment.
Task 3: Enable inbound and outbound sampling
Enable inbound and outbound sampling, and then enable scenario planner actuals migration by updating respective dynamic system settings.
Note: In standard use cases, you complete this task in the development environment that acts as the system of record and contains the product rule that defines the application package. For training purposes, you perform the tasks in a single environment.
Task 4: Create a product rule
Create a product rule to package the generated data migration artifacts.
Note: In standard use cases, you complete this task in the development environment that acts as the system of record and contains the product rule that defines the application package. For training purposes, you perform the tasks in a single environment.
Task 5: Configure service packages
Set up MigrateSimulationData, DataSyncPipeline, api, and cicd service packages appropriately as the security requirement in each environment varies.
Note: In standard use cases, you complete this task in the BOE and production environments to ensure that you meet the security requirements. For training purposes, you perform the tasks in a single environment.
Challenge Walkthrough
Detailed Tasks
1 Create and add a new ruleset to the application ruleset stack
Note: In standard use cases, you complete this task in the development environment that acts as the system of record and contains the product rule that defines the application package. For training purposes, you perform the tasks in a single environment.
- On the exercise system landing page, click Pega CRM suite to log in to Dev Studio.
- Log in as System Architect with User name SystemArchitect and Password rules.
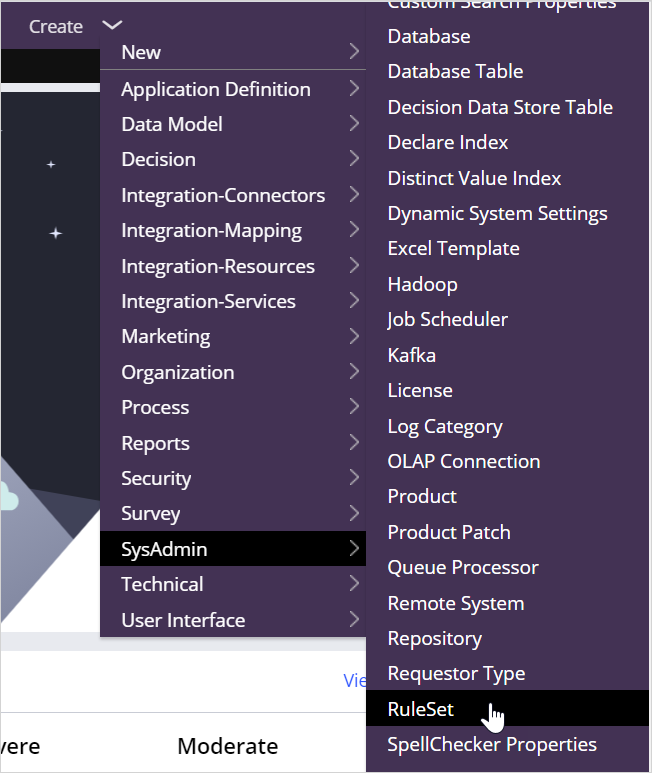
- In the header of Dev Studio, click Create > SysAdmin > RuleSet to create a new ruleset.
- On the Create RuleSet Version tab, in the Ruleset Name, enter DataMigration.
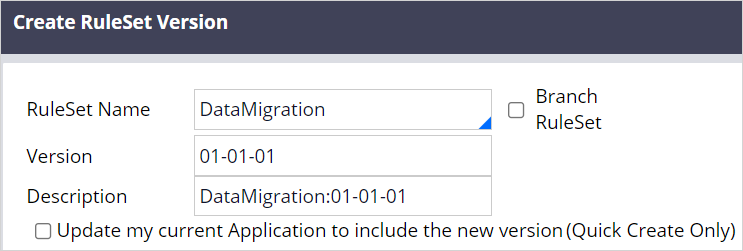
- In the upper right, click Create and open.
- Click Save.
- In the header of Dev Studio, click Application > Definition to open the application definition.

- In the application definition, in the Application rulesets section, click Add ruleset to add the new ruleset.

- In the new row, enter DataMigration and select ruleset.
- Enter the ruleset version.
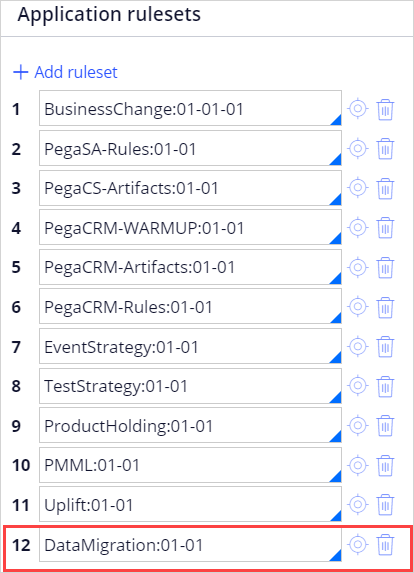
- Click Save.
2 Configure data migration settings
Note: In standard use cases, you complete this task in the development environment that acts as the system of record and contains the product rule that defines the application package. For training purposes, you perform the tasks in a single environment.
- In the header of Dev Studio, click Configure > Decisioning > Infrastructure > Data migration to open the Data Migration tab.

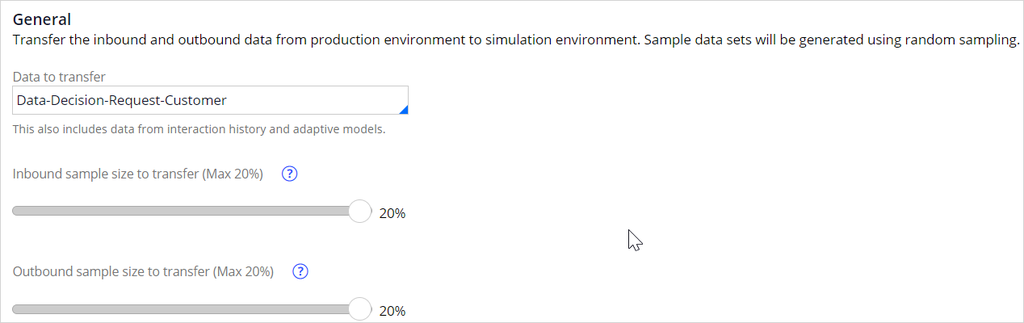
- On the Data Migration tab, confirm that the Data to transfer field is set to Data-Decision-Request-Customer.
- In the General section, move the Inbound sample size to transfer (Max 20%) slider to 20%.
- Move the Outbound sample size to transfer (Max 20%) slider to 20%.
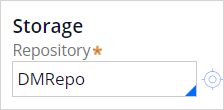
- In the Storage section, in the Repository field, enter or select DMRepo.
- In the Supporting artifacts section, in the Ruleset field, select DataMigration,
- In the Version list, confirm that the ruleset version is 01-01-01.
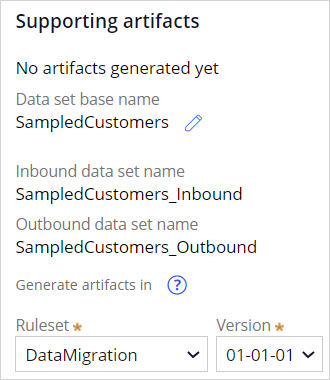
- Click Save to generate the supporting artifacts.
- In the Supporting artifacts section, click Show artifacts to view the generated supporting data migration artifacts.
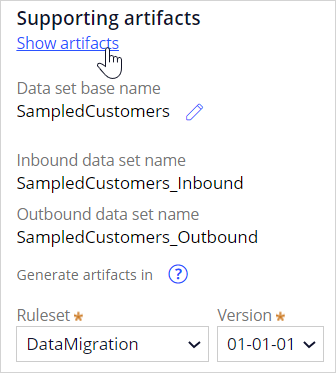
- View the generated artifacts, and then click Close to close the window.
3 Enable inbound and outbound sampling
Note: In standard use cases, you complete this task in the development environment that acts as the system of record and contains the product rule that defines the application package. For training purposes, you perform the tasks in a single environment.
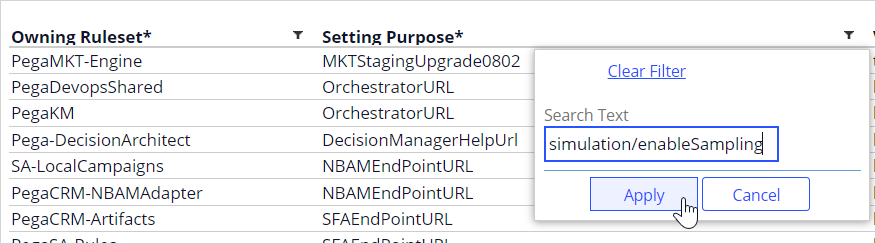
- In the navigation pane of Dev Studio, click Records > SysAdmin > Dynamic System Settings to open the DynamicSystemSettings tab.

- In the Setting Purpose column, click the Filter icon to filter by purpose.
- In the search box, enter simulation/enableSampling, and then click Apply.
- Open simulation/enableSampling, and then click Edit.

- In the Associated RuleSet field, enter or select DataMigration.

- In the Settings tab, in the Value field, enter true.
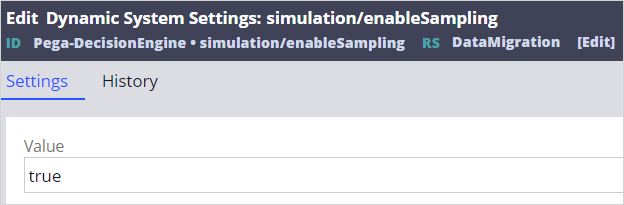
- Click Save.
- Repeat steps 2- 7 to update the CDHMigrateOutboundSample and CDHMigrateScenarioPlannerActuals dynamic system settings.
4 Create a product rule
Note: In standard use cases, you complete this task in the development environment that acts as the system of record and contains the product rule that defines the application package. For training purposes, you perform the tasks in a single environment.
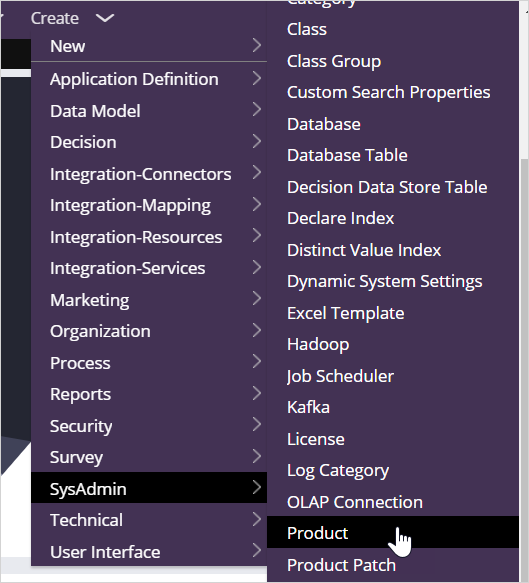
- In Dev Studio, click Create > SysAdmin > Product to create a new ruleset.
- On the Create Product tab, enter the following information:
- Label: DataMigrationArtifacts
- Product Version: 01-01-01
- Context: PegaCRM_Marketing
- Add to ruleset: DataMigration

- In the upper right, click Create and open to open the product rule.
- In the RuleSets to include section, in the Name field, enter or select DataMigration.
- Select the Include associated data check box to ensure that the Data Migration landing page where the settings were configured is also migrated.

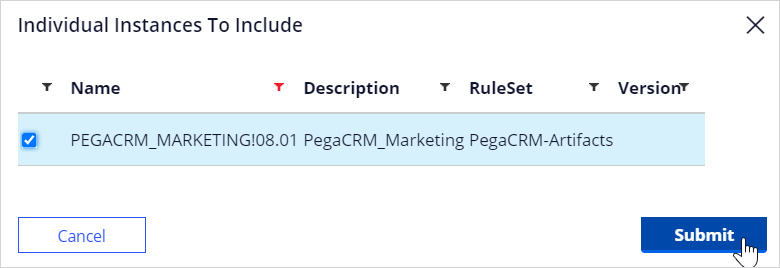
- In the Individual instances to include section, in the Select a class and press 'Query' field, enter Rule-Application.
- Click Query to add the application instance to view the individual instances.

- Filter the list by the PEGACRM_MARKETING 08.01 name, and then select PEGACRM_MARKETING!08.01.
- Click Submit to add the application instance to the product rule.
- Click Save to save the product rule.
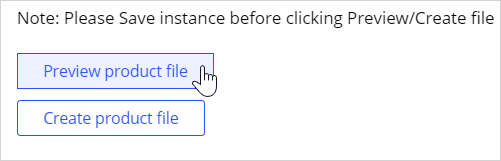
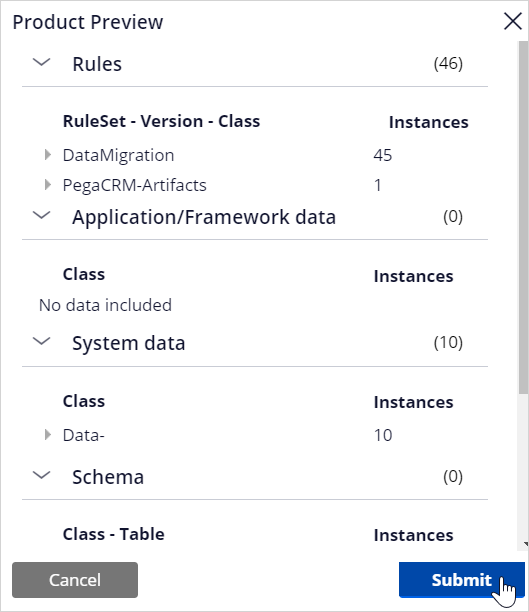
- In the File details section, click Preview product rule to view the rules that are included.
- Click Submit to close the Product preview window.
- In the header of the product rule form, click RS DataMigration:01-01-01 to open the product file ruleset.

- Click Lock and Save to provide and save a password for the ruleset access.
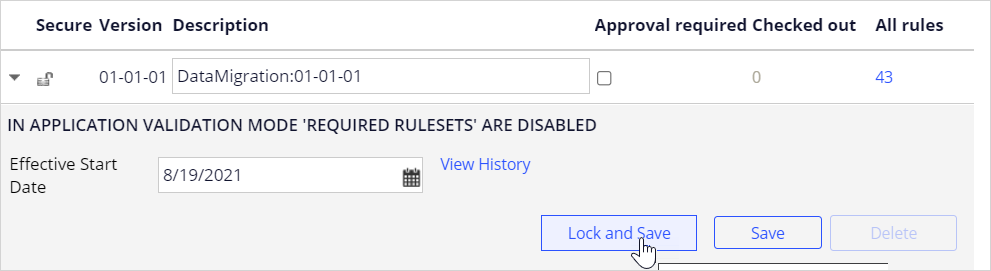
- In the Lock Ruleset version window, enter rules as the password twice.
- Click Submit.
- On the DataMigrationArtifacts 01-01-01 tab, click Create product file to generate the product file.
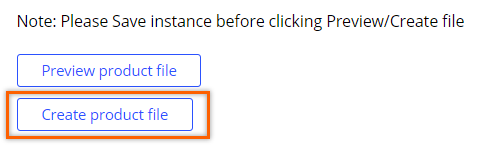
- In the Create Product File window, enter DataMigrationArtifacts as the name of the product file.
- Click OK to begin generating the product file.
- When the file generation is complete, click Archive created. Click here to save DataMigrationArtifacts.zip file locally link to download the product file.
5 Configure service packages
Note: Typically, this task is performed in the BOE and production environments to ensure the security requirements are met. For training purposes, you perform the tasks in a single environment.
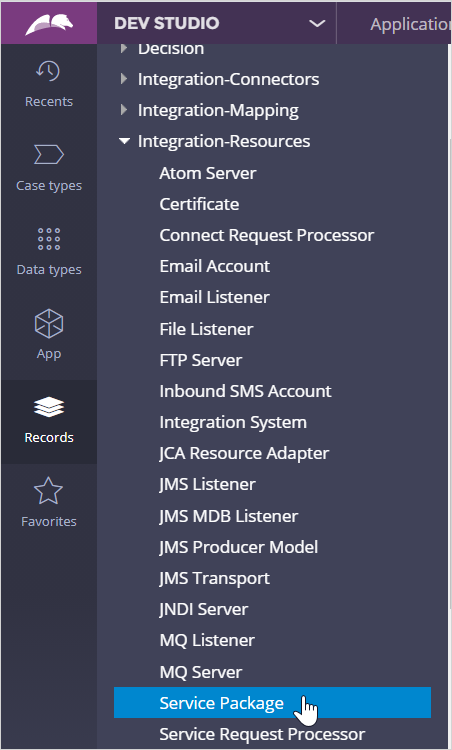
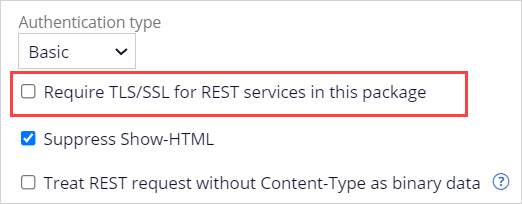
- In the navigation pane of Dev Studio, click Records > Integration-Resources > Service Package to open the ServicePackage tab.
- In the list of service packages, open the following service packages and then ensure that the Require TLS/SSL for REST services in this package field is cleared.
- DataSyncPipeline
- MigrateSimulationData
- api
- cicd
Note: Typically, as the last step, to prepare the environments for data migration, you import the generated DataMigrationArtifacts product rule into all environments by using the enterprise pipeline when possible. This step ensures that each environment is in sync and both BOE and production environments have the required artifacts to migrate the sample data from the production system to the BOE system. However, for training purposes, you complete all the tasks in a single system, so you do not need to import the product file as part of this challenge.