Recording robotic automations
2 Tasks
15 mins
Beginner
Robotic Process Automation
English
Scenario
You are developing a robotic project for customer service representatives from the Robotic Banking industry. The customer service representatives use two separate applications: the Banker Insight desktop application and the Pega Finance web application. You have already created the project and added the applications to the project. Your next task is to develop login automation for each application. To accomplish this, you record the automations.
Complete the following tasks:
- Record the Banker Insight log-in automation called BI_Login using automatic step creation and edit the steps to use input parameters.
- Record the Pega Finance log-in automation called Finance_Login using targeted step creation.
Both automations should use input parameters called username and password. To log in to both applications, enter the user name pega and password pega.
Note: This is a continuation of the previous challenge, Creating projects and adding applications. If you did not complete this challenge, click the following link to save the file to your desktop and unzip the folder to extract the files.
Challenge Walkthrough
Detailed Tasks
1 Record the Banker Insight login using automatic step creation
- In Pega Robot Studio, open the Robotic Banking project.
Note: The starter project includes a configured BankerInsight application. The value of the Path field must match the location of BankerInsight on your local computer for the project to function properly. In the BankerInsight application, change the value of the Path to the location of your BankerInsight application.
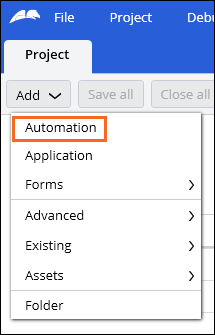
- On the start screen of the project, click Add > Automation to open the Add new automation dialog box.
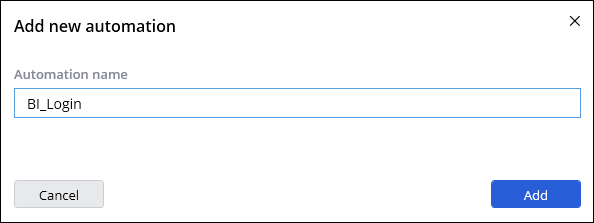
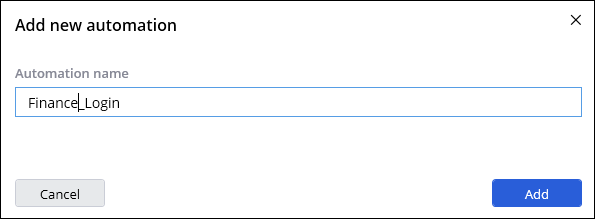
- In the Add new automation dialog box, in the Automation name field, enter BI_Login.
- Click Add to add the new automation to your project.
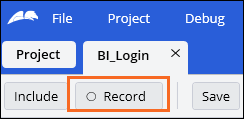
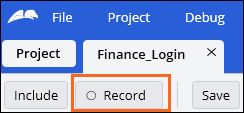
- Click to open the Recording assistant and begin recording the automation.
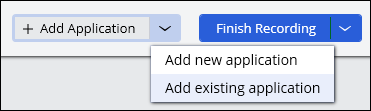
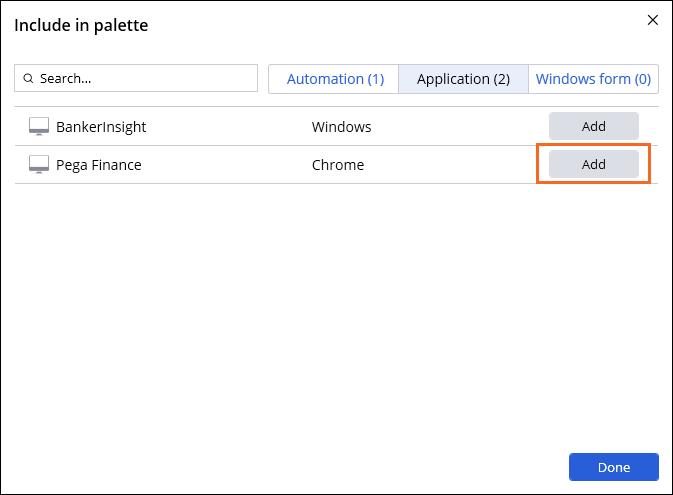
- In the Recording assistant, clickAdd Application > Add existing application to open the Include in palette window.
- In the Include in palette window, on the Application tab, in the BankerInsight row, click Add next to add the Banker Insight desktop application to the recording.
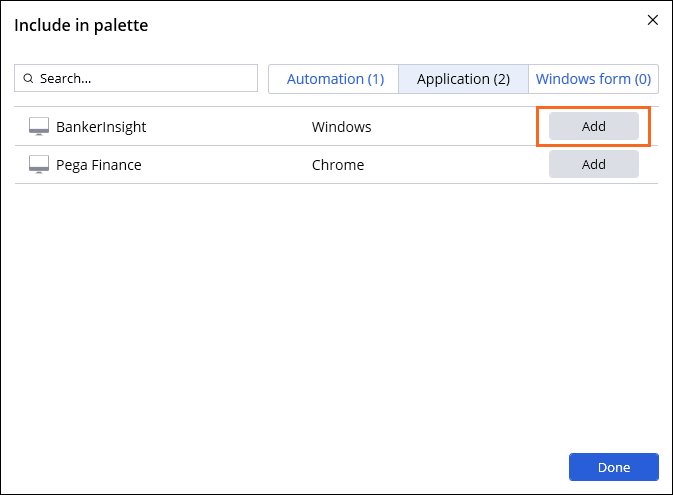
- Click Done to complete adding the application to the automation and launch the Banker Insight desktop application.
- Click the User Name input field. The Gear icon is displayed with a green background to indicate that automatic step creation is active.
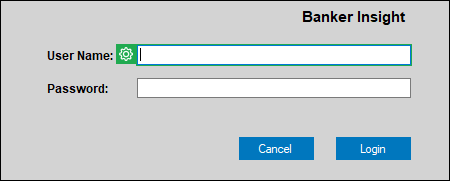
- In the User Name field, enter pega.
Note: You edit this step later to use an input parameter.
- Repeat steps 5d-5e for the Password input field.
- Use the Tab button to unfocus on the password field, and click Login to show the Client Details screen.
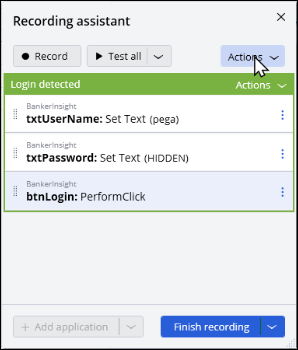
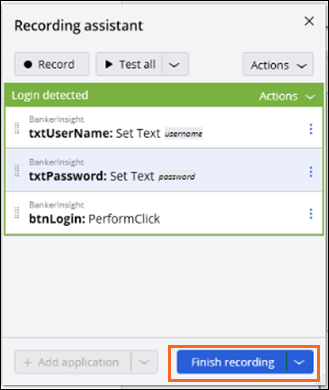
- In the Recording assistant, click Stop to stop recording the automation. The Recording assistant shows the recorded steps.
- In the Recording assistant, clickAdd Application > Add existing application to open the Include in palette window.
Note: Once you add the button click, the Login detected banner displays in the Recording assistant. No other interactions with the Actions button on the banner are necessary for this exercise.
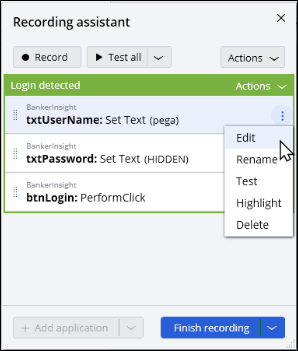
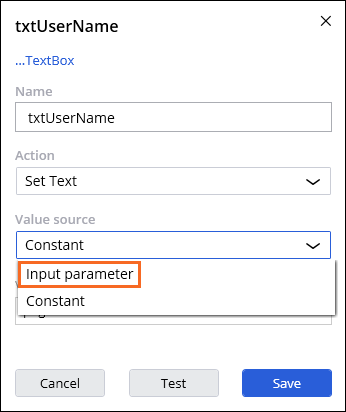
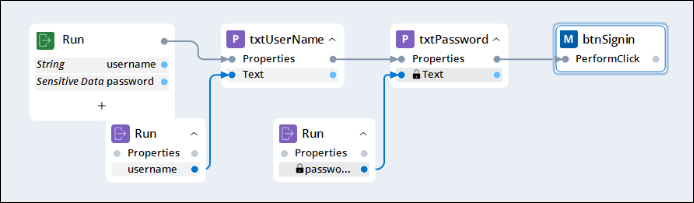
- In the Recording assistant, on the txtUserName step, click the More icon, and then select Edit to show the step editor.
- In the step editor, configure the following settings:
- In the Value source list, select Input parameter.
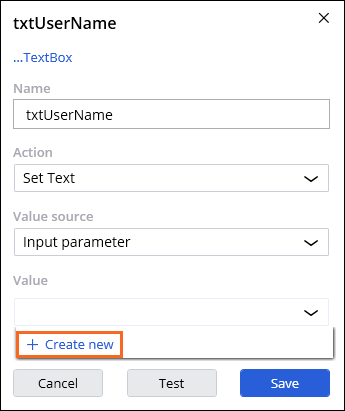
- In the Value section, click Create new to open the Create input parameter dialog box.
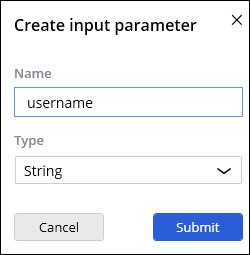
- In the Create input parameter dialog box, in the Name field, enter username.
- Click Submit to configure the step to use an input parameter in the automation.
- Click Save to save the changes you made to the step.
- Repeat steps 6-9 for the txtPassword step by naming the input parameter password and setting the parameter type to Sensitive Data.
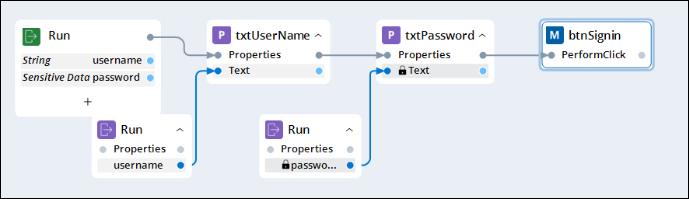
- On the Recording assistant, click Finish Recording to add the steps to the automation.
2 Record the Pega Finance login using targeted step creation
- On the toolbar, click Project to return to the Project Explorer.
- On the Project Explorer, on the toolbar, click Add > Automation to open the Add new automation dialog box.
- In the Add new automation dialog box, in the Automation name field, enter Finance_Login.
- Click Add to add the new automation to your project.
- Click to open the Recording assistant and begin recording the automation.
- In the Recording assistant, click Add Application > Add existing application to open the Include in palette window.
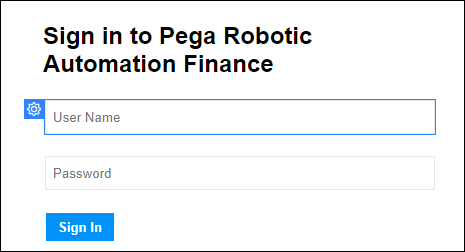
- In the Include in palette window, on the Application tab, in the Pega Finance row, click Add to add the Pega Finance web application to the recording.
- Click Done to complete adding the application to the automation and launch the Pega Finance web application.
- Hover your cursor over the User Name input field. The Gear icon is displayed a blue background to indicate that only targeted step creation is available.
- Click the Gear to display the step editor.
- In the Name field, enter txtUserName to change the name of the control.
- In the Value source list, select Input parameter.
- In the Value section, click Create new to open the Create input parameter dialog box.
- In the Create input parameter dialog box, in the Name field, enter username.
- Click Submit to configure the step to use an input parameter in the automation.
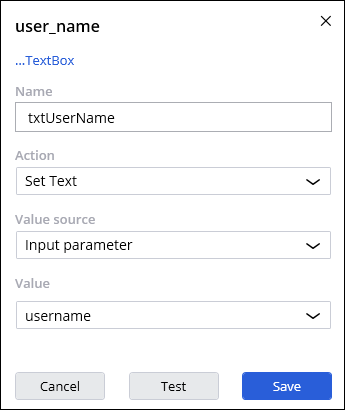
- Click Save to save the changes you made to the step.
- Repeat steps 8-12 for the Password field and use the information in the following table to configure the control.
Field Value Name txtPassword Value source Input parameter Value password Type Sensitive Data - Hover your cursor over the Sign In button, and then click the Gear icon to open the step editor.
- In the Name field, enter btnSignIn to change the name of the control.
- In the Action list, confirm that PerformClick is selected.
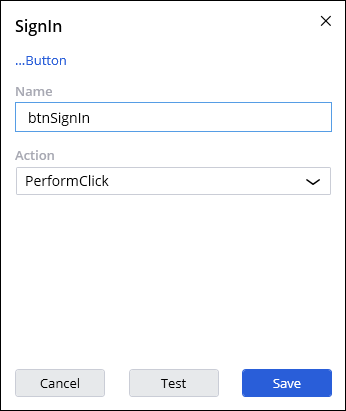
- Click Save to save the changes you made to the step.
- In the Recording assistant, click Finish Recording to stop recording the automation. The automation designer shows the recorded steps.
This Challenge is to practice what you learned in the following Module:
Available in the following mission:
If you are having problems with your training, please review the Pega Academy Support FAQs.
Want to help us improve this content?