Creating-basic-automation.zip
(418.54 KB)
Creating a basic automation
3 Tasks
20 mins
Beginner
Robotic Process Automation
English
Scenario
Create a project that logs in to the BankerInsight application, inserts the Customer Number, and searches for a client to display account details. To accomplish this you will build a simple automation for this project that only takes into account a happy path of execution.
Complete the following tasks:
- Create the BI_ClientSearch sub-automation that inserts the Customer Number and displays the customer's account details in a BankerInsight application.
- Create the main automation that performs a log-in and runs the BI_ClientSearch sub-automation.
- Use Jump To and Label design blocks to update BI_Login automation with basic error handling.
- Execute the project and check the results.
Note: This is a continuation of the previous challenge, Interrogating a single-page application. If you did not complete this challenge, click the following link to save the file to your desktop and unzip the folder to extract the files.
Detailed Tasks
1 Create the BI_ClientSearch automation
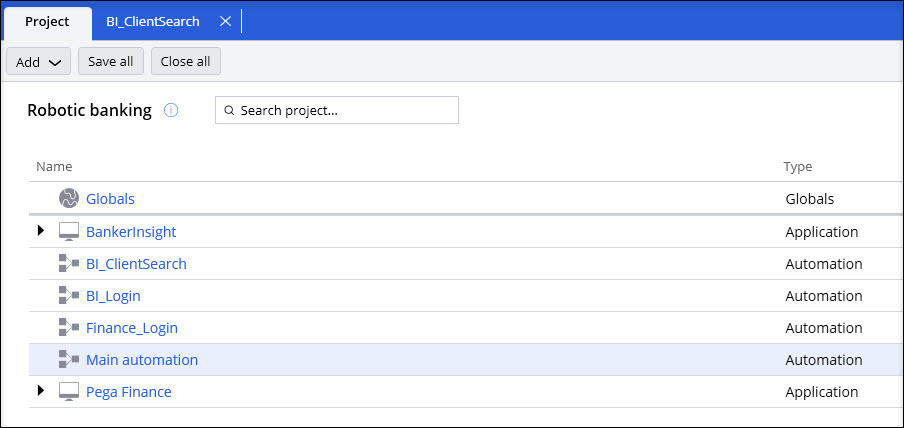
- In Pega Robot Studio, open the Robotic Banking project.
- On the Project tab, click Add > Automation to add a new automation to the project.

- In the dialog box, in the Automation name field, enter BI_ClientSearch.
Note: Be sure to select the Empty automation checkbox on the window so your automation to ensure your automation does not start using the automation template.
- Click Add to automatically display the newly created automation.
- On the BI_ClientSearch tab, click Include to display the Include in palette dialog box.
- On the Application tab in the Include in palette dialog box, click Add to add the BankerInsight application to the Applications section of the Palette tab.
- On the Include in palette dialog box, click to add the BankerInsight application to the automation.

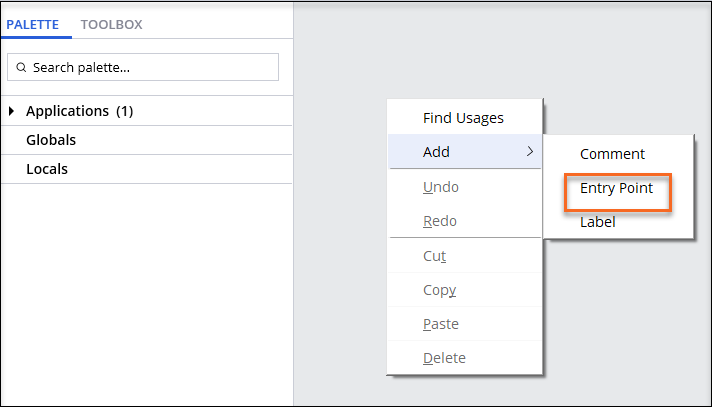
- On the automation surface, right-click, and then select Add > Entry Point to add an automation entry point.
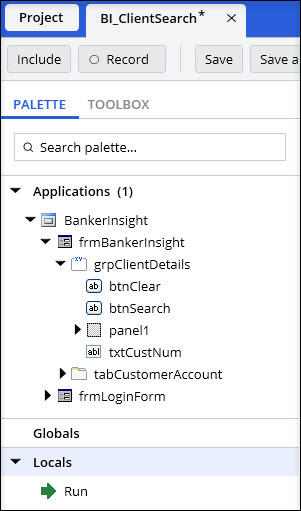
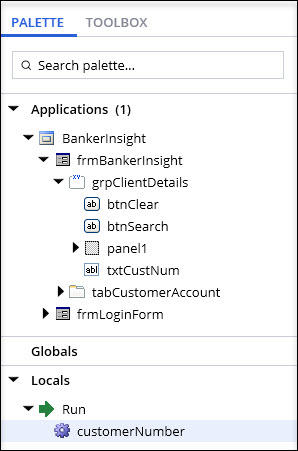
- On the Palette tab, in the Applications section, click BankerInsight > frmBankerInsight > grpClientDetails to expose the main window controls.
- Drag the control to the automation surface to display the dialog box.
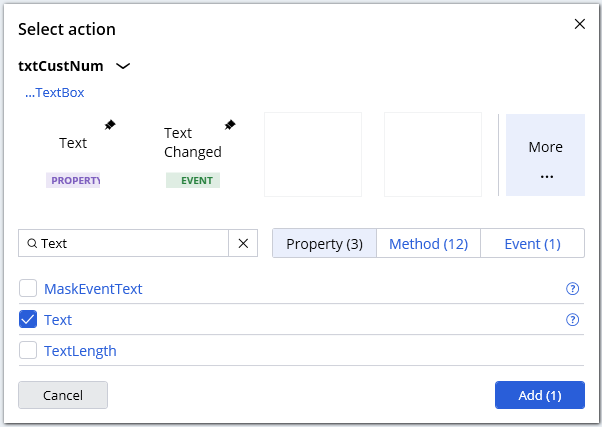
- In the Select actiondialog box, click More to display the properties, methods, and events for the control.
- In the search field, enter Text.
- Click the Property tab.
- Select the Text check box.
- Click Add to add the property to the design surface.
Tip: If the Text property is displayed in the main dialog window, you can also double click it to add it to the automation.
- Drag the btnSearch control to the automation surface to display the dialog box.
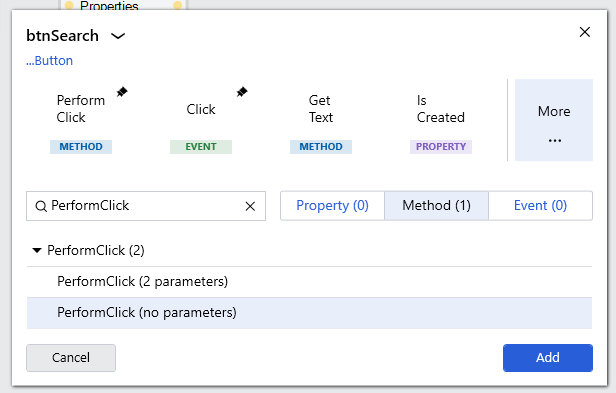
- In the dialog box, click More to display the properties, methods, and events for the control.
- In the search field, enter PerformClick.
- Click the Method tab.
- Expand the PerformClick group, and then select PerformClick (no parameters) to highlight the method.
- Click Add to add the method to the design surface.
Tip: If the PerformClick method is displayed in the main dialog window, you can also double click it to add it to the automation.
- On the automation surface, right-click, and then select Add > Exit Point to add an exit point shape.
- On the exit point shape, click the label, and enter Success to rename the exit point shape.
- On the entry point, click the Add icon to add the following input parameter to the sub-automation:
Parameter Type Parameter Name String customerNumber - On the Palette, in the Locals section, drag the customerNumber parameter to add the parameter to the design surface.
- On the automation surface, connect the data links as shown in the following example.
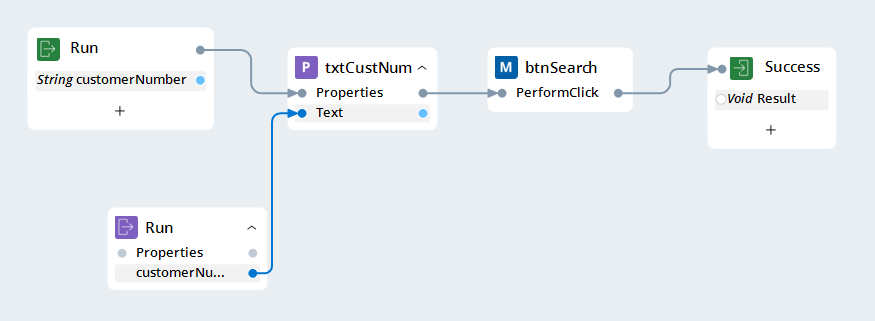
- On the toolbar, click Save to save the automation.
2 Create the main automation with two nested automations: BI_LogIn and BI_ClientSearch
- Click the Project tab to open the Project Explorer.
- On the Project Explorer, click and open the Main automation.
- On the Palette tab, in the Applications section, click BankerInsight to expose login form controls.
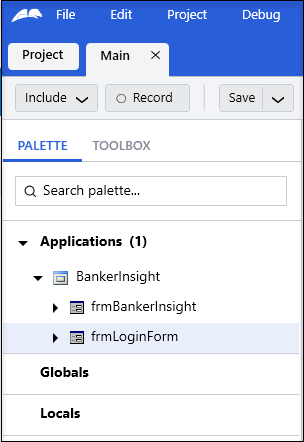
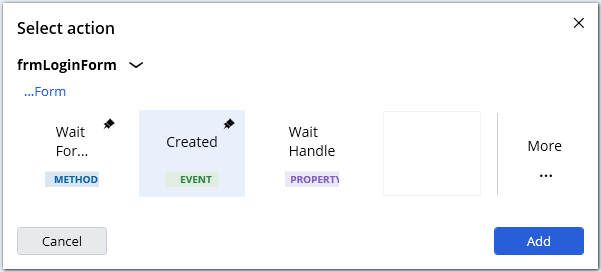
- Drag the frmLoginForm control to the automation surface to display the dialog box.
- In the dialog box, click More to display the properties, methods, and events for the control.
- In the search field, enter Created.
- Click the Event tab.
- Select the Created event.
- Click Add to add an event to the design surface.
- On the Main automation tab, click Include to add sub-automations to the main automation from the Include in palette dialog box.
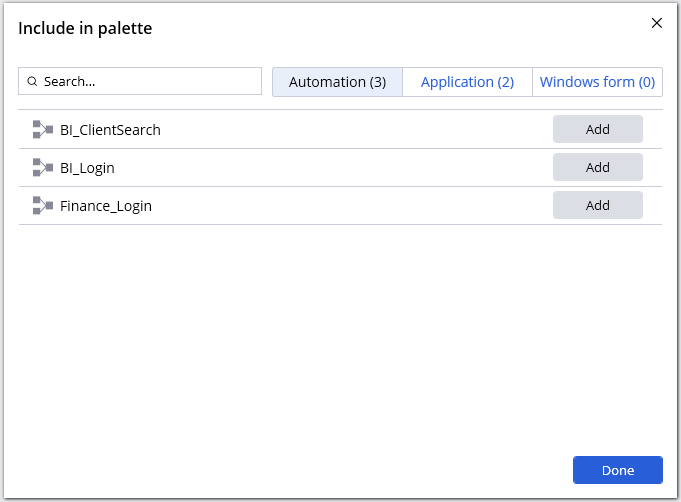
- In the Automations dialog box, click Add to add the following automations to the main automation:
- BI_LogIn
- BI_ClientSearch
- Click Done to close the dialog box.
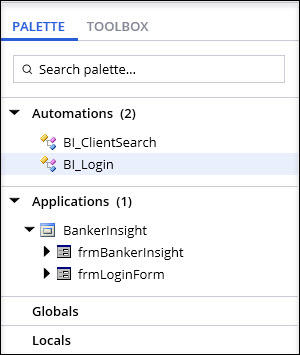
- On the Palette tab, in the Automations section, drag the BI_LogIn automation to the design surface to display the dialog box.
- Click More to display the properties, methods, and events for the control.
- In the search field, enter Run.
- Click the Method tab.
- Select the Run method.
- Click Add.
- On the Palette tab, in the Automations section, drag the BI_ClientSearch automation to the design surface to display the BI_ClientSearch dialog box.
- Select More to display properties, methods, and events for the control in a pop-up window.
- In the search field, enter Run.
- Click the Method tab.
- Select the Run method.
- Click Add.
- On the automation surface, connect the design blocks as shown in the following image.

- In the BI_LogIn design block, click the username and password parameters, and enter pega to define the value of the automation's input parameter.
Caution: It is not a best practice to use hardcoded credentials. It is used here for training purposes only.
- In the BI_ClientSearch design block, click the customerNumber parameter and enter 1234500078963456 to define the value of automation's input parameter.
- On the toolbar, click Save to save the main automation.

3 Use Label/Jump To components
- Click the Project tab to open the Project Explorer.
- On the Project Explorer, click and open the BI_LogIn automation.
- On the Palette tab, in the Applications section, click BankerInsight > frmBankerInsight to expose the application controls.
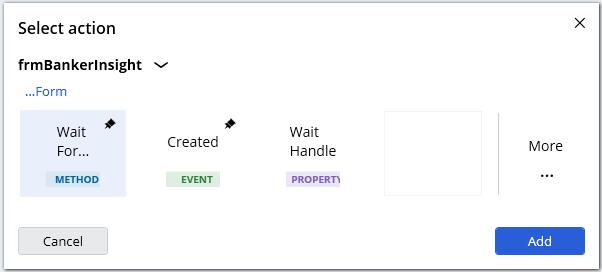
- Drag the frmBankerInsight control to the automation surface to display the dialog box.
- In the dialog box, click More to display properties, methods, and events for the control.
- In the search field, enter WaitForCreate.
- Click the Method tab.
- Select the WaitForCreate (no parameters) method.
- Click Add to add a method to the design surface. The WaitForCreate design block waits 30 seconds until the main window of the application is displayed.
- On the automation surface, perform the following actions to configure the Label and Jump To components:
- Click the link between the PerformClick method and the Success exit point.
- Right-click the link, and then select Delete to remove the automation link.
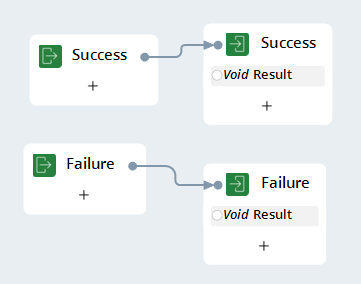
- On the automation surface, right-click, and then select Add > Label to add two labels.
- On each label shape, click the label, and rename the shape to:
- Success
- Failure
- On the automation surface, right-click, and then select Add > Exit Point to add an exit point shape.
- On the exit point shape, click the label, and enter Failure to rename the shape.
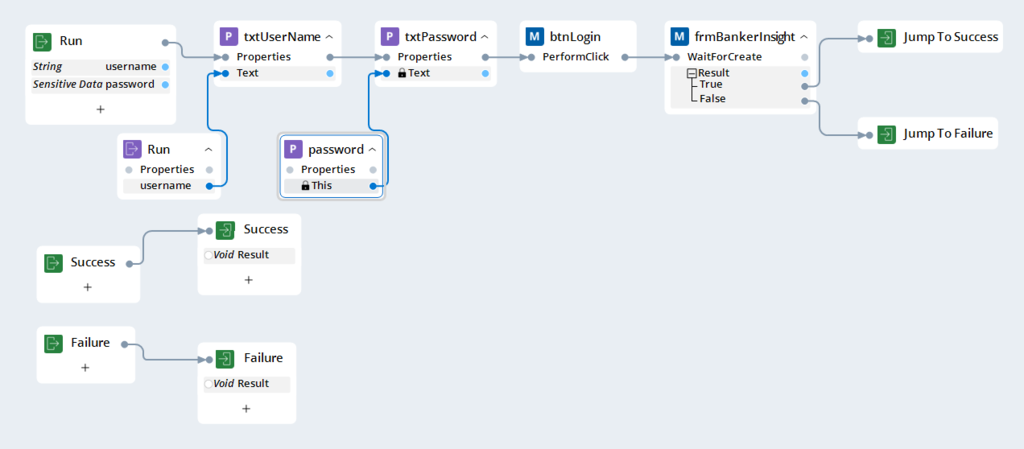
- On the automation surface, connect the automation links as shown in the following example.
- Right-click, and then select Jump To > Success to add a JumpTo component to the automation surface.
- Right-click, and then select Jump To > Failure to add a JumpTo component to the automation surface.
- Connect the automation links as shown in the following image.
- On the toolbar, click Save to save the BI_Login automation.
- Click the Main automation tab to switch to the Main automation.
- On the Toolbox tab, in the search field, enter MessageBox.
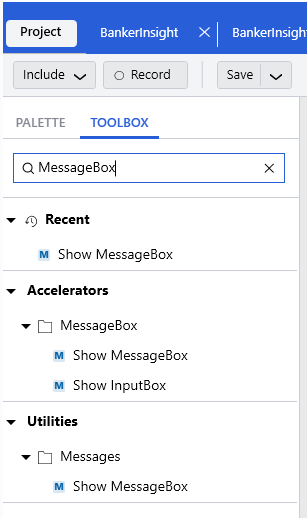
- Drag the Show MessageBox method to the automation surface to display the Choose Method Overload dialog box.
- In the Choose Method Overload dialog box, keep the default version of the method.
- Click Submit to close the dialog box.

- On the automation surface, click the message parameter of the MessageBox design block.
- In the message field, enter Application timeout to inform the user about the cause of an automation failure.
- On the automation surface, connect the automation links as shown in the following image.
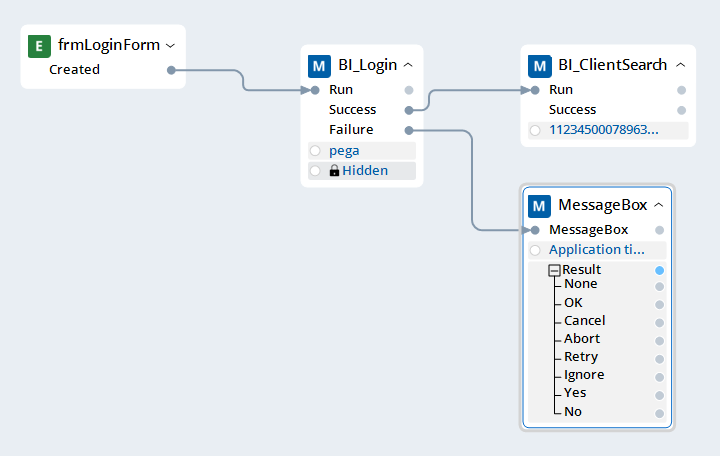
- Save the automation.
This Challenge is to practice what you learned in the following Module:
Available in the following mission:
If you are having problems with your training, please review the Pega Academy Support FAQs.
Want to help us improve this content?