Creating a composite tab
Archived
3 Tasks
5 mins
Advanced
English
Scenario
As a system architect, you have a requirement to create a new tab to display the first name, last name, and mobile phone number for a contact in a separate tab.
Use the following credentials to log in to the exercise system:
|
Role |
Username |
Password |
|
System Architect |
CASysAdmin |
rules |
Your assignment consists of the following tasks:
Task 1: Create a new section called ContactInfo
In PegaCA-Work > User Interface > Section, create a new section called ContactInfo, and add the fields First Name, Last Name, and Mobile Phone to the section
Task 2: Create a new tab and add the ContactInfo section
Find the section used to display the customer composite tabs and add the section you created.
Task 3: Verify your work
In the Interaction Portal, start an interaction with John Brown and verify that the new Contact tab is displayed.
Challenge Walkthrough
Detailed Tasks
1 Task 1: Create a new section called ContactInfo
Create a new section for your customer composite tab.
- Log in as operator casysadmin with password rules.
- Open the App Explorer and navigate to PegaCA-Work > User Interface > Section.
- Right-click Section and click Create.
- On the Create Section page enter the following information
- Label: ContactInfo
- Development branch: No branch
- Ruleset: PegaCS-Sample
- Version: 08-03-02
- Click Create and open.
- In the right panel, click +, scroll to the Data Display section, then click the Text object to add the field to the section.
- Select the newly added field and click the Pencil icon.
- In the Property field, enter .Contact.FirstName and click Submit.
- Repeat steps 5, 6 and 7 to add properties for .Contact.LastName and .Contact.MobilePhone.
- Click Save to save the section.
2 Task 2: Create a new tab and add the ContactInfo section
Find the section used to display the customer composite tabs and add the section you created.
- In Dev Studio, search for CPMCompositeTabs.
- Click Section in PegaCA-Work class, select CPMCompositeTabs.
- Click Save as to save the tab and confirm that the ruleset is PegaCS-Sample and version 08-03-02.
- Click Create and open.
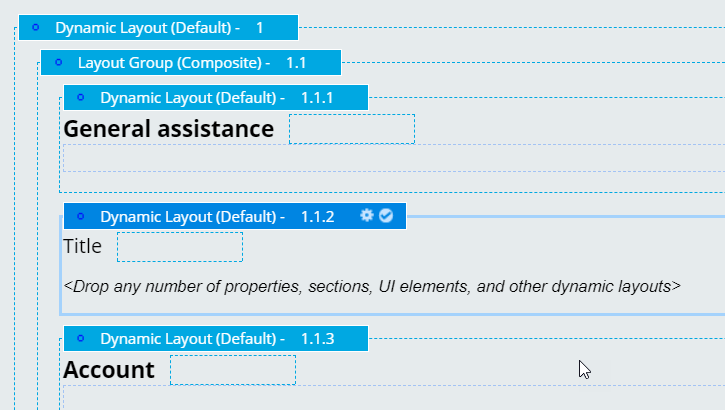
- Click Structural, drag a Dynamic layout object before the Account layout.
- Click the gear icon for the new Dynamic Layout.
- In the Container Settings, in the Title field, name the field Contact.
- Click Submit to save the tab settings.
- Click Structural, drag an Embedded Section object, and place it inside the Contact layout.
- Set the name of the section to: ContactInfo.
- Click Submit to the add new section to the tab.
- Click Save.
3 Task 3: Verify your work
In the Interaction Portal, start an interaction with John Brown and verify that the new Contact tab is displayed.
- In Dev Studio, click Launch web interface > Interaction Portal to open the Interaction Portal.
- In the Interaction Portal, click + New > Demo Screen Pops > Demo Pop - BROWN to start an interaction with John Brown.
- Click Accept to accept the incoming call. The Contact tab you added should be displayed.