Creating a data object for BAs
4 Tasks
30 mins
Beginner
Data Integration
User Experience
Constellation
English
Scenario
One of the most important elements of a Pega application is the Data Model. After Directly Capturing Objectives (DCO) sessions with several GoGoRoad stakeholders, including a Subject Matter Expert (SME) and a Business Analyst, the GoGoRoad Conceptual Data Model involved six data objects: Customer, Service address, Vehicle information, Payment information, and Selected service. As a Pega Business Architect on the GoGoRoad project, you are tasked with converting the Conceptual Data Model into the Logical Data Model. Although the data objects included in the Logical Data Model apply only to the Assistance Request Case Type at this time, you and your team of BAs have designed them for reuse in future Pega applications developed for GoGoRoad.
You have been hard at work creating the Logical Data Model in the GoGoRoad application, and only the Customer data object remains to be created.
User story
As a member of the GoGoRoad Service team, I want to be able to access information associated with GoGoRoad customers so that I have the information required to successfully resolve the request for assistance, and receive payment for services rendered.
Technical notes documented by the System Architect
- The GoGoRoad Data Model includes a Customer Data Object.
- The Customer data object contains the following fields: First name, Last name, Full name, Account ID, Coverage level, Customer email, and Enrollment.
- The Customer data object included five data records with customer information.
The following table provides the credentials you need to complete the challenge:
| Role | User name | Password |
|---|---|---|
| Business Architect | author@gogoroad | pega123! |
Challenge Walkthrough
Detailed Tasks
1 Create the Customer Data Object
- In the Pega instance for the challenge, enter the following credentials:
- In the User name field, enter author@gogoroad.
- In the Password field, enter pega123!.
- In the navigation pane of App Studio, click Data to display the list of Draft data objects in the GoGoRoad Application.
- Click the Customer (Draft) data object.
Note: Data objects created in the Case Life Cycle are designated as Draft data objects in the Integration Designer.
- Click .
- Confirm that the data object name is Customer, and then click .
- Confirm that Pega is listed as the system of record, and then click .
2 Add fields to the Customer data object
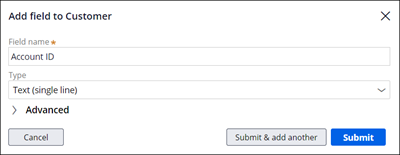
- On the Data model tab of the Customer data object, click Add field to create a new field for the Customer data object.
- In the Field name field, enter Account ID to name the field.
- Verify that Type defaults to Text(single line).
- Click Submit & add another, and then repeat steps 2-3 to add the following fields:
- First name
- Last name
Tip: When you want to add multiple fields to a data object or Step, use the Submit & add another option. Click Submit after you add the last field.
- Click Submit & add another, and then add the following fields:
Field name Type Customer email Email Enrollment Boolean Tip: The system uses the name of the field to predict the field Type. When creating a field, verify the field type by clicking or tabbing to the field type list before you submit the entries. - Click Submit & add another to configure a picklist field:
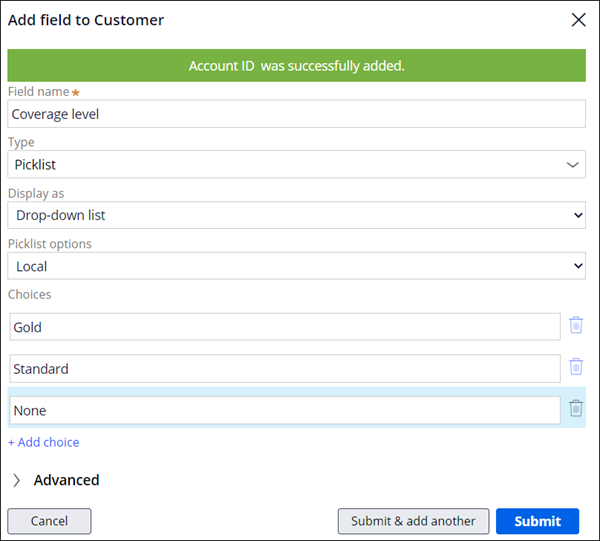
- In the Field name field, enter Coverage level.
- In the Type list, select Picklist.
- Click Add choice, and then enter Gold.
- Repeat step 6c. to add the following choices:
- Standard
- None
- Click to configure a calculated field:
- In the Field name field, enter Full Name, and then verify that the Type list defaults to Text (single line).
- Click .
- In the Input method list, select Calculated (read-only).

- In the first Calculation field, confirm that the default choice is Use expression.
- In the second Calculation field, in the second box, copy and paste the following text: .FirstName + " " + .LastName

- Click .

- In the upper-right corner, click Save to commit the fields to the Customer data object.
3 Add records to the Customer data object
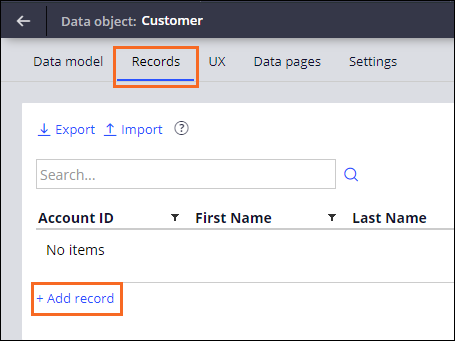
- In the Customer data object, click the Records tab to add records to the Customer data object.
- Click to add a record to the Customer data object.
- In the Account ID field, enter [email protected].
- In the First Name field, enter Jane.
- In the Last Name field, enter Mitchell.
- In the Customer email field, enter [email protected].
- In the Enrollment column, select the checkbox to set a value of True to the Boolean field.
- In the Coverage level list, select Gold.
- Click .
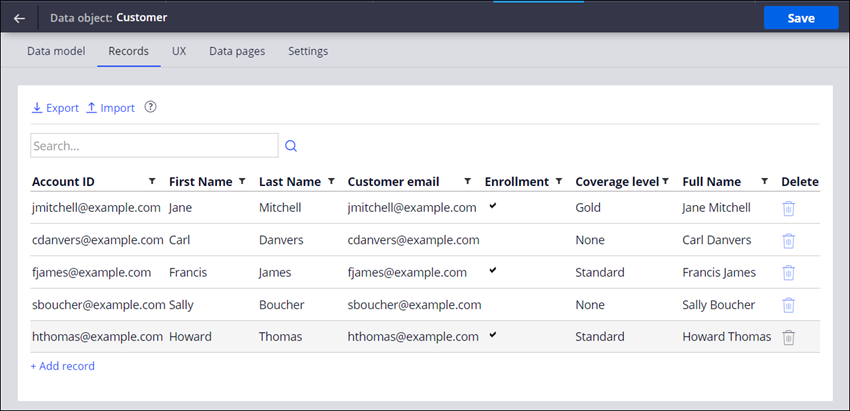
The system autopopulates the Full Name field with the combination of the First Name and Last Name fields that you entered.
- Repeat steps 2a-2f to enter the following records into the Customer data object:
Account ID First Name Last Name Customer email Enrollment Coverage level [email protected] Carl Danvers [email protected] False None [email protected] Francis James [email protected] True Standard [email protected] Sally Boucher [email protected] False None [email protected] Howard Thomas [email protected] True Standard - In the upper-right corner, click .
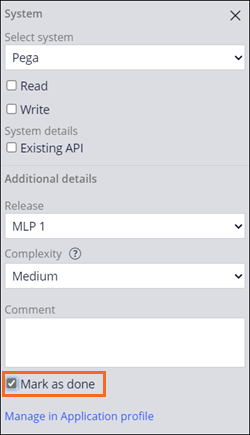
4 Mark the Customer data object as Done
- In the navigation pane of App Studio, click Case Types > Assistance Request to display the Assistance Request Case Life Cycle.
- In the Data & Interfaces section of the Create Stage, in the Customer data object, click to open the contextual properties pane on the right.
- In the contextual properties pane, select the Mark as done checkbox.
- In the upper-right corner, click .
This Challenge is to practice what you learned in the following Module:
Available in the following mission:
If you are having problems with your training, please review the Pega Academy Support FAQs.
Want to help us improve this content?