
Creating a new, DX-compliant service request type
3 Tasks
20 mins
Pega Customer Service 8.7
Advanced
English
Scenario
U+ Insurance wants one of its regional teams to start submitting E-bill registration service requests in their homegrown React-based CRM application. As a Customer Service Application Administrator, you have been tasked with creating a DX-compliant case type in the Pega Customer Service application. As part of the service request CSRs must collect customer confirmation of registering for e-bills, and once registration is confirmed, an option to collect alternate email addresses should be presented to the CSR.
Use the following credentials to log in to the exercise system:
| Role | User name | Password |
|---|---|---|
| Customer Service Application Administrator | CSIAppAdmin | install12345! |
| CSR | BillCarter | install12345! |
Your assignment consists of the following tasks:
Task 1: Create a new case type – Register for e-bill.
In App Studio, create the Register for e-bill case type based on the Customer Service Generic Template.
Task 2: Add the required fields to the Capture Case Input view.
In App Studio, add the Contact details page to the Capture Case Input view. Configure the page to display the Primary email property. Next, add a Boolean field for confirming e-bill registration and a text input field to capture alternate email. Lastly, turn off the Allow duplicate search case processing option for the new service request type.
Task 3: Add conditional visibility to the secondary email text input field.
Because visibility expressions are not supported in V1 APIs, conditional visibility must be defined using a when rule. In Dev Studio, configure a when rule that validates whether the customer has confirmed their e-bill registration. Define the secondary email input field as visible only once the when rule is set to true. Lastly, add an action set to the Boolean field and configure it to refresh the entire section every time the field is clicked.
Task 4: Confirm your work.
Run the Register for e-bill service request instance in the React application and ensure that the Capture Case Input view is displayed correctly.
Challenge Walkthrough
Detailed Tasks
1 Create a new case type – Register for e-bill
- On the exercise system landing page, click Pega CRM suite to log in to App Studio.
- Log in as a Customer Service for Insurance Administrator, with User name CSIAppAdmin and Password install12345!
- In App Studio, click Case types to open the Case Type Explorer.
- Click New to start creating a new case type.
- In the Case type name field, enter Register for e-bill.
- Click Case Template to expand the section.
- Select Customer Service Generic Template from the Template list.
- Click Next.
2 Add the required fields to the Capture Case Details view
- In the Register for e-bill case life cycle view, in the Intake stage, hover over the Capture case details process and click the Configure process icon.
- In the process flow diagram, click the plus icon on the Capture Case Details subprocess shape.
- Select the Capture Case Details assignment shape.
- On the General tab on the right, click Configure View.
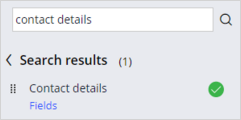
- In the search field, enter: Contact details.
- In the Search results, click the Add icon to add the Contact details data page to the view.
- In the View row, click Open to create a new view within the added data page.
- In the View name field, enter Primary email and then click Create.
- In the primary email view, remove all the page properties by clicking the Remove icons next to them.
- In the search bar, enter Primary email and then click the Add icon next to the respective field to add the property to the view.
- In the Primary email row, click the Options drop-down menu and select Read-only.
- In the Fields tab on the Primary email view, click the Capture case input link to go back to the respective view.

You have added a page property to the newly created view. Bear in mind that using temporary pages with the DX API is not recommended. - Click Add field.
- In the Field name, enter E-bill registration.
- In the Type list, select Boolean.
- Click Submit.
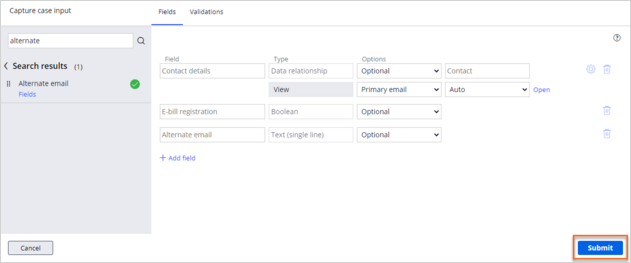
- In the Search field, enter Alternate email.
- In the Search results, click the Add icon next to the Alternate email field.
- Click Submit.
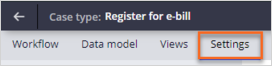
- Click Settings.
- In the Settings tab, click Case processing options.
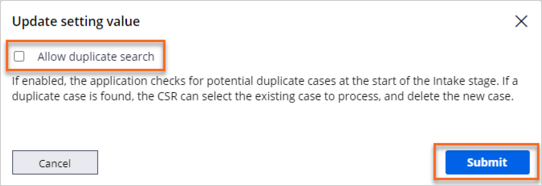
- In the Case processing options menu, in the Allow duplicate search row, click More > Override default value.
- In the Update setting value dialog box, uncheck the Allow duplicate search option and click Submit.
- Click Save.
3 Add conditional visibility to the secondary email text input field
- Click the Switch Studio drop-down and select Dev Studio.
- In the navigation pane of Dev Studio, click App.
- On the Classes tab, in the search field, enter PegaCPMI-Work-Service-RegisterForEbill.
- Within the selected class, click Process > Flow Action > CaptureCaseInput.
- On the Flow Action Configuration page, on the Layout tab, next to the Section field, click the Open icon to open the CaptureCaseInput section.
- Click Check out to start editing the section rule.
- On the Section Configuration page, on the Design tab, hover over the Alternate email address field and click the Edit icon.

- In the Cell Properties dialog box, in the Visibility list, select Condition (when rule).
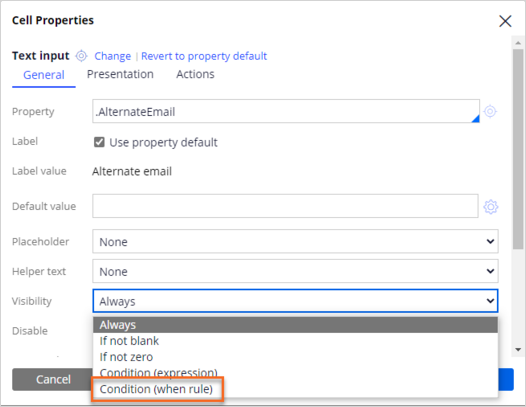
For conditional visibility, make sure to always use when rules and not expressions.Visibility expressions are not DX-compliant and will not render properly in a React application. - Next to the Condition for visibility field, click the Open icon to start configuring a new when rule.
- On the When Record Configuration page, in the Label field, enter Is e-bill registration acknowledged.
- Click Create and open.
- On the When Rule Configuration page, on the Conditions tab, in the property list, select E-bill registration.
- In the comparator list, select is true.
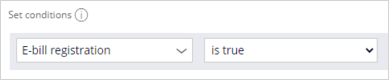
- Click Save.
- Click the CaptureCaseInput tab to go back to the Section Configuration page you opened in step 5.
- In the Cell Properties dialog box, in the Conditions for visibility field, enter Isebillregistrationacknowledged to select the newly created when rule.
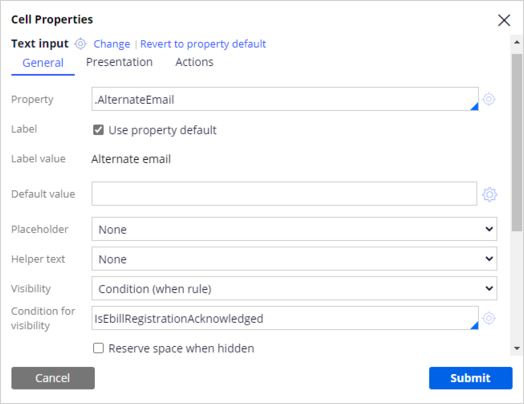
- Click Submit.
- On the Design tab, hover over the E-bill registration field and click Edit.

- In the Cell Properties dialog box, click the Actions tab.
- Click Create an action set.
- In Action set 1, click Add an event > Click.
- Click Add an action > Display: Refresh.
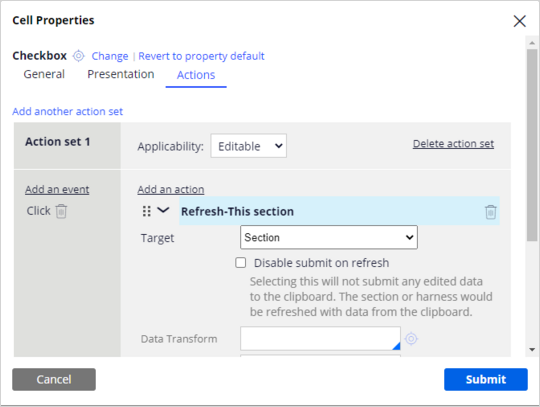
- Click Submit.
- Click Save.
- Click Check in.
- In the Check-in comments field, enter Visibility conditions configured and then click Check in.
If you are having problems with your training, please review the Pega Academy Support FAQs.
Want to help us improve this content?