Creating a new service request
6 Tasks
10 mins
Intermediate
Case Management
English
Scenario
U+ Bank wants to offer its employees lunch services by creating a service request in which employees can select and then submit what they want to eat. In the request, employees can select the type of sandwich, sandwich toppings, and a beverage.
Use the following credentials to log in to the exercise system:
| Role | User name | Password |
|---|---|---|
| CS Administrator | CSAppAdmin | password123! |
Your assignment consists of the following tasks:
Task 1: Create a new case type
In App Studio, create a new case type named Order Lunch that uses the Customer Service Generic Template.
Task 2: Add properties to the data model
Add fields for Sandwich, Toppings, and Drink to the data model.
Task 3: Update the Case input section of the UI
Update the Case input section of the UI to add fields for the case.
Task 4: Update the user interface
Run the case and update the user interface to use your properties.
Task 5: Observe duplicate case search
Run an interaction and start the Order Lunch service case. Run the Order Lunch service case a second time, and notice that you are prompted to verify that this is not a duplicate case before case processing begins.
Task 6: Turn off duplicate case search and observe results
Update the case processing settings for the Order Lunch case type to disable the duplicate search check. Run an interaction and the Order Lunch case and observe that you no longer see a duplicate case prompt.
Challenge Walkthrough
Detailed Tasks
1 Create a new case type
- On the exercise system landing page, click Pega CRM suite to log in to App Studio.
- Log in as a customer service administrator, with user name CSAppAdmin and password password123!.
- In the navigation pane of App Studio, click Case types to open to the Case Type Explorer.
- On the Case types landing page, in the upper-right corner, click New to create a new case type.
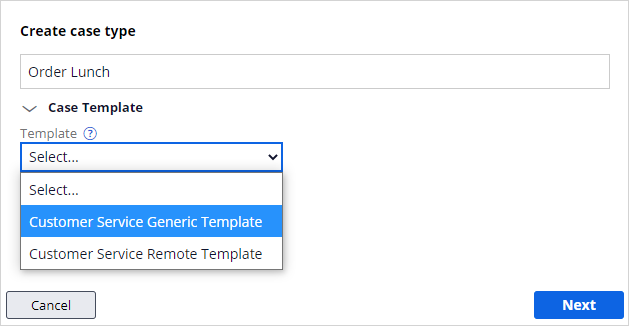
- In the Case type name field, enter Order Lunch.
- Expand Case Template to view the Template list.
- In the Template list, select Customer Service Generic Template.
- Click Next to create the new case.
2 Add properties to the data model
- On the case type, click the Data model tab to view the properties of the case type.
- In the upper right, click Add field to add a new property to the case type.
- In the Add field to Order lunch dialog box, in the Field name field, enter Sandwich.
- In the Type list, select Text (single line), and then click Submit & add another.
- Repeat steps 3 and 4 to add two more fields:
- Toppings
- Drink
- Close the dialog box.
- Click Save to save your case.
3 Update the Case input section of the UI
- Click Save and run to run the case type In Pega Customer Service.
- In the Case input section, hover over the instructions, and then click Configure this view to update the intake section.

- In the configuration pane on the right, click Change to update the layout of the view.
- In the Select a template dialog box, click 3 Column to select the layout.
- In the configuration pane, in Column A, click the Add icon to add a field.

- In the Add list, hover over Sandwich, and then click the Add icon to add the field to the view
- Close the list.
- In Column A, to the right of the Intake instruction field, click the More icon, and then click Cut to remove the instructions from the view.

- In Column B, repeat steps 5-7 to add the Toppings field.
- In Column C, repeat steps 5-7 to add the Drink field.
- Close the configuration pane to finish editing the section.
- In the Case input section, enter some details for the case.
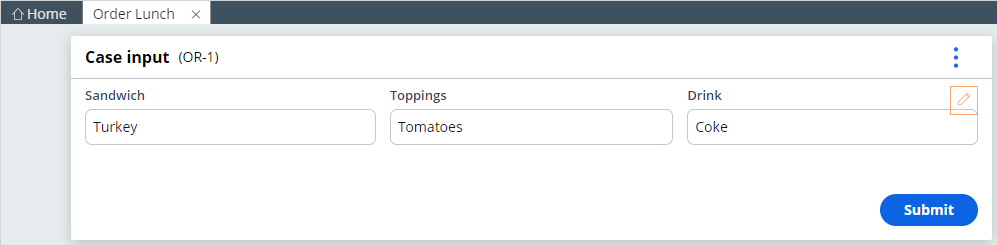
- Click Submit to advance the case.
4 Update the user interface
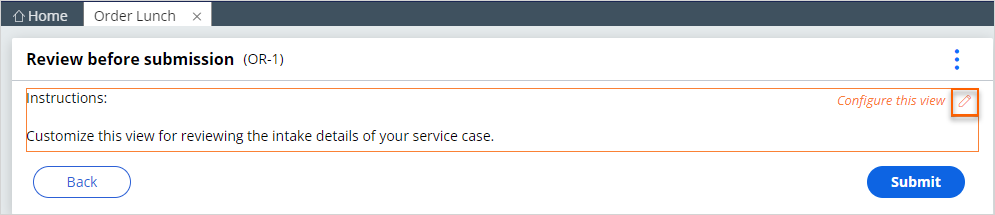
- In the Review before submission section, hover over the instructions, and then click Configure this view to update the review section.
- In the configuration pane, In Column A:
- Click the Add icon, and then in the Add list, add the following fields:
- Sandwich
- Toppings
- Drink
- Close the list.
- Click the Add icon, and then in the Add list, add the following fields:
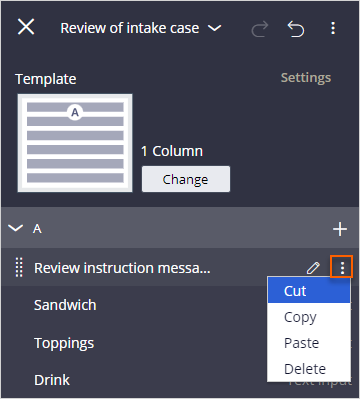
- In Column A, to the right of the Intake instruction field, click the More icon, and then click Cut to remove the instructions from the view. Close the configuration pane to finish editing the section.
- Click Submit to advance to the next step, and then click Submit to complete the next step in the case.
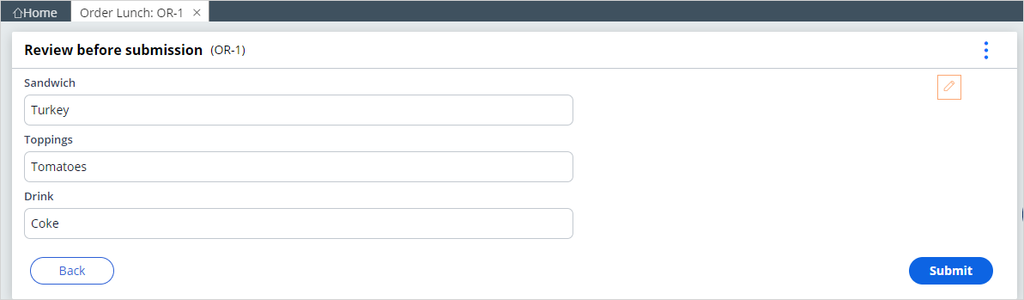
- Click Close to complete the case.
5 Observe duplicate case search
- In the header of Customer Service, click New > Demo Screen Pops > Demo Pop – CONNOR to start a new interaction.
- Click Accept to start the interaction.
- On the call interaction, click Add task to add an Order Lunch case.
- Double-click Order Lunch to start the case.
- In the Case input section, enter details for the lunch order, and then complete the service case.
- Repeat steps 3 and 5 to add another Order Lunch case.
- Double-click Order Lunch to start the case.
- Confirm that the Potential duplicate cases section is displayed.
- In the Potential duplicate cases section, select the case, and then click Resolve as duplicate.
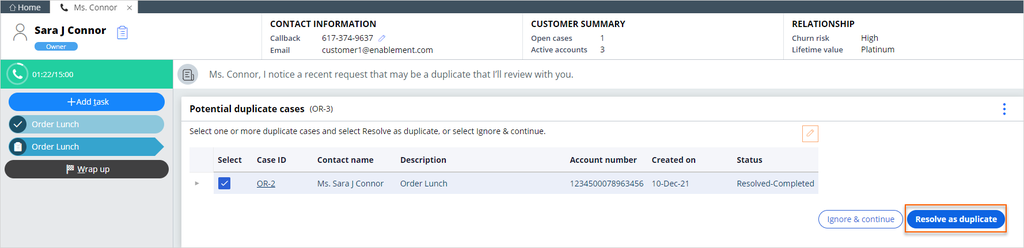
- Click Close, and then click Wrap up.
6 Turn off duplicate case search and observe results
- In the navigation pane of App Studio, click Case types to open the Case Type Explorer.
- Open the Order Lunch case type.
- Click the Settings tab.
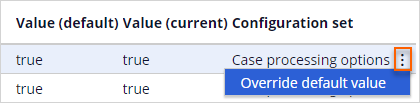
- Click the Case processing options section to update the settings.
- To clear the Allow duplicate search, scroll left and then click the More > Override default value.
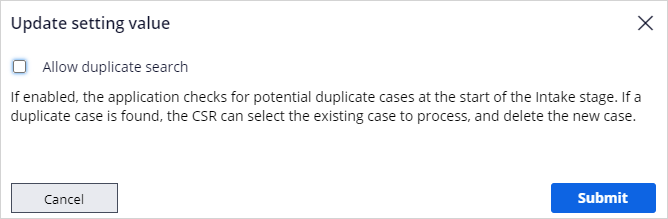
- Clear the Allow duplicate search checkbox, and then click Submit to update the setting value.
- Click Save to save the changes.
- In the header of App Studio, click Preview to open the Customer Service application.
- In the header of Customer Service, Click New > Demo Screen Pops > Demo Pop – CONNOR to start a new interaction.
- Click Accept to start the interaction.
- Click Add task to add an Order Lunch case.
- Double-click Order Lunch to start the case.
- Observe that this time that the duplicate cases section is not displayed.
This Challenge is to practice what you learned in the following Module:
If you are having problems with your training, please review the Pega Academy Support FAQs.
Want to help us improve this content?