DownloadingAssetsStart.zip
(32.93 KB)
Downloading and using a local asset file
2 Tasks
15 mins
Pega Robotic Automation 22.1
Beginner
Robotic Process Automation
English
Scenario
You are a part of the team building a robotic project for a Customer Support division of a banking company. Your task is to create an automation that retrieves and displays the customer data in case of a customer support call.
Complete the following tasks:
- Include the deployed Asset from a local disc to the project.
- Create an automation that uses the Asset to display customer data for a support call.
Challenge Walkthrough
Detailed Tasks
1 Include deployed Asset from a local disc to the project
- Download the project:
- Save the file to your desktop, and then extract the project folder to C:\Users\<username>\Documents\Pega Robot Studio\Projects\.
- On the Home screen in Pega Robot Studio, click Open Project, access the Projects folder, and then open DownloadingAssetsStart.pegaproject.
- Download the asset:
BankerInsight_0.zip (120.25 KB)
- Extract the file, and then copy BankerInsight.pegaAsset file to C:\Users\<username>\AppData\Pegasystems\Assets\.
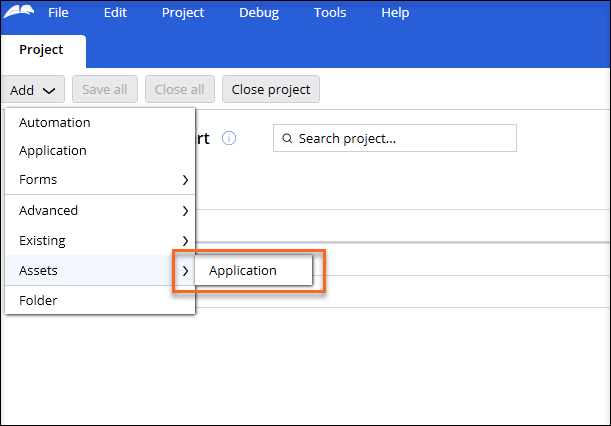
- In the Project Explorer, click Add > Assets > Application, as shown in the following figure:
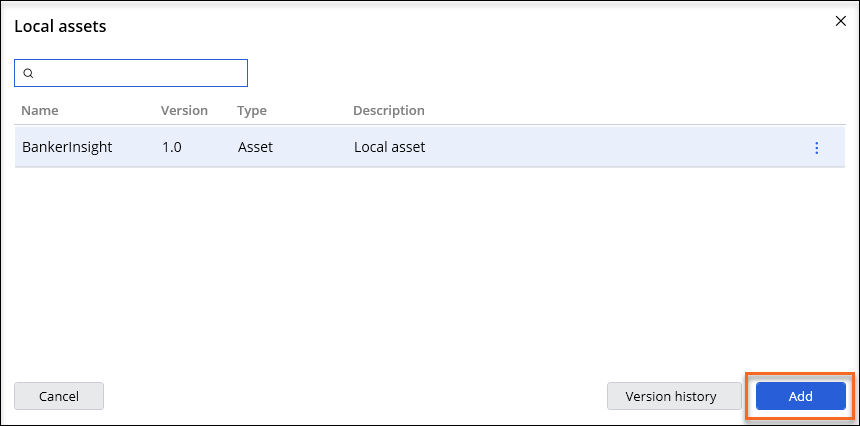
- In the dialog box, select BankerInshight, then click , as shown in the following figure:
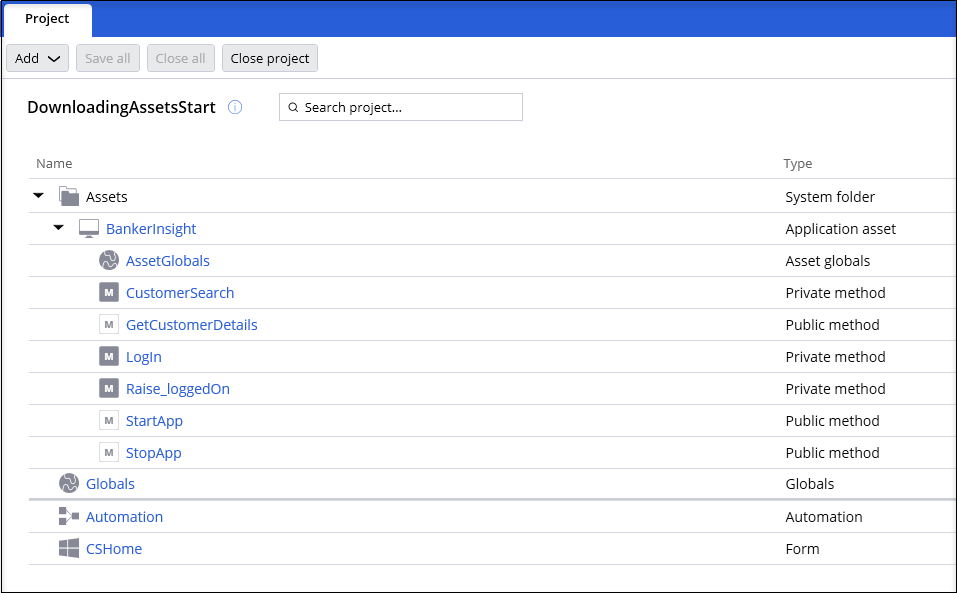
- In the , expand the BankerInsight, and then verify whether the system added all elements, as shown in the following figure:
2 Create an automation that uses the Application Asset to display customer data in the windows form
- In the Project Explorer, click Add > Automation.
- In the dialog box, in the Automation name field, enter StartCustomerCall, and then click to create a new automation.
- In the Toolbar, click Include.
- In the Include in palette dialog box, on the Application tab, click the icon to add the BankerInsight application.
- On the Form tab, click the icon to add the CSHome form.
- Click .
- Adjust the value of the Path field to the location of the BankerInsight application on your local computer:
- In the Project Explorer, click BankerInsight to open the application designer.
- Open the StartCustomerCall automation.
- On the Palette tab, expand the Applications section, and then select the BankerInsight control.
- In the properties grid, next to the Path property, click the More icon.
- In the installation folder for BankerInsight, click the BankerInsight application, and then click .
- On the Palette tab, expand Forms > CSHome, and then drag the Start call control to the automation surface.
- In the dialog box, select Click, and then click Add.
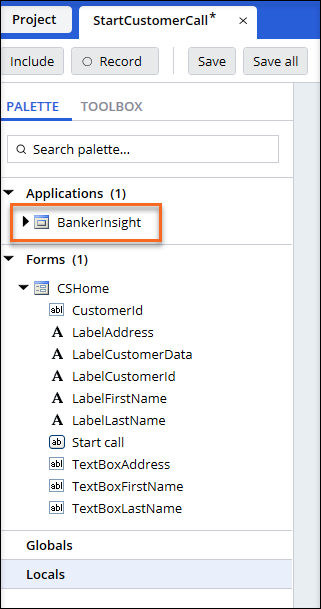
- On the Palette tab, expand Applications, and then drag the BankerInsight control to the automation surface, as shown in the following figure:
- In the Select action dialog box, click More to access the search field.
- In the search field, enter GetCustomerDetails, select the GetCustomerDetails method, then click Add.
- On the Palette tab, in the Forms section, drag the CustomerId control to the automation surface, select the Text property, and then click .
- Add a username String variable to the automation surface:
- On the Toolbox tab, in the Variables section, drag a String variable to the automation surface.
- On the String design block, click String1, and then enter username.
- On the String design block, click Vaule, and then enter pega.
- Add a password-sensitive data variable to the automation:
- On the Toolbox tab, in the Variables section, drag a Sensitive data variable to the automation surface.
- On the Sensitive design block, click Sensitive1, and then enter password.
- On the Sensitive design block, click Vaule, and then enter pega.
- On the Palette tab, in the Forms section, drag the following controls to theautomation surface:
- TextBoxAddress
- TextBoxFirstName
- TextBoxLastName
- Select the Text property, and then click Add.
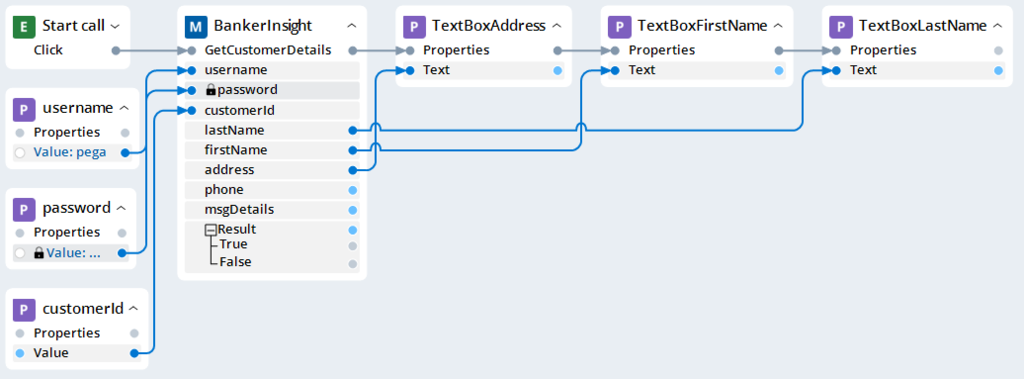
- On the automation surface, connect the links, as shown in the following figure:
- On the toolbar, click to save the automation.
This Challenge is to practice what you learned in the following Module:
If you are having problems with your training, please review the Pega Academy Support FAQs.
Want to help us improve this content?