Exporting adaptive model data for external analysis
3 Tasks
25 mins
Beginner
English
Scenario
U+ Bank implements cross-selling of their credit cards on the web by using Pega Customer Decision Hub™. Self-learning, adaptive models drive the predictions that support the Next Best Actions for each customer. In the production phase of the project, you can export the data from the Adaptive Decision Management datamart to further analyze the performance of your online models over time, across channels, issues, and groups, in your external data analysis tool of choice.
To limit the scope and size of the data set, you can modify the data flows that export the data files. This allows you to select the data for the models that interest you.
Use the following credentials to log in to the exercise system:
| Role | User name | Password |
|---|---|---|
| Data scientist | DataScientist | rules |
Your assignment consists of the following tasks:
Task 1: Generate the monitoring export artifacts
In the Prediction Studio settings, configure the Monitoring database export to generate the monitoring export artifacts.
Task 2: Modify the generated ModelSnapshot data flow
Add a filter component to the ModelSnapshot data flow to select model snapshots for the Web Click Through Rate model.
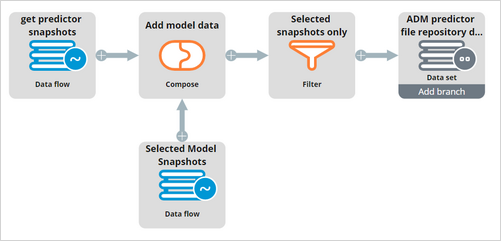
Task 3: Modify the generated PredSnapshot data flow
Add a Compose component to the PredSnapshot data flow to select predictor binning snapshots for the Web Click Through Rate model.
Task 4: Confirm your work
Export the monitoring database and examine the content of the JSON files.
Challenge Walkthrough
Detailed Tasks
1 Generate the monitoring export artifacts
- On the exercise system landing page, click Pega CRM suite to log in to Customer Decision Hub.
- Log in as a data scientist:
- In the User name field, enter DataScientist.
- In the Password field, enter rules.
- In the navigation pane of Customer Decision Hub, click Intelligence > Prediction Studio to open Prediction Studio.
- In the navigation pane of Prediction Studio, click Settings > Prediction Studio settings to navigate to the settings page.
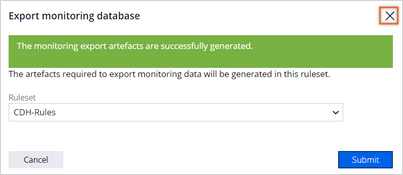
- Scroll down to the Monitoring database export section, and then click Configure to open the Export monitoring database dialog box.
- In the Export monitoring database dialog box, set the Ruleset to CDH-Rules and click Submit to generate the monitoring export artifacts.
- Close the Export monitoring database dialog box.
Note: These monitoring export artifacts are typically generated in a development environment and deployed to higher environments through the enterprise pipeline.
- In the lower-left corner, click Back to Customer Decision Hub.
2 Modify the generated ModelSnapshot data flow
- In the search field, enter ModelSnapshot, and then press Enter to search for the ModelSnapshot data flow.
- In the search results, click the ModelSnapshot data flow to open the data flow canvas.
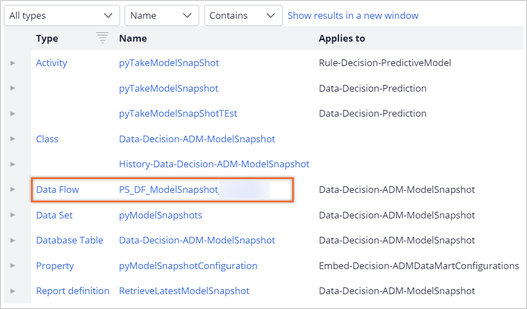 Note: The name of the data flow contains a random identifier that is created during this exercise.
- In the upper-right corner, click Check out.
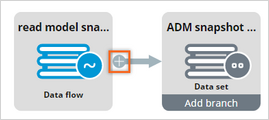
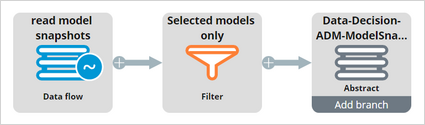
- Click the Add icon, and then click Filter to add a filter component to the data flow.
- Right-click the filter component, and then click Properties to configure the component.
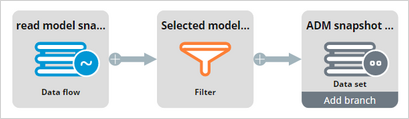
- In the Filter configurations dialog box, in the Name field, enter Selected models only.
- In the Filter conditions section, click Add condition.
- Enter a condition that reads: When .pyConfigurationName = "Web_Click_Through_Rate".

- Click Submit to close the Filter configurations dialog box.
- In the upper-right corner, click Check in.
- In the Check in dialog box, enter appropriate comments, and then click Check in.
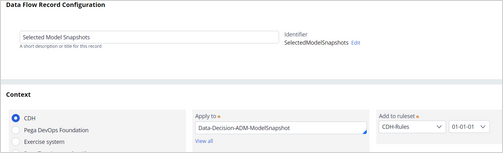
- In the upper-right corner, click Save as to configure a new dataflow:
- In the Name field, enter Selected Model Snapshots.
- In the Add to rules field, enter or select CDHRules
- In the upper-right corner, click Create and open.
- In the upper-right corner, click Check out.
- Right-click the destination component, and then click Properties to configure the component.
- In the Destination configurations dialog box, in the Destination field, select Abstract.
- Click Submit to close the dialog box.
- In the upper-right corner, click Check in.
- In the Check in dialog box, enter appropriate comments, and then click Submit.
3 Modify the generated PredSnapshot data flow
- In the search field, enter PredSnapshot, and then press Enter to search for the PredSnapshot data flow.
- In the search results, click the PredSnapshot data flow to open the data flow canvas.
 Note: The name of the data flow contains a random identifier that is created during this exercise.
- In the upper-right corner, click Check out.
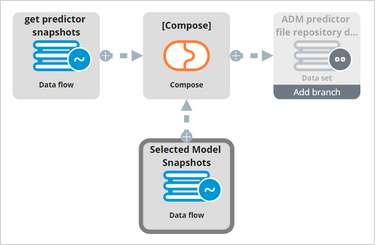
- Click the Add icon, and then click Compose to add a second source component.

- Right-click the second source component, and then click Properties to configure the component.
- In the Source configurations dialog box, in the Source field, select Data flow.
- In the Input class field, enter or select Data-Decision-ADM-ModelSnapshot.
- In the Data flow field, enter or select SelectedModelSnapshots.
- Click Submit to close the dialog box.
- Right-click the Compose component, then click Properties to configure the component.
- In the Compose configurations dialog box, in the Name field, enter Add model data.
- In the Property field, enter .ModelData, and then click the gear icon on the right of the Property field to create a new property.

- In the Add to ruleset field, ensure the CDH-Rules ruleset is selected.
- In the upper-right corner, click Create and open.
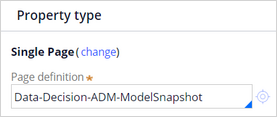
- In the Property type section, click Change.
- In the Page column, click Single page to change the property type.
- In the Page definition field, enter or select Data-Decision-ADM-ModelSnapshot.
- In the upper-right corner, click Save, and then close the ModelData page.
- In the Compose configurations dialog box, in the Compose when conditions below are met section, enter or select the condition to read When pyModelID is equal to .pyModelID.

- Click Submit to close the dialog box.
- Click the Add icon on the Compose component, and then select Filter.

- Right-click the Filter component, and then click Properties to configure the component.
- In the Name field, enter Selected snapshots only.
- In the Filter conditions section, click Add condition.
- Enter the condition to read When .ModelData.pyModelID != "" to filter out predictor snapshots that do not match with a selected model and are therefore irrelevant.

- Click Submit to close the dialog box.
- In the upper-right corner, click Check in.
- In the Check in dialog box, enter appropriate comments, and then click Submit.
If you are having problems with your training, please review the Pega Academy Support FAQs.
Want to help us improve this content?