Interrogating Windows and web applications
Archived
6 Tasks
30 mins
Beginner
Robotic Process Automation
English
Scenario
Your solution contains both projects and associated application adapters, and the next step is interrogation. The process calls for logging in to the CRM, displaying the customer information on a user interface, and adding a menu item for a future process. For the ACME Search System, the project documentation states to log in to the application and access the Stores link to search for the nearest store based on the ZIP code of the customer. The project documentation requires that the control names start with the application acronym. The ACME Search System login must also have at least four characters for both the user name and password fields. A hidden control on the sign-in page requires interrogation.
Interrogate the login controls, toolbar buttons, customer account information, and menu items in the CRM application by using the three methods: Interrogation target, Create Control, and Add Menu Items. Rename the objects in the Properties window during the interrogation process.
In this part of the solution, complete the following tasks:
- Interrogate the Windows application and the controls required for login, menu buttons, and customer information.
- Rename the Windows application controls.
- Interrogate the web application and the controls required for login, menu links, search criteria, and search results.
- Rename the web application controls.
Detailed Tasks
1 Interrogate a Windows application
- Under the CRMPrj, in the Solution Explorer, double-click the CRM.os project item to open the adapter in the Designer Window.
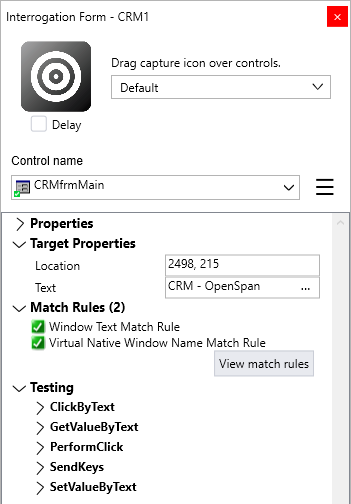
- On the CRM.os tab, click Start Interrogation to launch the CRM application as specified in the Path property and open an Interrogation Form dialog box.
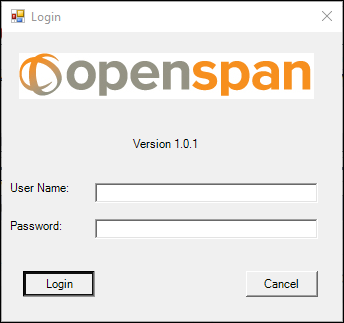
- On the Interrogation Form, click and drag the Target icon to the Login button.
- On the Login screen, with the Login button highlighted, release the pointer to update the Object Hierarchy with the button control.
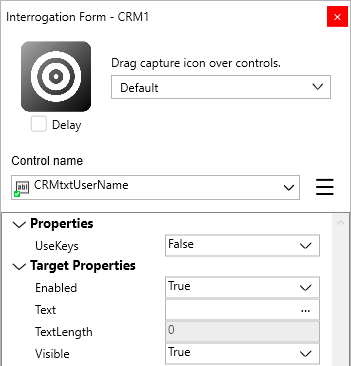
- On the Interrogation Form, click and drag the Target icon to interrogate the User Name and Password fields and update the Object Hierarchy with the new controls.
- On the Interrogation Form, in the Control name field, enter CRMtxtUserName to change the value.
- In the Control name list, select txttxtPassword.

- In the Control name field, enter CRMtxtPassword to change the value.
- On the Interrogation Form, repeat steps 7-8 to replace the object names in the Control name field with the updated names.
Object Name
Updated (Name)
Login
CRMfrmLogin
btnbtnLogin
CRMbtnLogin
-
With the interrogation still running, on the CRM application, click Login button to display the CRM window.
- On the Interrogation Form, click and drag the Target icon to interrogate the New Call, User 1, User 2, and User 3 buttons to add the new controls to the solution.
- On the Interrogation Form, in the Control name field, select and replace the object names with the updated names by using the following parameters:
Object Name
Updated (Name)
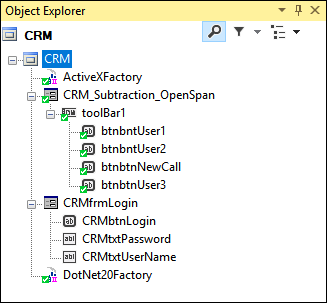
CRM_Subtraction_OpenSpan
CRMfrmMain
Toolbar1
CRMToolBar
btnbntUser1
CRMbtnUser1
btnbntUser2
CRMbtnUser2
btnbtnNewCall
CRMbtnNewCall
btnbtnUser3
CRMbtnUser3
-
On the CRM toolbar, click New Call to display the New Call 1 window.
Note: Your display settings may black out the Account Number field. Change the display to Windows Classic, if desired. - On the Interrogation Form, click and drag the Target icon to interrogate the following targets:
- Account Number
- Name
- Street Address
- City
- State
- ZIP

- On the Interrogation Form, in the Control name field, select and replace the object names with the updated names by using the following parameters:
Object Name
Updated (Name)
MdiClient
CRMMDIClient
CRMchild
CRMChild
pnlCustomerInfo
CRMpnlCustInfo
lbllblAcctNum
CRMlblAcctNum
txttxtCity
CRMtxtCity
txttxtName
CRMtxtName
txttxtState
CRMtxtState
txttxtStreetAdd
CRMtxtStreetAdd
txttxtZip
CRMtxtZip
2 Interrogate a Windows application using Add Menu Items
- With interrogation still running, in the Control Name field, select the CRMfrmMain object.
- On the Interrogation Form, click the More icon, and then select Add Menu Items to display the Add Menu Items window.
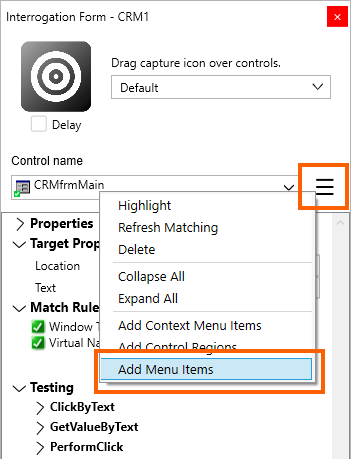
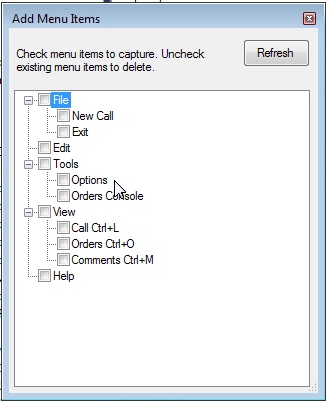
- In the Add Menu Items window, select the Orders Console check box.
- In the Add Menu Items window, click the Close icon to close the window and save your selection.
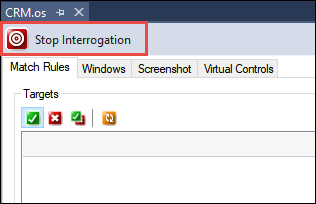
- On the CRM.os tab, in the design area, click Stop Interrogation to close the CRM application and the Interrogation Form window.
- On the menu bar, click File > Save All to save the interrogation.
3 Interrogate a web application
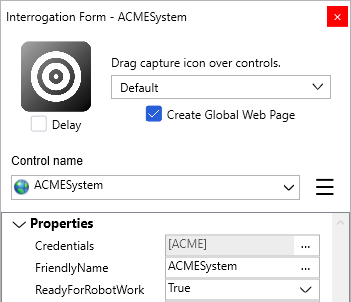
- In the Solution Explorer, double-click ACMESystem.os to open the adapter in a design tab.
- On the ACMESystem.os tab, click Start Interrogation to open the Interrogation Form and browser.
- With the Interrogation Form dialog option set as Default and the Create Global Web Page check box selected, click and drag the Target icon to interrogate the following targets:
- User Name
- Password
- Sign In
- On the Interrogation Form, in the Control name field, select and replace the object names with the updated names by using the following parameters:
Object Name Updated (Name) Sign_In_Pega_Training_Web_Appl ACMEwpSignIn Please_enter_a_user_name_of_at_least ACMEfrmCredentials Login_button ACMEbtnSignIn textBox1 (user_password) ACMEtxtPassword User_name ACMEtxtUserName - On the Login page, in the User Name and Password fields, enter 1234 to enable the Sign In button.
- On the Login page, click Sign In to open the Home Page of the website.
- On the Interrogation Form, click and drag the Target icon to the Stores link to update the Object Hierarchy with the controls.
Note: Make sure the smallest highlight box is displayed for the correct target.
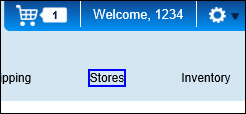
- On the Home page, click Stores to open the Stores search page of the website.
- On the Interrogation Form, click and drag the Target icon to the Zip Code field and Find Store button to update the Object Hierarchy with the controls.
- On the Interrogation Form, in the Control name field, select and replace the object names with the updated names by using the following parameters:
Object Name Updated (Name) Home_Pega_Training_Web_Applica ACMEwpHome Stores ACMElnkStores Stores_Pega_Studio_Training_Web_Ap ACMEwpStores Search_by_ZIP_CodeSubtrationORSubt ACMEfrmSearch Find_Store ACMEbtnFindStore txtZip ACMEtxtZip - On the Search page, in the Zip Code field, enter 30022.
- On the Search page, click Find Store to display the Results page.
4 Interrogate using Select Element
Note: In the Select Element window, when you select an element tag, the application highlights the control to ensure that you select and create the correct control during the interrogation process.
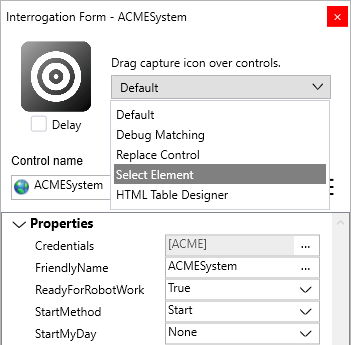
- On the Interrogation Form, in the Drag capture icon over controls list, select Select Element.
- On the Interrogation Form, click and drag the Target icon to the store address to display the Select Element window.
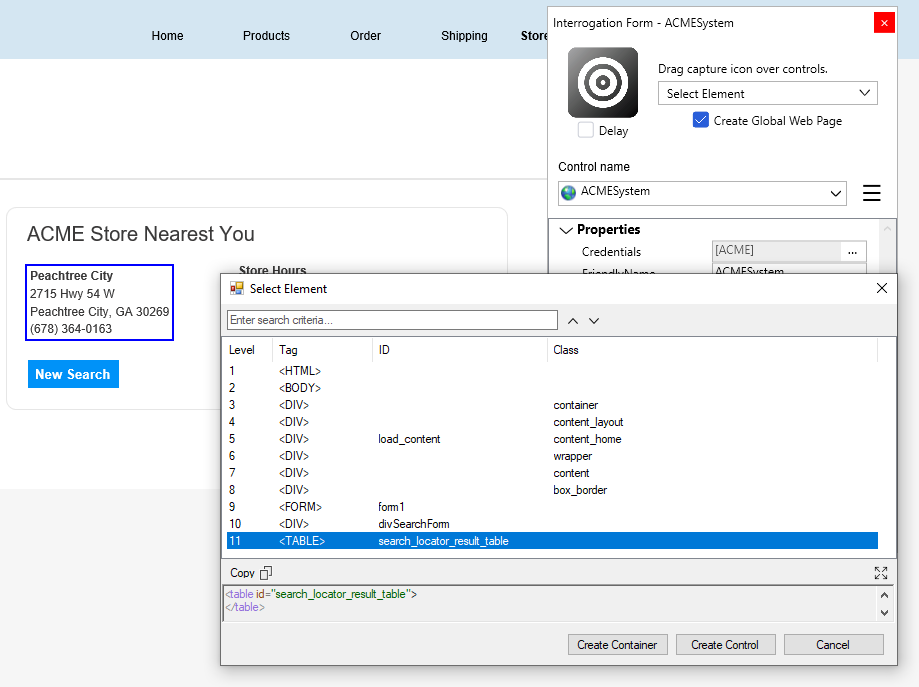
- In the Select Element window, select <TABLE>, and then click Create Control.
The object collects all table rows as one unit to use for the address instead of each individual address item. - On the Interrogation Form, in the Control name field, select and replace the object names with the updated names by using the following parameters:
Object Name Updated (Name) Store_Locator_Pega_Studio_Training_We ACMEwpResults Peachtree_City2715_Hwy_54_WPeachtr1 ACMEfrmStoreAdd Peactree_City2715_HWY_54_WPeachtre ACMEtblNearestStore
5 Interrogate with Match Rules
- On the Interrogation Form, in the Drag capture icon over controls list, select Default.
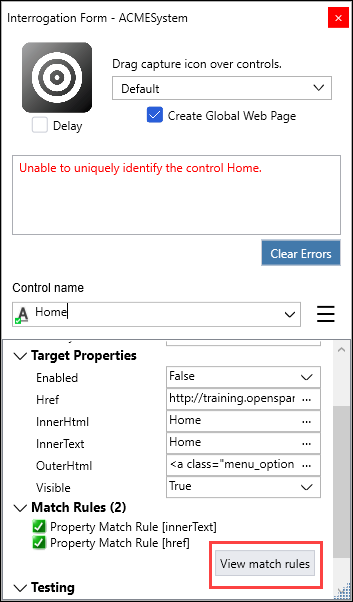
- Click and drag the Target icon to the Home link to update the Object Hierarchy with the control.
Note: Make sure the smallest highlight box is displayed for the correct target.

- On the Interrogation Form, click View match rules to display the Match Rules tab for the control in Pega Robot Studio.
- In the Match Rules tab, with the first control highlighted, select Property Match Rule from the drop-down list.
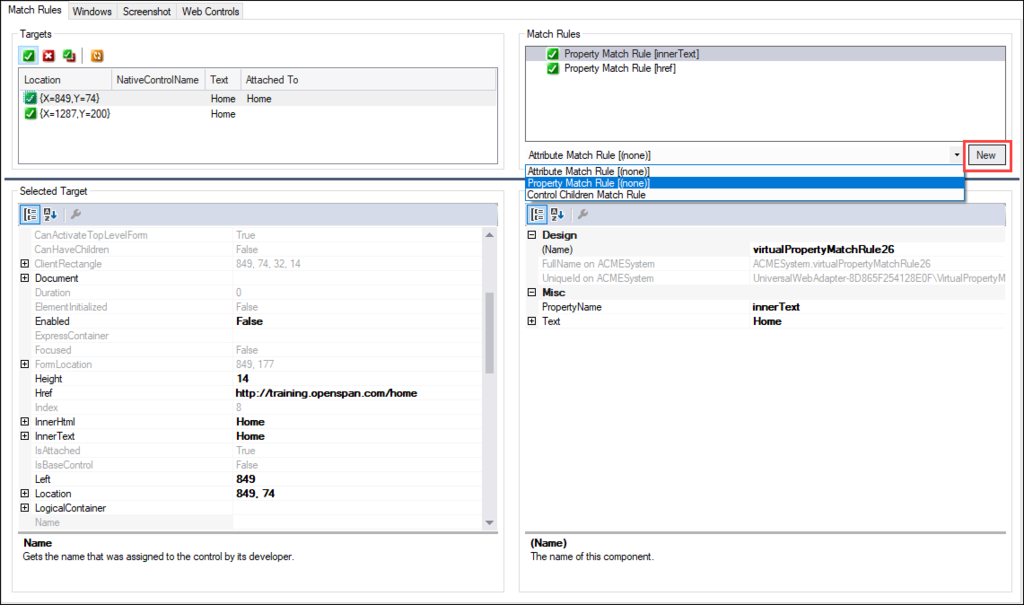
- Click New to open the Match Rule Designer window.
- In the Match Rule Designer window, select classname.
- At the bottom of the Match Rule Designer window, click Create Match to add the HTML class a target match rule.
Pega Robot Studio now matches only one target in the Match Rules tab.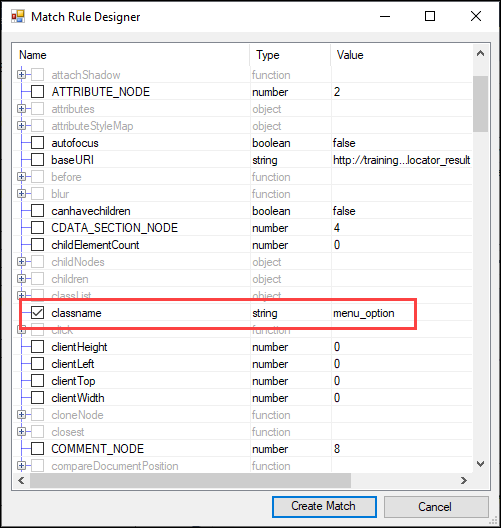
- On the Interrogation Form, click Clear Errors to clear the Match Rules error.
- Rename the Home control to
ACMEInkHome. - On the ACMESystem.os tab, click Stop Interrogation to close the browser window and Interrogation Form window.
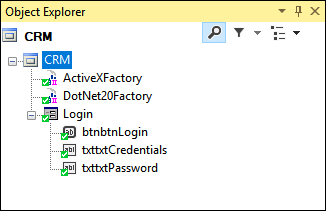
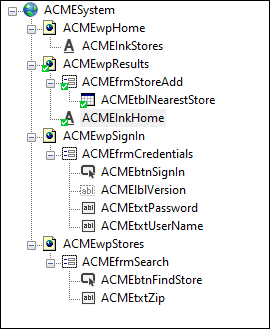
- From the menu bar, click File > Save All to save the changes. When complete, the Object Hierarchy looks like the following image:
6 Interrogate using Web Controls
- On the ACMESystem.os tab, click Start Interrogation to open the Interrogation Form and browser.
- On the ACMESystem.os tab, click the Web Controls tab.
- On the Web Controls tab, in the Web Controls section, click List Browsers and Frames to list all open browser windows.
- From the list, click Sign In.
- In the Filter list, select INPUT type = 'Hidden'.

- In the Web Controls section, click List Web Controls to display a text box control in the Control Type list.
- In the Control Type list, right-click INPUT type='Hidden', and then select Create Control to display the control in the Object Hierarchy as pegasystem_version.
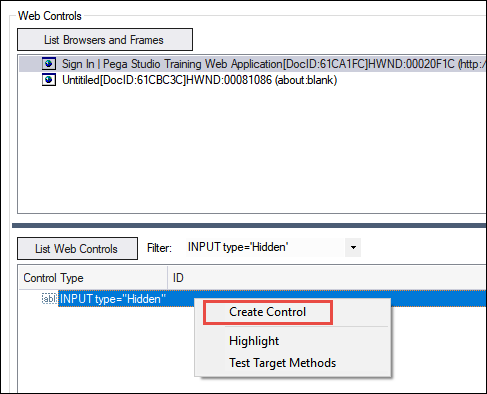
- In the Object Hierarchy, click pegasystem_version.
- In the Properties window, rename the design (Name) property to ACMElblVersion.
- On the ACMESytstem.os tab, click Stop Interrogation to close the browser window and Interrogation Form window.
- From the menu bar, click File > Save All to save your edits.