Pega Knowledge authoring
5 Tasks
5 mins
Pega Customer Service 8.7
Beginner
English
Scenario
You have been asked to create content that provides customers with guidance through the process of remortgaging with U+ Bank. The goal of the content is to help a customer apply to move their loan and receive support while doing so.
Use the following credentials to log in to the exercise system:
| Role | User name | Password |
|---|---|---|
| Author | KMAuthor | password123! |
| Approver | KMApprover | password123! |
| Publisher | KMPublisher | password123! |
| Customer Service Representative | CACSR | password123! |
Your assignment consists of the following tasks:
Task 1: Create a content draft
Create a new content draft, modifying the default attributes associated with a content type, and then submit the content to be approved.
Task 2: Reject the content draft
Find the content in the Knowledge Content – Approvals workbasket, reject the content, provide rejection notes, and then route it back to the original author.
Task 3: Modify the draft
Find the content in your worklist, make the changes requested by the approver, and then submit the content to be approved.
Task 4: Approve the draft
Find the content in the Knowledge Content – Approvals workbasket, verify the changes from Task 3, and then approve the content.
Task 5: Publish the approved content
Find the content in the Knowledge Content – Publish workbasket, and then publish it.
Challenge Walkthrough
Detailed Tasks
1 Create a content draft
- Log in as an Author, with username KMAuthor using password password123!.
- In the Knowledge Portal, from the left menu, click Knowledge > Content.
- In the upper right corner, click New content.
- In the upper right corner, under Publish settings, select How To from the Content type list.
Note: The settings are populated with the default attributes from the selected content type.
- Add a new language:
- Next to the Language drop down, select the Add languages checkbox.
- Under No translation available, click + New translation.
- In the New translation dialog box, select Spanish from the list, and then click Add.
- Click Submit.
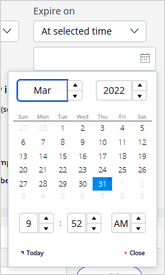
- Add an expiration date for the article:
- Under Expire on, expand the Never list, and then click At selected time.
- In the field that appears below the list, click the calendar icon.
- Select a future date and time.
- Change the review schedule:
- Under Schedule review in, expand the list, and then select 6 months from the list.
- Under Display settings, select the Show version number on content checkbox.
- In the upper left corner, in the Title text box, provide the following title: Moving your mortgage to U+ Bank.
- In the Abstract text box, provide the following summary of the article content: This article will take you through the steps necessary to move your home loan to U+ Bank.
- Add taxonomy categories for the article:
- In the Categories section, under No category selected, click + Add category.
- Click the + next to Mortgage to expand the category.
- Select Remortgaging from the list.
- Click + Add category again.
- Click the + next to Customer Service to expand the category.
- Select Retail Banking from the list.
- Provide the Content body:
- Complete the introductory sentence with the following text: move your home loan to U+ Bank.
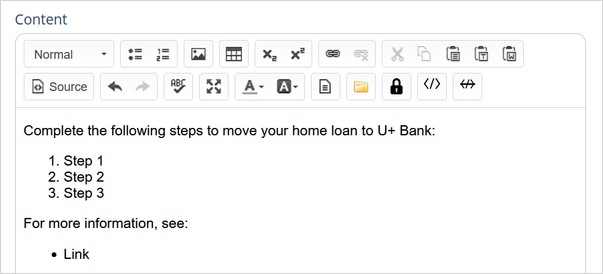
- Replace the steps from the template with the steps from the following table:
Step 1
Go to the Loans section on the U+ Bank website and compare our rates with your current rates.
Step 2
Click Apply now, and then provide information about you and your mortgage.
Step 3
Build the perfect mortgage based on what is important to you.
Step 4
Complete the process to apply online or get advice by phone or in one of our branches.
- Complete the introductory sentence with the following text: move your home loan to U+ Bank.
- Update the links and references in the template:
- Highlight the Link bullet point with your pointer.
- Click Article references.
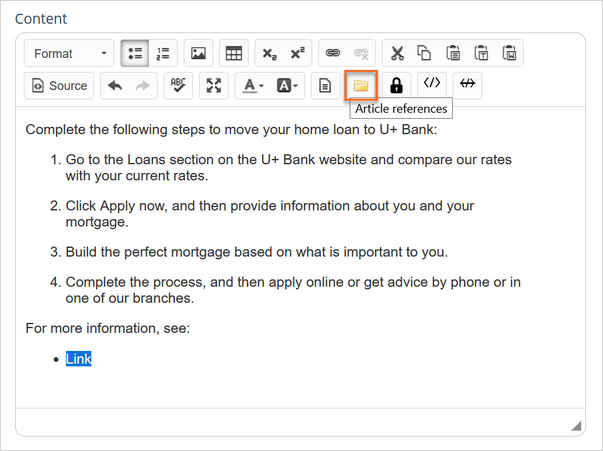
- In the Article references dialog box, expand the category list, and then select Retail Banking from the list.
- Find the Transferring accounts from other financial institutions article on the list, and then click it to add the reference to the content.
- Add a snippet to the body:
- Place your pointer at the end of the content body, and then press Enter to advance to the next line.
- Press Enter again to exit the bulleted list.
- Click Add a snippet in the toolbox.

- Select the U+ Bank boilerplate sample snippet from the list.
- Add tags to the article:
- In the lower right corner, under Tags, type Loan into the text box, and then click Add.
- Add another tag by typing Home into the text box and clicking Add again.
- Add a content reference to the article:
- In the lower right corner, click Content to open the Content tab.
- Click Add.
- In the Add article references dialog box, expand the All categories drop down and select Retail Banking from the list.
- Find the Finding your nearest U+Bank ATM or branch article on the list, and then select the box next to the article and click Submit.
Note: To search for the article, use the Search content title box.
- Click Save below the Content body.
- Click Preview in the upper right corner to see your article.
Note: The Preview opens in a new window.
- Verify everything displays as configured and close the Preview window.
- Click Submit under the article body to route the content for approval.
- Log out.
2 Reject the content draft
- Log in as an Approver, with username KMApprover using password password123!.
- In the Knowledge Portal, from the left-hand menu, click Work > Workbaskets.
- From the Select a workbasket list, select Knowledge Content – Approvals.
- Click the Moving your mortgage to U+ Bank content created in Task 1 to open it.
- Verify that the content is as provided in Task 1.
- In the upper right corner, expand the Actions drop down, and then click Reject content.
- In the Rejection note content, provide the following text: Remove the content expiration date, and then add a link to the loan application to the content body.
- Under Assign to, select Original Author to route the draft back to KMAuthor.
- Click Submit.
Note: The article's status changes to Pending-DraftRejected.
- Log out.
3 Modify the draft
- Log in as an Author, with username KMAuthor using password password123!.
- In the Knowledge Portal, from the left menu, click Work > Worklists.
- Locate the rejected Moving your mortgage to U+ Bank article, and then click it to open the article in edit mode.
- Perform the changes requested in the Rejection note.
Note: You see the Rejection note below the article title.

- To remove the content expiration date, under Schedule settings, from the Expire on list, select Never.
- Add a link to the loan application to the content body:
- Open the exercise system landing page, and then click U+ Bank.
- Click the LOANS tab at the top of the screen.
- Copy the URL from your browser address bar.
Note: The URL will have the following structure:
https://<env-id>.pegaenablement.com/uplus-wss/retail_bank/offer3.html
where <env-id> is the unique ID of your Pega challenge instance - Close the U+ Bank tab and return to the Knowledge Portal.
- Highlight the text Loans section in the first step in the content body, and then click Link.
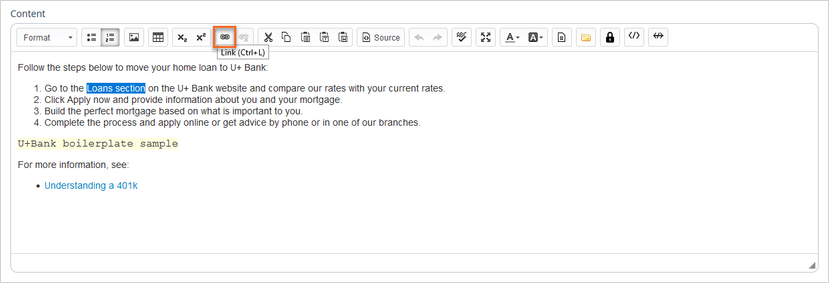
- Under URL, paste the URL from your clipboard.
- Click OK.
- Click Save, and then click Submit to save the changes and route the article to the Knowledge Content – Approvals workbasket.
- Log out.
4 Approve the draft
- Log in as an Approver, with username KMApprover using password password123!.
- In the Knowledge Portal, from the left menu, click Work > Workbaskets.
- From the Select a workbasket list, select Knowledge Content – Approvals.
- Click the Moving your mortgage to U+ Bank content created in Task 1 to open it.
- Verify the changes to the content expiration date and the link added in Task 3.
- Below the Content body, click Approve to route the article to the Knowledge Content – Publish workbasket.
Note: The article's status changes to Pending-Approval.
- Log out.
5 Publish the approved content
- Log in as a Publisher, with username KMPublisher using password password123!.
- In the Knowledge Portal, from the left menu, click Work > Workbaskets.
- From the Select a workbasket list, select Knowledge Content – Publish.
- Click the Moving your mortgage to U+ Bank content approved in Task 4 to open it.
- Below the Content body, click Publish.
- Log out
This Challenge is to practice what you learned in the following Module:
If you are having problems with your training, please review the Pega Academy Support FAQs.
Want to help us improve this content?