ASO-SMD-start.zip
(411.76 KB)
Streamlining work with Assisted Sign-On and Start My Day
7 Tasks
20 mins
Beginner
Robotic Process Automation
English
Scenario
The Robotic Banking company plans to streamline work by allowing its workers to automatically open and log in to everyday work applications and web pages. To do so, the company configures the Extra Mile project that implements Assisted Sign-On and Start My Day features using Pega Robot Studio.
Note: Note that the UI presented in the exercise will be updated in the following sprints by the UI development team.
Complete the following tasks:
- Add a control to the Windows Form.
- Use the Windows Form event as a trigger of an automation.
- Configure Assisted Sign-On for a BankerInsight application and Pega Finance webpage using Credential Collection Editor.
- Add the BankerInsight and Pega Finance to the Start My Day using automatic settings.
- Set up applications' position and size using the Manage Application dialog.
Challenge Walkthrough
Detailed Tasks
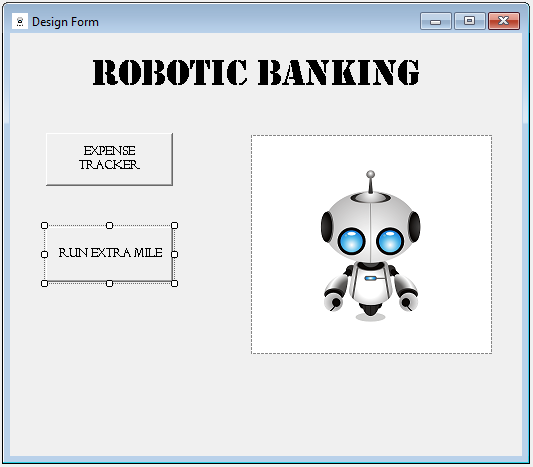
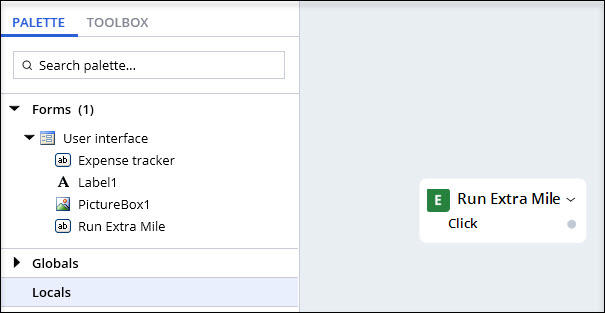
1 Add a new control to the Windows form
- Download the Expense Tracker Challenge project:
- Save the file to your desktop and unzip the file to extract the project folder to your C:\Users\<username>\Documents\Pega Robot Studio\Projects\.
- On the Home screen in Pega Robot Studio, click Open Project, and then navigate to the projects folder and open RoboticBanking.pegaproject.
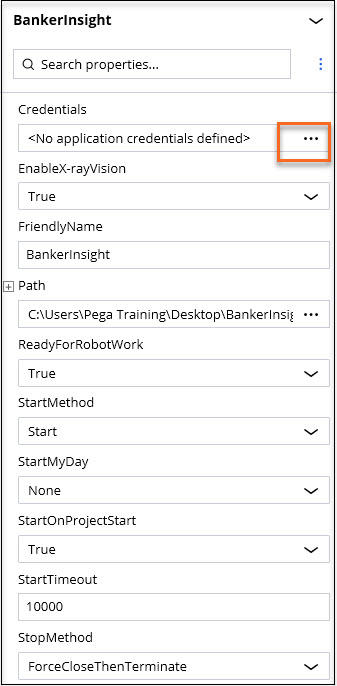
Note: The starter project includes a configured BankerInsight application. The value of the Path field must match the location of BankerInsight on your local computer for the project to function properly. In the BankerInsight application, change the value of the Path to the location of your BankerInsight application.
- On the Project Explorer, click User interface to open the Design Form of the Robotic Banking UI.
- In he Toolbox dialog box, in the search field, enter Button.
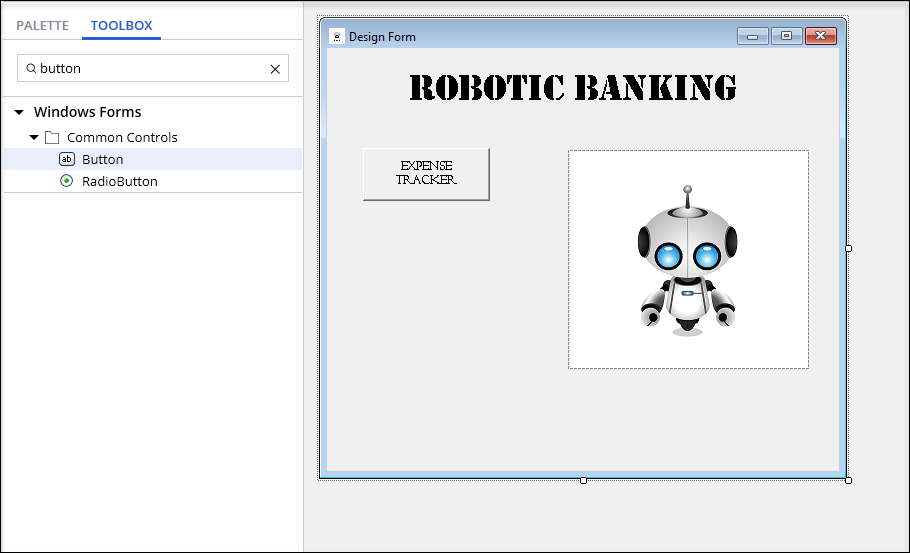
- Click the Button control and draw the button shape on the Design Form to add a button to the UI.
Tip: If a Property Grid is not displayed, open it using the arrow button on the right corner.
- From the Property Grid of the button, in the Name field, enter Run Extra Mile.
- Repeat step 7 to change the Text property to Run Extra Mile.
- In the Design Form, resize the button to display the full name of the button.
- Save the Windows Form.
2 Use the Windows form event as a triggering event of the Extra Mile automation
- On the Project Explorer, click Extra Mile to open the automation.
- Add the User interface window form to the Extra Mile automation:
- On the Extra Mile automation, click to open Include in palette window.
- In the Include in palette window, click the Form tab.
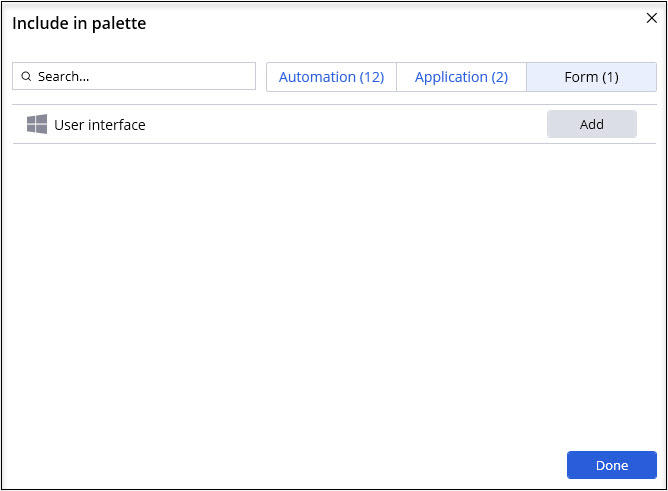
- In the User interface row, click the button to add the Windows form to the automation.
- Click to close the Include in palette window.
- On the Palette, expand the Forms section, and then click User interface to expose the Windows form controls.

- Drag the Run Extra Mile button to the automation surface to open the Select action window.
- In the Select action window, select Click event.
- Click to add the Click event to the automation.
- Save the automation.
3 Configure ASO for a BankerInsight application using Credential Collector Editor
- Click the Project tab to open the Project Explorer.
- In the Project Explorer, click BankerInsight to open the application.
- On the Property Grid, on the Credentials property, click the More icon to open the Credential Collection Editor.
- In the Credential Collection Editor, click to configure credentials.
The BankerInsight application is displayed on the members' list. - In the section, select each control and click the More icon.

- In the , click the + icon to view the and configure login controls with the following values:
Control name Value LoginControl
BankerInsight\btnLogin
PasswordControl
BankerInsight\txtPassword
UserNameControl
BankerInsight\txtUserName
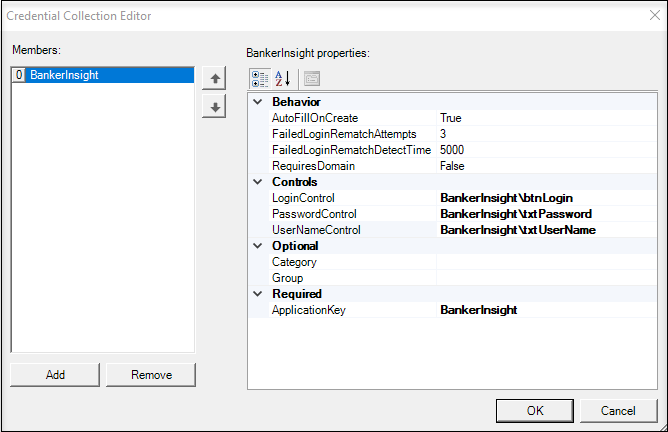
- Click to close Credential Collection Editor.
- Save the application changes.
- On the toolbar, click to run the product and display the window.
- In the window, in both the User Name and Password fields, enter pega.

- Click to close the window. Pega Robot Studio will automatically log in to the BankerInsight using provided credentials.
- Close the BankerInsight application and click on the toolbar to stop the project execution.

4 Configure ASO for a Pega Finance application using the Credential Collector Editor
- Click the Project tab to open the Project Explorer.
- On the Project Explorer, click Pega Finance to open the application.
- Repeat the procedure from Task 3 (Configure ASO for a BankerInsight application using Credential Collector Editor), with the following controls:
Control name Value LoginControl Pega Finance\btnSignIn
PasswordControl
Pega Finance\txtPassword
UserNameControl
Pega Finance\txtUserName
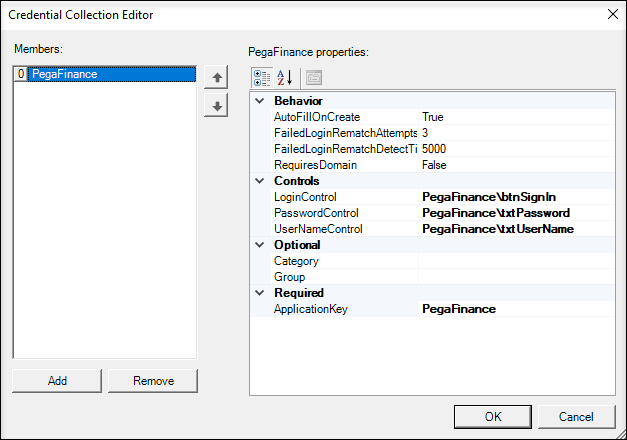
- On the toolbar, click Save to save the changes.
5 Configure Start My Day for the BankerInsight application
- Click the Project tab to open the Project Explorer.
- On the Project Explorer, click BankerInsight to open the application.
- On the Property Grid, in the StartMyDay list, select Automatic.

- In the search field of the BankerInsight application, click the icon, and then select Advanced view to display an advanced view of the Property Grid.
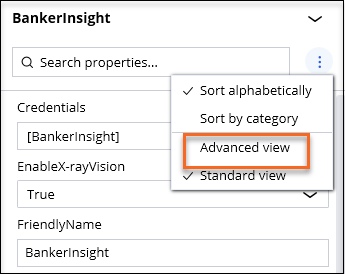
- In advanced view of the Property Grid, click the StartMyDayControls list, and then select the frmLoginForm and frmBankerInsight controls to include them in the Start My Day feature.
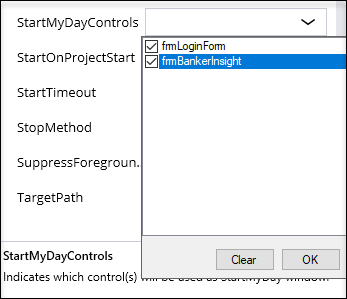
- Click to close the StartMyDayControls list.
- Save the application changes.
6 Configure Start My Day for the Pega Finance webpage
- Click the Project tab to open the Project Explorer.
- On the Project Explorer, click Pega Finance to open the application.
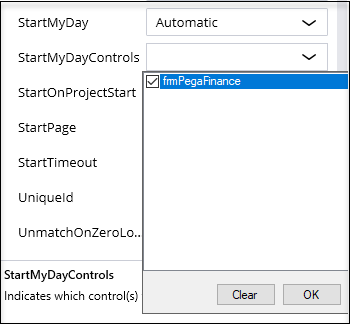
- Repeat the procedure from Task 5 (Configure Start My Day for the BankerInsight application), with the frmPegaFinance control.
- Save the application changes.
7 Create an automation that displays the Manage Application window and runs Start My Day
- Click the Project tab to open the Project Explorer.
- On the Project Explorer, click Extra Mile to open the automation.
- On the automation surface, click and drag the dot that represents the output automation link to open the Toolbox dialog box.
- In the Quick add dialog box, in the search field, enter ShowDialog to find the method that displays the Manage Application dialog box. Double-click the method to add it to the automation surface.
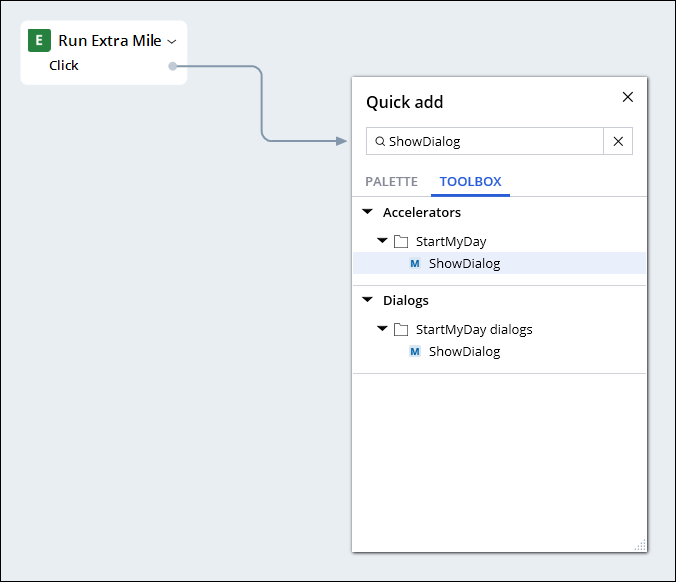
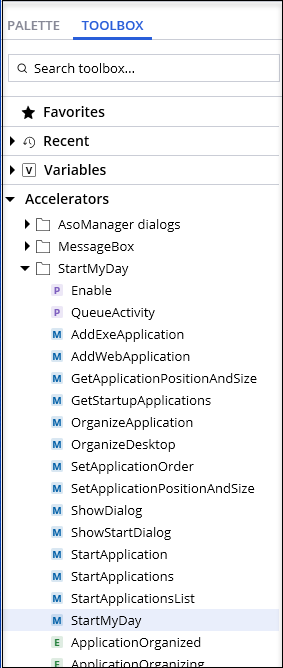
- From the Toolbox, click Accelerators > StartMyDay to display the Start My Day methods.
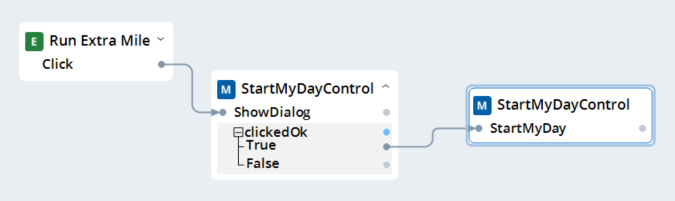
- In the list, drag the StartMyDay method to the automation surface, and connect it to the True output of the ShowDialog design box as shown in the following image:
- Save the automation.
- On the , click to run the project.
- On the User interface, click to display the Manage Applications window.

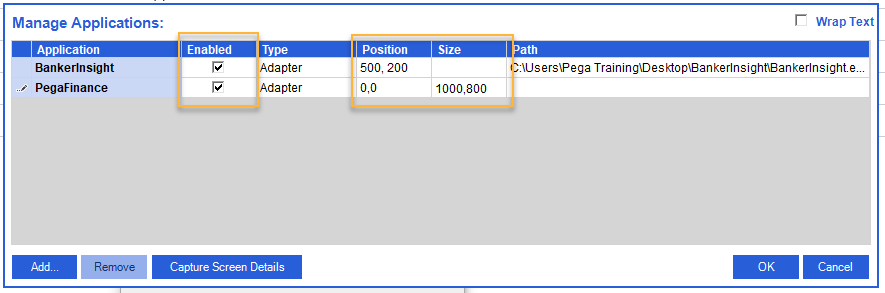
- In the Enabled column, select the check boxes for the BankerInsight and PegaFinance applications.
- Set the position and size as shown in the following image.
- Click to close the Manage Applications window.
This Challenge is to practice what you learned in the following Module:
Available in the following mission:
If you are having problems with your training, please review the Pega Academy Support FAQs.
Want to help us improve this content?