Updating a dialog
Archived
2 Tasks
15 mins
Beginner
Agent Desktop
English
Scenario
As a manager, you want customer service agents to have more of a personal touch when communicating with customers. You want agents to use the customer's first name when making an address change.
| Role | User name | Password |
|---|---|---|
| Customer Service Manager | csmanager | password123! |
Your assignment consists of the following tasks:
Task 1: Run the Address change service case
Start an interaction and run the Address change service case.
Task 2: Update the dialog
Use the Configuration Tools to update the dialog to add the first name to the dialog.
Challenge Walkthrough
Detailed Tasks
1 Run the Address Change service case
- Log into the Pega Customer Service Interaction Portal with the user name csmanager and password password123!.
- Click Preview to launch the Interaction Portal.
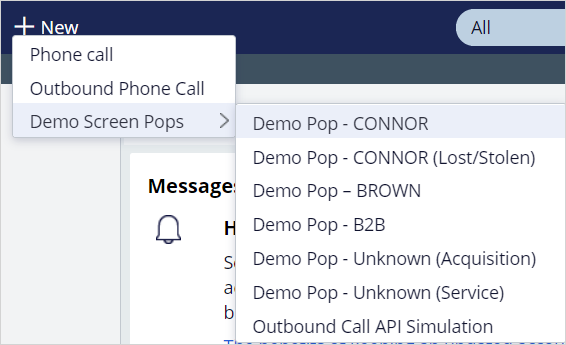
- In the header of Pega Customer Service, click New > Demo Screen Pops > Demo Pop - CONNOR to simulate a phone call.
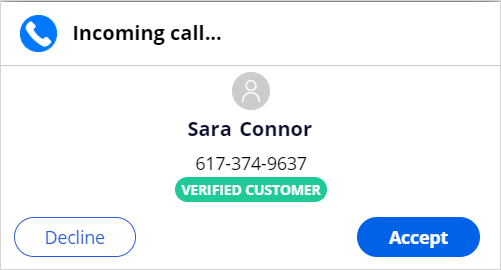
- Click Accept to accept the incoming call.
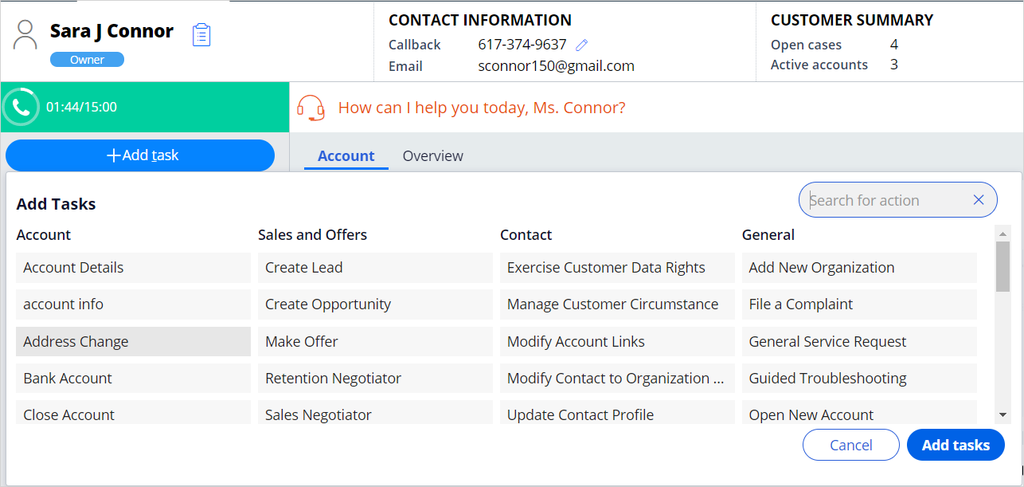
- On the Interaction Portal, click Add task.
- Double-click the Address change service case to access the address details.
2 Update the dialog
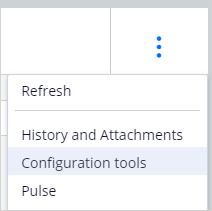
- In the Address Change service case, click the Other actions icon, and then select Configuration tools to access the Configuration tools dialog box.
- In the Configuration tools dialog box, click the Edit icon to modify the dialog of the interaction.
- Modify the dialog to add the customer's first name at the beginning of the dialog.
- In the Refer to list, select Contact to choose the category of properties.
- In the Attribute list, select First name to personalize the dialog.
- Click Insert to add the attribute.
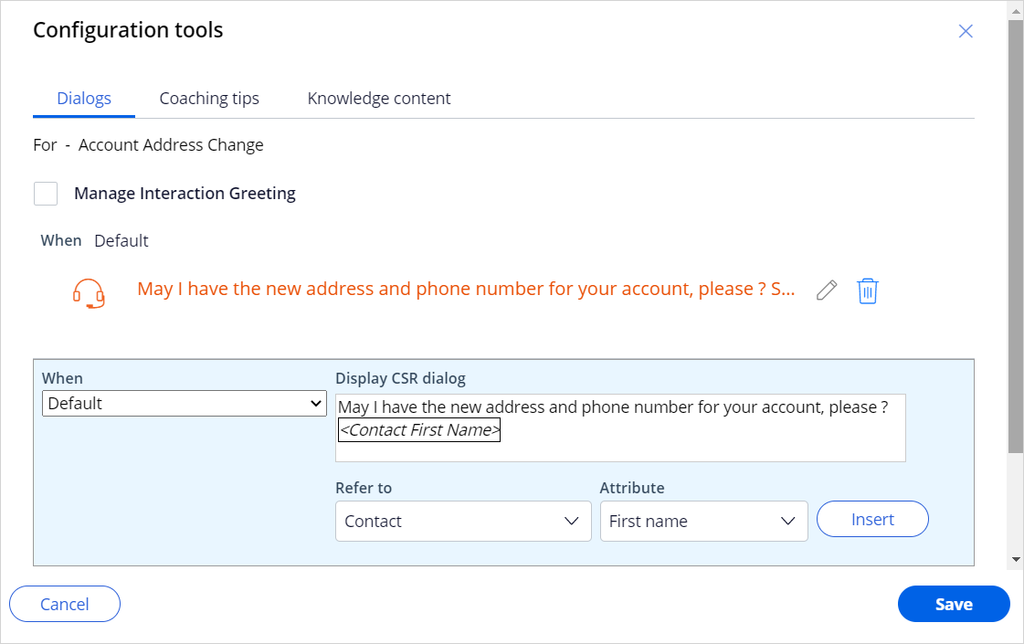
- Click Save to save your change.
- In the upper-right corner, click Close icon to close the Configuration tools dialog box.
- Verify that the first name is now displayed in the existing dialog.
