Decision tables in Dev Studio
A decision table uses a set of conditions to test property values and return an appropriate response. In App Studio, you can use a decision table to calculate the value of a field. In Dev Studio, additional capabilities of decision tables allow you to delegate responsibility for maintaining decision logic, expand the result options, and direct flow processing.
Delegate responsibility for maintaining decision logic
Organizations can delegate the maintenance of certain rules to stakeholders who manage a specific process within a case life cycle. These stakeholders—sometimes referred to as process owners—understand the business environment and can quickly identify changes that may impact how users achieve the desired outcome for a case. In Dev Studio, a decision table can be delegated to a process owner, who can update the decision logic as needs change. This is most helpful when small changes need to be made.
For example, a logistics manager may decide to set the order threshold for expedited shipping of customer orders to USD500 when an application is first released. As business conditions change, such as to match a competitor, the logistics manager may want to lower the threshold to USD400. Rather than submitting a request for a developer to update the application and release a patch to apply to the production system, delegation allows a process owner to update the threshold in production immediately.
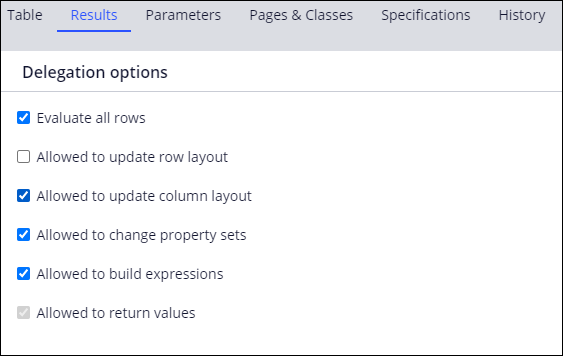
When delegating a decision table, use the Delegation options section of the Results tab to control the configuration options granted to the process owner. For example, you can allow the process owner to add columns to the table while preventing the process owner from adding rows.
Expand the options for returning a result
Decision tables used to calculate a property value return a single result based on the decision logic. In Dev Studio, you can configure a decision table to return all successful results or set the value of additional properties.
Evaluate all rows
To return all successful results from a decision table, select the Evaluate all rows check box in the Results tab of the decision table rule form. When enabling Evaluate All Rows, all rows of the table are checked. When the condition is met on a row, the defined action and return calculation for the row is performed. Clear this check box to stop processing after the system finds the first row that evaluates as true.
For example, an expense exceeding USD500 requires approval by a manager, while an expense exceeding USD5,000 also requires approval by a director. If a case requires multiple levels of approval, you can use a decision table to create an authority matrix identifying the required approvals. The decision table contains a row for each possible approver. You select the Evaluate all rows check box to process each row in the table. If the conditions in the row are met, the corresponding approver is added to the authority matrix.
Note: When Evaluate all rows is set to true, the Allowed to return values setting is disabled.
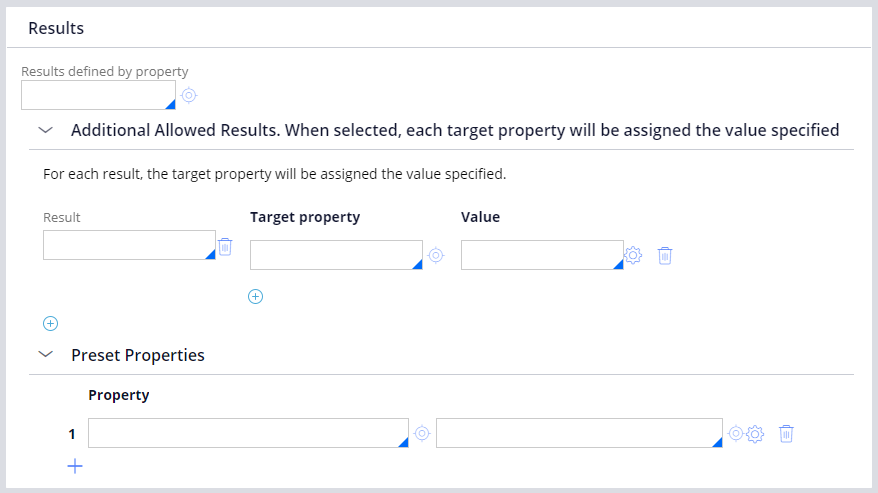
Results section
Use the options in this section to define the possible values that the decision table can return. If you need to add any entries to the allowed results, you can configure them by expanding Additional Allowed Results. You can also specify a list of preset properties that are calculated before the decision table is run.
Direct flow processing
The sequence of steps required for a case sometimes varies based on the details of the case itself. You can automate decision-making during a process by using a decision table. Two examples of using decision tables in a process are determining the next step in a flow and routing an assignment.
Determine the next step in a process
You can determine the outcome of a flow using a decision shape to return an outcome based on several testable conditions. Adding a decision shape to the flow makes business processes flexible and responsive by providing conditional paths that a case can follow to reach a resolution. In Dev Studio, you add a decision shape to a flow by clicking on Flow shapes and selecting Decision.
Double-click the decision shape to open the properties panel and select the decision table to use. Then, drag the head of each connector to the flow shape representing the next step for the corresponding result.
Tip: When you specify the decision table for a decision shape, Pega Platform™ automatically adds a connector for each decision result.
Route an assignment
Determine the appropriate operator or workbasket for an assignment by selecting a decision table router, such as assigning a portfolio consultation to the appropriate branch office based on the address of the requestor. The router uses the decision table logic to determine the appropriate operator or workbasket for the assignment.
In the following image, click the + icons to learn more about how decision tables can automate decision-making in a process.
Check your knowledge with the following interaction.
If you are having problems with your training, please review the Pega Academy Support FAQs.
Want to help us improve this content?