Preparing for data migration
To prepare your environment for data migration, complete a one-time configuration to generate all the required artifacts.
Video
Transcript
This demo shows you how to generate the artifacts and configure the settings that are required to assemble the data migration pipeline.
U+ Bank, a retail bank, would like to prepare their systems to be able to generate the artifacts and configure the settings that are required to migrate sampled data from the production environment to the Business Operations Environment (BOE).
Typically, a system architect completes the initial configuration in the development environment, and then you promote the generated artifacts and settings to higher environments.
In the development environment, as a best practice, start by creating a new ruleset to host all system-generated artifacts such as data sets and data flows. Storing these artifacts in a dedicated ruleset is not mandatory; however, this action is useful later when you package the artifacts in cases where an enterprise pipeline is not available. If an enterprise pipeline exists, you can use the pipeline for migrating the rules to the production and BOE environments.
Note: If your system is deployed in Pega Cloud™, see Generating the data migration artifacts for more information.
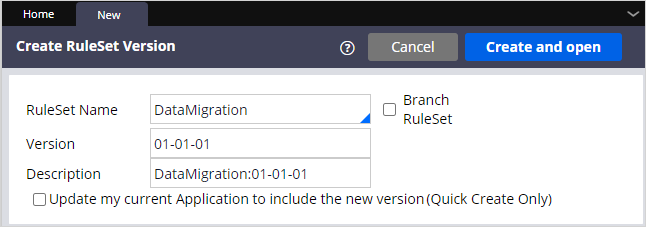
Create a new rule set, and then add that ruleset to your application. This ruleset holds all the system-generated artifacts.
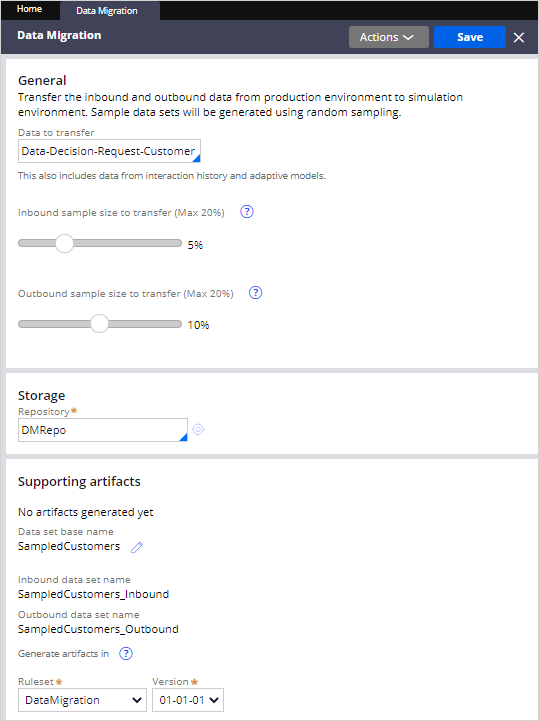
As your next step, navigate to the Data Migration landing page. By default, the Data-Decision-Request-Customer class is selected in the Data to transfer field. Leave this default setting, and then select the inbound and outbound sample size. The sample size must be less than 20% for inbound and outbound sampling. Select a repository that both the BOE and the Production environment can access. If necessary, you can rename the data sets that ultimately hold the sample customer data. Now, choose the ruleset in which you want to store the new artifacts. In this case, select your new ruleset.
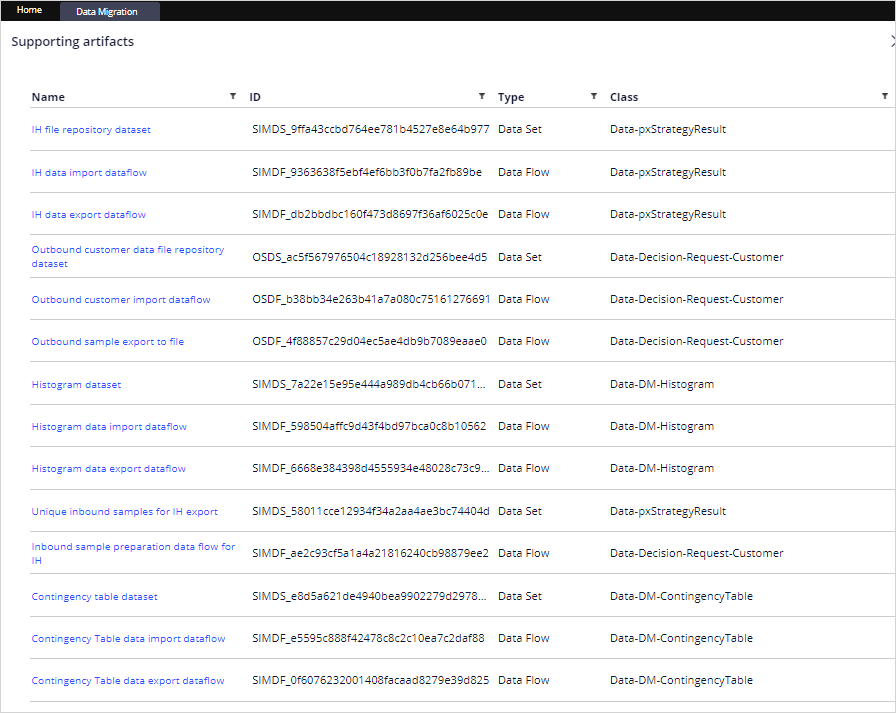
After saving the configuration, you can browse the generated artifacts by clicking the Show artifacts link. The data migration artifacts contain sampling data sets, data flows, and file repository data sets.
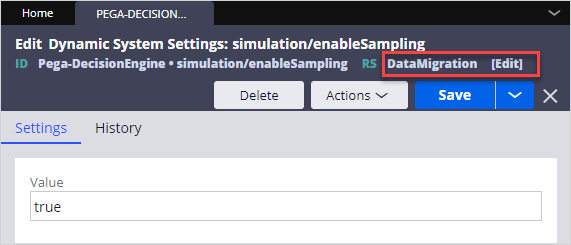
Depending on the requirement, you can choose to only sample inbound interactions (inbound calls to Pega Customer Decision Hub™), create a sample from the entire customer base for running outbound simulations, or both. You control this functionality through dynamic system settings. To enable inbound sampling, save the simulation/enableSampling dynamic system setting to the same ruleset that you created earlier, and then set it to true.
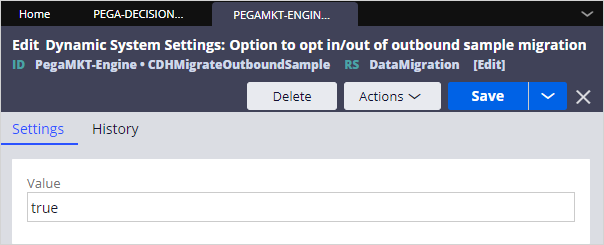
To enable outbound sampling, save the CDHMigrateOutboundSample dynamic setting to the same ruleset that you created earlier, and then set it to true.
Besides migrating sampled customer data, the data migration pipeline can be used to migrate actual production data from production environment to the BOE. The actual data is used in scenario planner to determine how close the results are to meeting expected targets. To migrate the actuals data set, save the CDHMigrateScenarioPlannerActuals dynamic setting to the same ruleset that you created earlier, and then set it to true.

Now, create a product rule to package the generated artifacts. Give the rule a name and a product version.
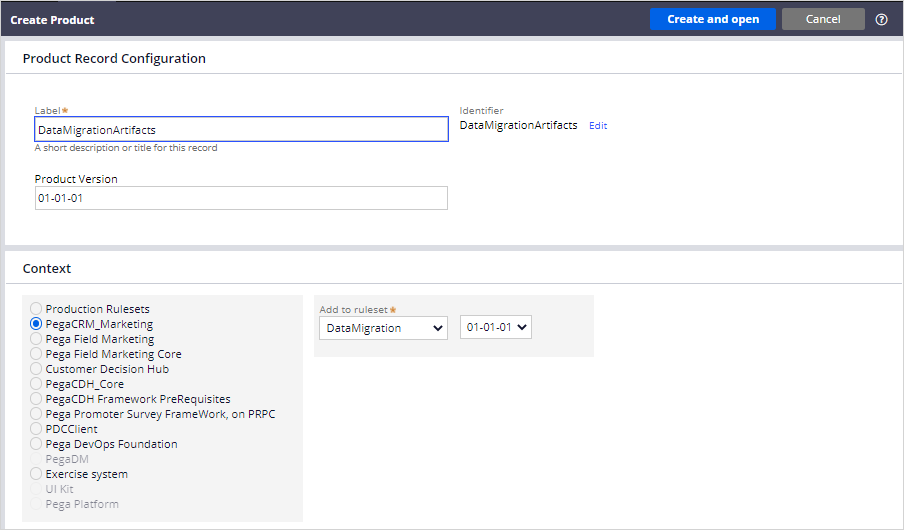
In the RuleSets to Include section, choose the ruleset in which the data migration artifacts are stored, and then check the Include associated data check box. This setting ensures that the Data Migration landing page where the settings were configured is also migrated.

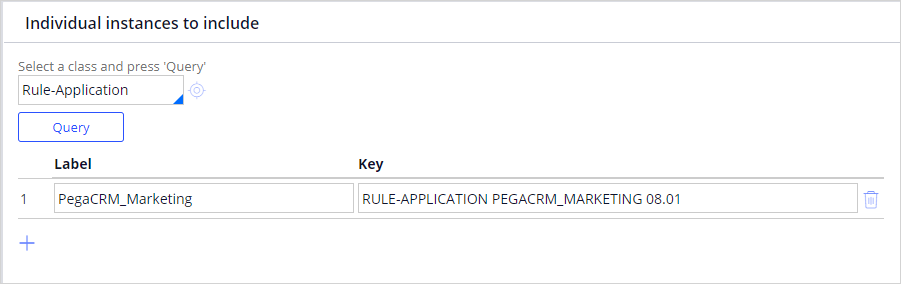
As a best practice, to keep the application stack in sync, add the application instance to the Product rule by querying the Rule-Application class, and then selecting the application. In this case, select PEGACRM_MARKETING 08.01.
Save the product rule and preview the rules that are included. Then, lock the ruleset and generate the product rule.
As the next step, ensure that the setup of MigrateSimulationData, DataSyncPipeline, api, and cicd service packages is correct, and the Require TLS/SSL for rest service in this package check box is unchecked in the BOE and production environments. Complete these actions manually because the security requirements in environments might vary. The pipeline diagnostics tool ensures that you select the right option in each environment.
The final step in preparing the environments for data migration is to import the product rule into all environments. Use the enterprise pipeline to migrate artifacts when possible. This action ensures that each environment is in sync and that both the BOE and Production environments have the required artifacts to migrate data.
You have reached the end of this demo. What did it show you?
- How to configure the data migration settings and generate artifacts.
- How to enable inbound and outbound sampling.
- How to enable actuals data migration for scenario planner.
- How to create a product rule with the required data migration artifacts and import that rule into the BOE and Production systems.
This Topic is available in the following Module:
If you are having problems with your training, please review the Pega Academy Support FAQs.
Want to help us improve this content?