Adding agreements and activity plans from the PGP landing page
3 Tasks
20 mins
Beginner
English
Scenario
GrantsCo. want to get the consent of local residents, with their e-signatures, as part of their new public awareness program. GrantsCo. also needs to devise a plan for their public awareness program that includes goals and tasks for each step.
As a system administrator, add the Consent Agreement and Activity plan components, and then configure the Activity plan tab as part of the application workflow. Then, as a system manager, confirm and resolve tasks created as part of the Activity plan.
The following table provides the credentials that you need to complete the challenge:
| Role | User name | Password |
|---|---|---|
| Admin | pgpcosmossysadmin | rules |
| Manager | pgpcosmosmanager | rules |
Challenge Walkthrough
Detailed Tasks
1 Create the Consent agreement
- In the navigation pane of App studio, click Case types and then click the Grant case type.
- On the Workflow tab, in the Create stage, click + Step > More > Processes.
- In the Processes list, click Consent Agreement and then click Select.
- In the Step configuration pane, In the Source list, select By name.
- In the Consent agreement template list, select Federal Consent Agreement, and then select the Is e-signature required? checkbox.
- In the header of App Studio, click Save and run to run a new instance of the Grant case type.
- In the New Grant window, In the Person ID list, select PERSONS-6, and then click Submit.
- In the New Grant window, in the Passport row, click + Attach.
- In the Add document window, in the Name field, enter Passport.
- In the Content field enter Passport and then click Submit.
- In the New Grant window, in the License row, click + Attach.
- In the Add document window, in the Name field, enter License.
- In the Content field enter License doc and then click Submit.
- In the document intake pane, click Submit.
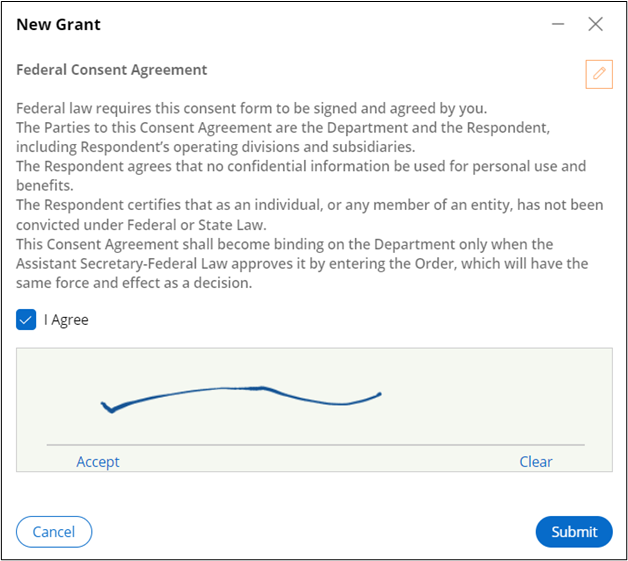
- In the New Grant window, in the Federal Consent Agreement section, use your mouse to enter a signature in the field below, and then select the I Agree check box.
- Click Accept below the signature field and then click Submit.
- In the Review checklist window, in the Checklist section, select the Identification document, Land registration document, and Finance document check boxes.
- Click Submit to submit the checklist.
- In the Evaluate section, in the Score column, use the sliders to increase the Score value for Financial Criteria to 91, and the Score value for Personal Criteria to 96.
- Wait for the circular Approve graph to finish filling, and then click Submit.
- In the Verify Document section, click Go.
- Select the Approve radio button and then click Submit to verify the documents.
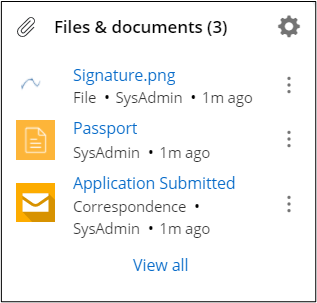
- Expand the Utility pane and check that the signature file and other documents are displayed in the File & documents section.
2 Create the Activity plan
- In the navigation pane of App studio, click Case types and then click the Grant case type.
- On the Workflow tab, in the upper-right corner, click Optional Actions.
- In the Review stage, click + ACTION, and then click Process.
- Rename the process to Activity Plan.
- Delete the Review (1) step.
- Click + Step > More > Processes > Add activity plan, and then click Select.
- Click Save.
- In the header of App Studio, click Preview.
- In the left pane, click Activity Plan.
- Click the TASKS tab, and then click Add task.
- In the New task dialog box, enter the following information:
Task Name
Due in
Unit
Description
Provide Clean water
10
Days
Providing clean water
- Click Submit.
- Click the GOALS tab, and then click Add goal.
- In the New goal dialog box, enter the following information:
-
Goal Name
Due in
Unit
Description
Clean water drive in the neighborhood
10
Days
Clean water drive in the neighborhood
- Click + Add task.
- Select the Select existing task radio button and then, in the Task list, select the Provide Clean Water task.
- Click Submit.
- Click the ACTIVITY PLANS tab, and then click Add activity plan.
- In the New plan template dialog box, enter the following information:
Activity Plan Name
Due in
Unit
Description
Grant activity plan
15
Days
This activity plan drives clean water
- Click Submit.
- In the New plan template window, click + Add task.
- In the New task dialog box, select the Create custom task radio button, and then enter the following information:
Task Name
Due in
Unit
Description
Sanitation Drive
10
Days
Sanitization drive in the community
- Click Submit.
- In the New plan template window, click Submit.
- In the header of App Studio, click Exit Preview.
- In the upper-right corner, click Save and run.
3 Create the Activity plan view
- Click Save and run to run a new instance of the Grant case type.
- Run through the case to the Review Checklist window, and in the View pane, in the upper-right corner, click Configure this view.

- In the Case information pane on the right, expand the Case information list and then select Case Main Inner.
- In the Main content (Grouped - Default) section, click the + icon to view a list of available tabs.
- In the Add... pane, in the Activity plan tab row, click the + icon.
- Click Close to return to the Case main innerpane.
- In the Activity plan tab row, click the Edit icon.
- In the Activity plan tab pane, in the upper-right corner, click Settings.
- In the Section pane, in the Container settings section, select the Include Icon or value check box.
- Click the Icon or value type list and select Property value.
- In the Property value field, enter or select .Plancount.
- Click Apply.
- Click the Close button to return to the tab.
- Click Actions > Refresh.
- In the left pane, click Activity plan, and then click Add activity plan.
- In the window, select the Select existing activity plan template radio button.
- In the Activity plan list, select Grant activity plan, and then click Submit.
- Expand the Assigned to list and select PGP Cosmos Manager.
- Click Submit.
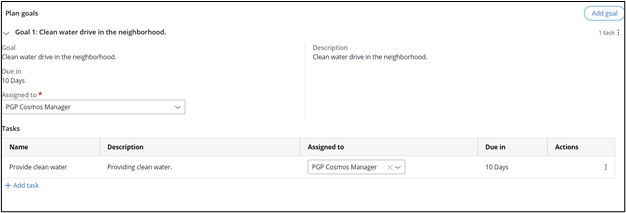
- In the window, in the section, click Grant activity plan and then, in the Activity plan: Grant activity plan section, click Add goals and tasks.
- In the window, in the section, in the Assigned to field, select PGP Cosmos Manager.
- Click Submit.
- In the window, select the Select existing goal radio button.
- In the Goal field, select Clean water drive in the neighborhood.
- Click Submit.
- In the window, in the section, in the Assigned to list, select PGP Cosmos Manager.
- In the section, in the Assigned to list, select PGP Cosmos Manager.
- Click Submit.
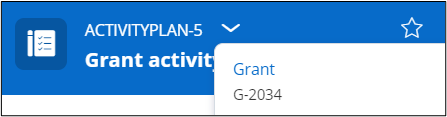
- Expand the Grant activity plan list and select the Grant case type.
- In the lower-left corner of App Studio, click the user icon, and then click Log off.
If you are having problems with your training, please review the Pega Academy Support FAQs.
Want to help us improve this content?