
Configuring Pega Robot Manager
Archived
4 Tasks
30 mins
Beginner
Robotic Process Automation
English
Scenario
MyTown wants to assign and manage automation execution for Inquiries and Service Requests case types using a Pega Robot Manager™ application. The enabled Robot Administrator login configures the new Pega Robot Manager application.
Complete the following tasks to configure the application:
- Configure the appropriate settings for the application.
- Set up both the Service Request and Inquiries work groups and assignment types.
- Create two new operator IDs for a developer and a user administrator.
The following table provides the credentials you need to complete the challenge:
| Role | User name | Password |
|---|---|---|
| Robot Manager System Administrator | RMSysAdmin | myt0wn@pp1 |
Detailed Tasks
1 Create a new application built on Pega Robot Manager
- In the Pega Platform instance for the challenge, enter the following credentials:
- In the User name field, enter RMSysAdmin
- In the Password field, enter myt0wn@pp1.
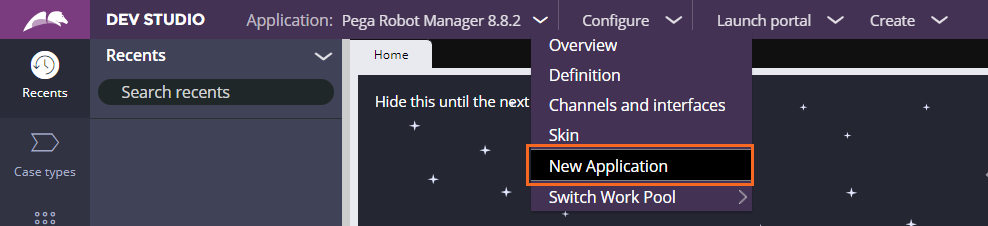
- From the Dev Studio header, click the Pega Robot Manager 8.8.2 application to access the Application menu.
- Click New Application to open the New Application wizard.
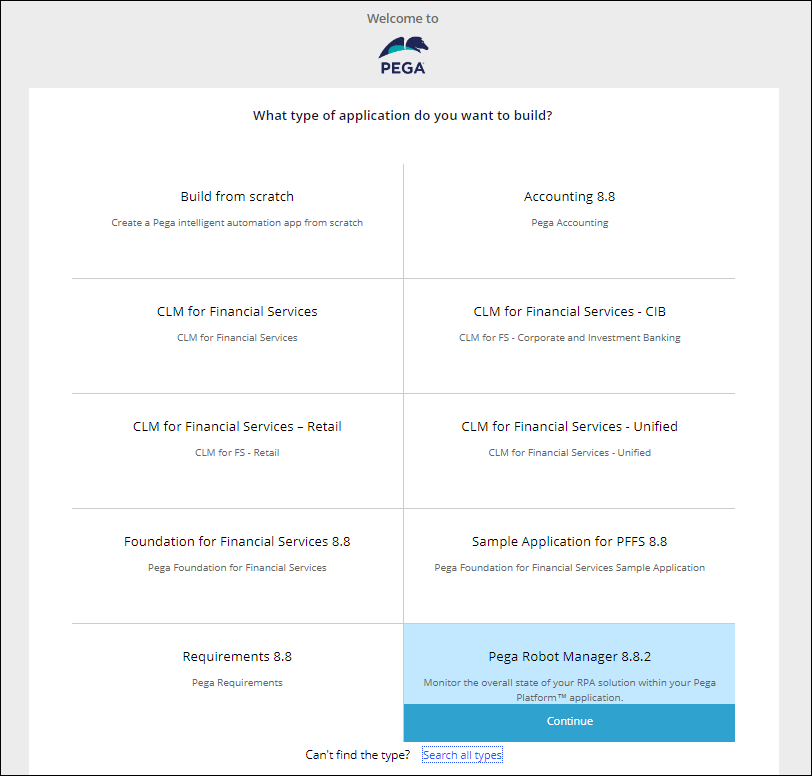
- In the New Application wizard, click Pega Robot Manager 8.8.2 to begin building a new Robot Manager application.
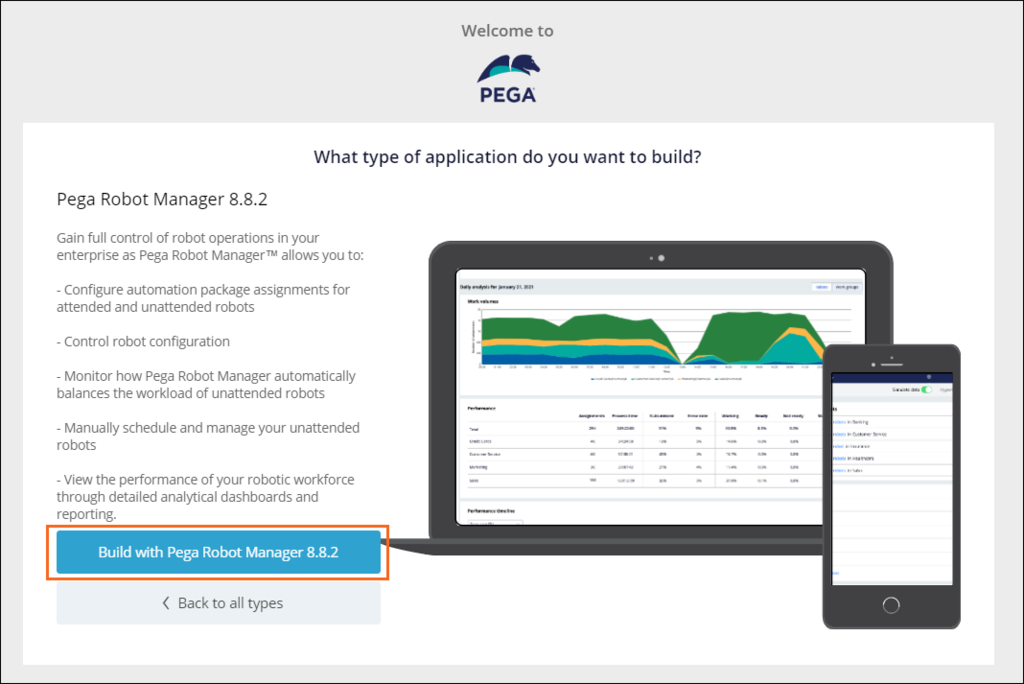
- Click Build with Pega Robot Manager 8.8.2 to continue the new application build.
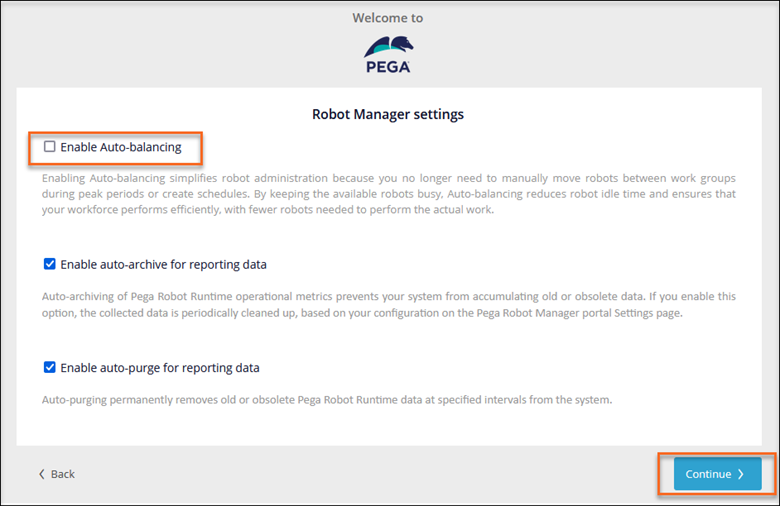
- On the Robot Manager Settings frame, deselect Enable Auto-balancing and then click Continue.
2 Configure the work groups and assignment types
- Click Add work group to open the New work group window.

- In the Give your work group a name field, enter Inquiry WG.
- In the What kind of assignment types do you want to process from this group? field, enter Inquiries AT.
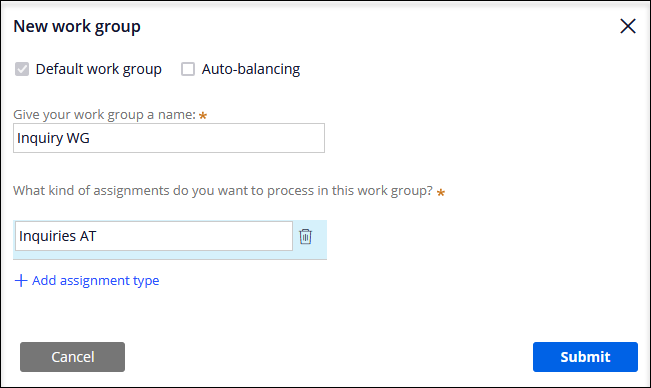
- Click to confirm the build process.
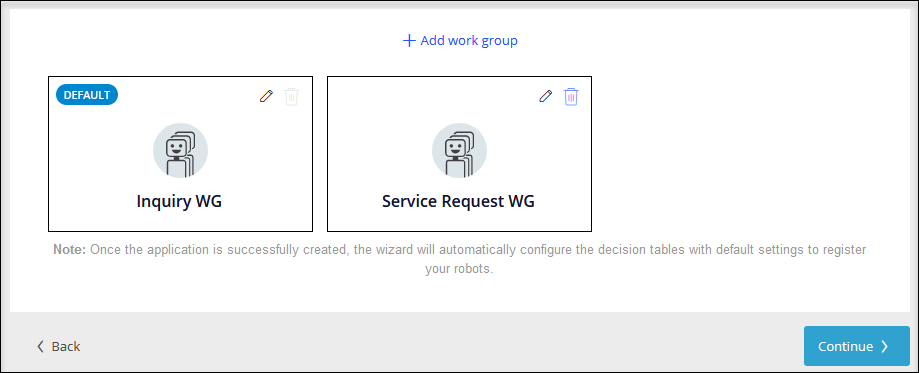
- Click Add work group to open the New work group window.
- In the Give your work group a name field, enter Service Request WG.
- In the What kind of assignment types do you want to process from this group? field, enter Service Requests AT.
- Click to confirm the build process.

- Click Continue to move on to the next step in the process
3 Complete the application setup
- In the Name your application field, enter MyTown RM.
- Click to continue the setup process.

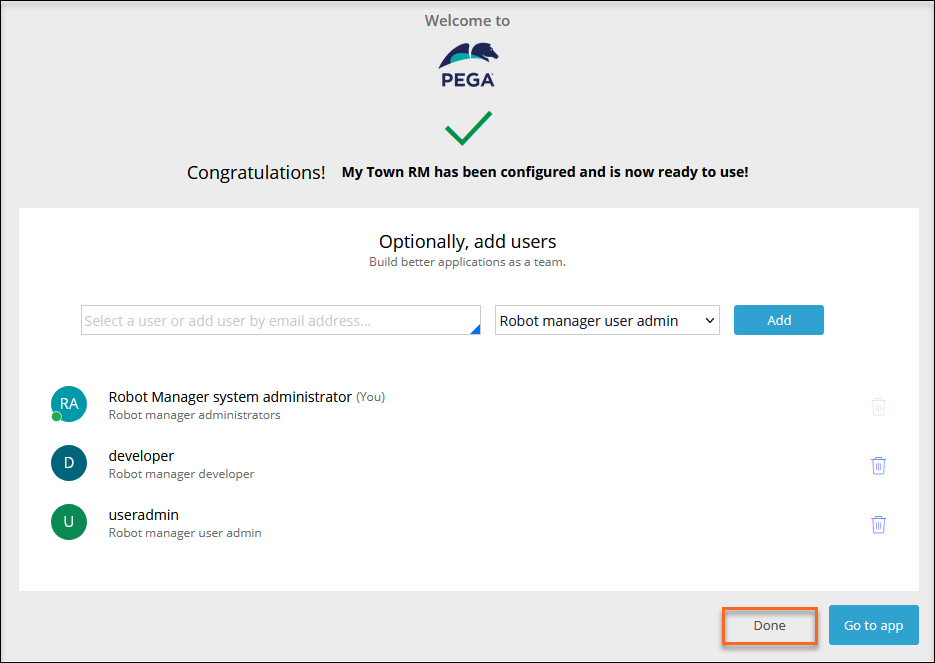
- In the Select a User or add user by email address field, enter the developer@mytownrm email address.
- Select Robot manager developers from the role drop-down list.
- Click Add to create the developer@mytownrm user.
- In the Select a User or add user by email address field, enter the useradmin@mytownrm email address.
- Select Robot manager user admin from the role drop-down list.
- Click Add to create the useradmin@mytownrm user.
- Click Done to complete the application setup.
4 Update the passwords for the new Operator IDs
- In the navigation pane, click to display the list of operator IDs.
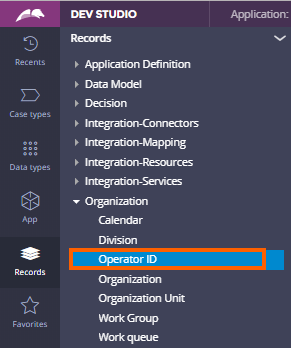
- On the tab, search for and click developer@mytownrm to open the operator ID.
- On the developer@mytownrm tab, click Security.
- In the Access Settings window, clear the Force password change on next login checkbox.
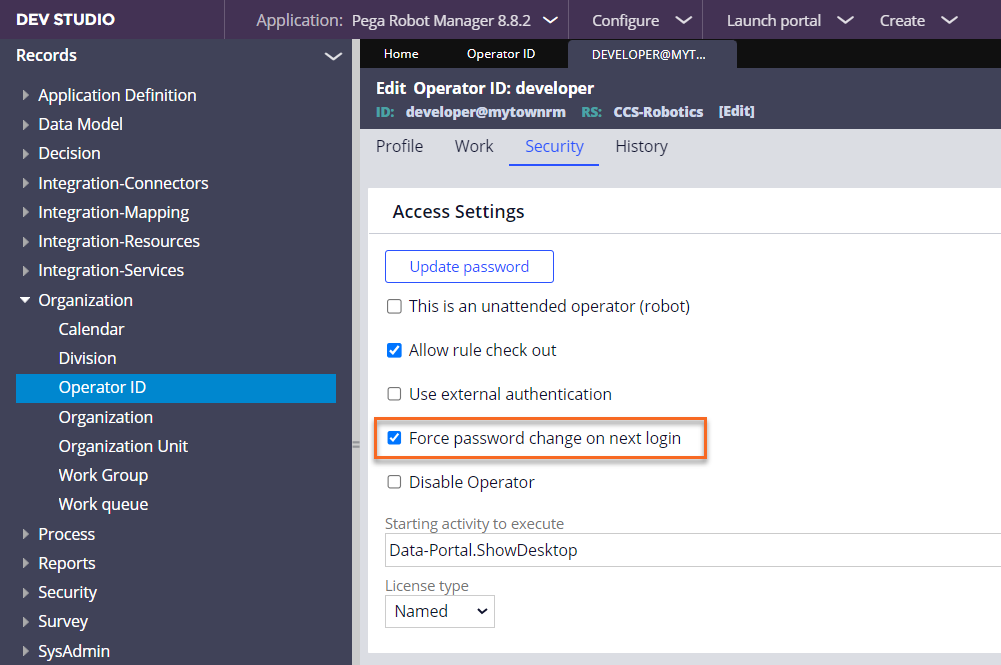
- In the Access Settings window, click Update Password.
- In the Change Operator ID Password window, enter myt0wn@pp2 in both fields, then click Submit.
- On the developer@mytownrm tab, click Save.
-
Close the developer@mytownrm form.
- Repeat steps 2-8 to update the password for the useradmin@mytownrm user.