Creating a decision strategy
Archived
4 Tasks
25 mins
Scenario
As a Strategy designer, you are tasked to design a basic decision strategy that outputs the Label action with the lowest printing cost. A set of Label actions are already defined and available for you in the Enablement business issue and Labels group . The printing cost of a label depends on a label-specific base cost and a variable depending on the number of letters of the label. To do so, you need to use the Proposition data, Set Property and Prioritize components on the strategy canvas. You verify your work by testing the strategy.
Use the following credentials to log in to the exercise system:
|
Role |
User name |
Password |
|---|---|---|
|
Decisioning Consultant |
CDHAnalyst |
rules |
Your assignment consists of the following tasks:
Task 1: Import the actions from the Enablement Business issue and Labels group.
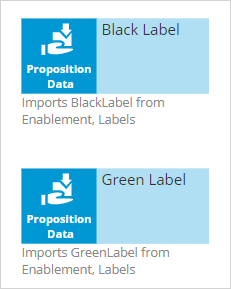
Create a new strategy canvas, add the BlackLabel and the GreenLabel actions using the Proposition data component.
Task 2: Set the PrintingCost property for each action.
Use a Set Property component to set the PrintingCost property for each action. The printing cost is computed as base cost + 5 times the number of letters from the label.
Task 3: Select the action with the lowest printing cost.
Use a Prioritize component to select the action with the lowest printing cost.
Task 4: Confirm your work.
Test the strategy created.
Challenge Walkthrough
Detailed Tasks
1 Import the actions from the Enablement Business issue and Labels group
- Login as a Strategy Designer using User name CDHAnalyst and Password rules.
- In the left-hand menu, select Intelligence > Strategies.
- In the top-right, click Create > Start with new canvas.
- Give the strategy a name: Lowest Printing Cost.
- For the Business issue, select Enablement. For the Group, select Labels.
- Scroll down and, in the Context section, change the Apply to class in PegaCRM-Data-Customer. In case there is a Development branch, ensure No branch is selected.
- Scroll up and click Create and open.
- Right-click on the canvas and select Import > Proposition data.
- Right-click on the new component and select Properties to configure it.
- Select the BlackLabel action in the Proposition data dropdown.
- Click Submit.
- Repeat steps 8-11, this time importing the GreenLabel action.
2 Set the PrintingCost property for each action
- Right-click on the canvas and select Enrichment > Set property.
- Connect both Proposition Data components to the Set Property component. To connect two components, hover over on the Proposition Data component, select the gray triangle on the right, click on it and hold, and draw an arrow to the Set Property component.
- Right-click on the Set Property component and select Properties.
- Give the component a name: Set Printing Cost.
- In the Target tab, click Add item.
- Set the Target to .PrintingCost and click on the icon next to the Target field. Notice the Apply to class is: CRM-SR-Enablement-Labels.
- Click Create and open.
- In the Property type section, change the type to Decimal.
- Click Save.
- Close the Property rule to return to the canvas by clicking on the X in the right top corner.
- Click the icon next to the Source field to enter the Expression builder.
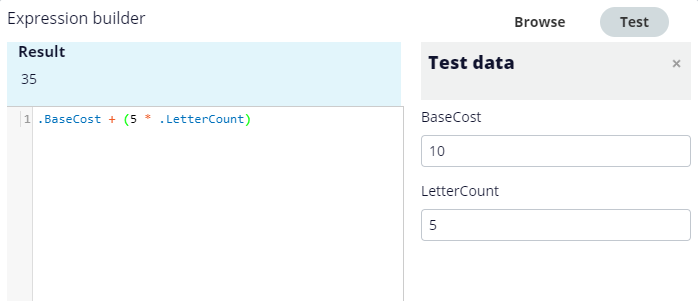
- Enter the expression: .BaseCost + (5 * .LetterCount).
- Click on Test.
- Enter a value for the BaseCost and one for the LetterCount and click outside of the input field. Verify that the Result is correct. For e.g. BaseCost=10, LetterCount=5 results in Result=35.
- Click Submit to save changes to the expression.
- Click on Submit to save changes of the component.
3 Select the action with the lowest printing cost
- Right-click on the canvas and select Arbitration > Prioritize.
- Connect the Set Property component to the Prioritize component.
- Right-click on the Prioritize component and select Properties.
- Give the component a name: Prioritize on PrintingCost.
- In the Expression field, select or enter: .PrintingCost.
- Change the Order by to Lowest first.
- Scroll down and set the Output to Top 1.
- Click Submit.
- Connect the Prioritize component to the Results component.
- Save the strategy
4 Confirm your work
- Click on Check out.
- Open the Test run panel on the right side.
- Double click on the canvas in a white area to re-align the strategy.
- Click Save and Run.
- Select the Set Property component and check the value of the PrintingCost property for both actions in the Results section of the Test run panel.
- Select the Results component and verify that the action with the lowest printing cost has been selected.


