Designing complex Views with Constellation
5 Tasks
45 mins
Intermediate
User Experience
Constellation
English
Scenario
Your work on the Tell Us More application continues. In this challenge, you use Constellation to build Views associated with the Eligibility Check and Handle Ticket Steps. You will configure several partial Views, conditional Visibility, and custom routing.
The following table provides the credentials you need to complete the challenge:
| Role | User name | Password |
|---|---|---|
| System Architect | Author@SL | pega123! |
Note: Your practice environment may support the completion of multiple challenges. As a result, the configuration shown in the challenge walkthrough may not match your environment exactly.
Challenge Walkthrough
Detailed Tasks
1 Create field groups in the Eligibility check View
- In the Pega instance for the challenge, enter the following credentials:
- In the User name field, enter Author@SL.
- In the Password field, enter pega123!
- In the navigation pane of App Studio, click Case Types > Incident to open the Incident Case Type.
- Click the UX tab.
- Click the Other Views tab, and then open the Eligibility check View.
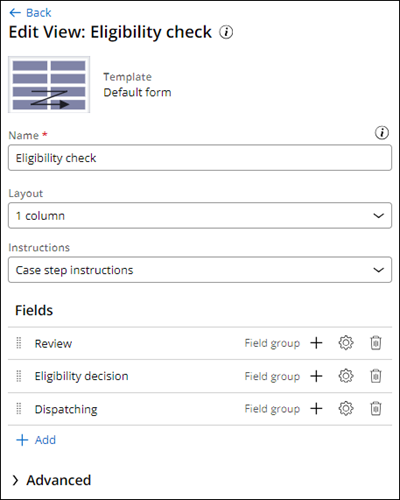
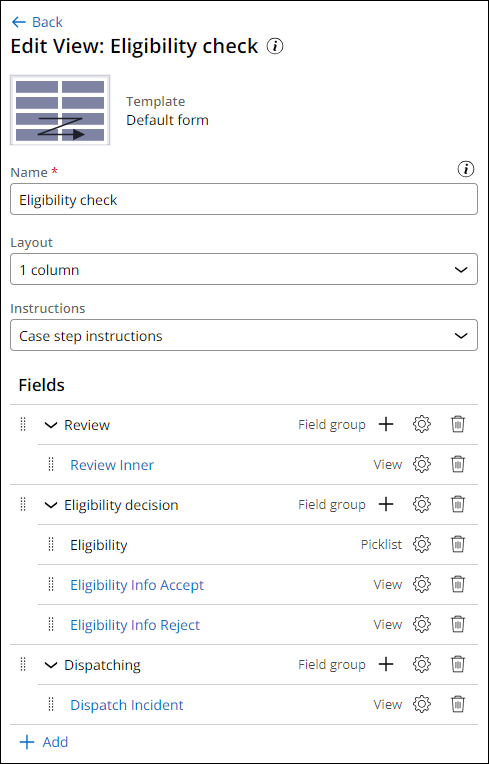
- Create three field groups in the Eligibility check View:
Heading Collapsible Review Yes Eligibility decision No Dispatching No
- In the Review field group, click Add to add the Review Inner View.
- In the Review Inner View row, click the Gear icon to configure the View, clear the Show heading checkbox, and then click Save.
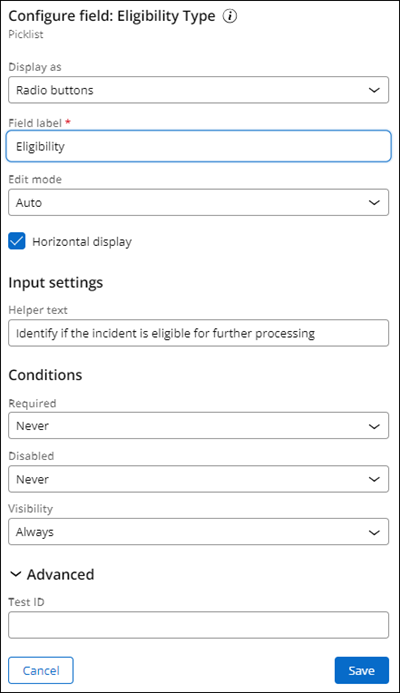
- In the Eligibility decision field group, click Add to add the Eligibility Type field.
- In the Eligibility Type field row, click the Gear icon to configure the field:
- In the Display as list, select Radio buttons.
- In the Field Label field, enter Eligibility.
- Select the Horizontal display checkbox.
- In the Helper text field, enter Identify if the incident is eligible for further processing.
- Click Save.
2 Configure partial Views for the Eligibility decision field group
- On the Other Views tab, create two new partial Views:
Name Template Eligibility Info Accept Details (One column) Eligibility Info Reject Details (One column) - In the Form section of the Other Views page, open the Eligibility check View.
- In the Eligibility decision field group, click Add, and then add the Eligibility Info Accept and Eligibility Info Reject partial Views.
- Click Eligibility Info Accept to open the partial View.
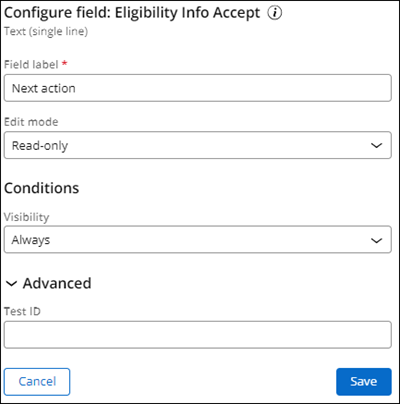
- Add the Eligibility Info Accept field.
- In the Eligibility Info Accept field row, click the Gear icon to configure the field:
- In the Field label field, enter Next action.
- In the Edit mode list, select Read-only.
- Click Save.
- Repeat steps 4-6 for the Eligibility Info Reject partial View by adding the Eligibility Info Reject field and configuring the field as detailed.
- Return to the Edit View: Eligibility check window.
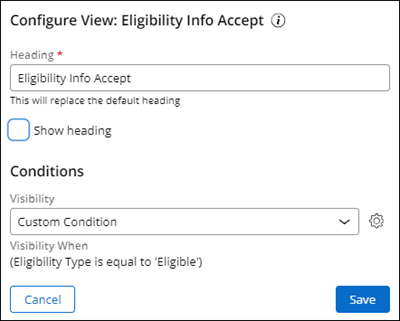
- In the Eligibility Info Accept partial View row, click the Gear icon and then configure the View as follows:
- Clear the Show heading checkbox.
- In the Visibility list, select Custom Condition.
- Configure the following custom Condition: Eligibility Type is equal to "Eligible".
- Click Submit, and then click Save.
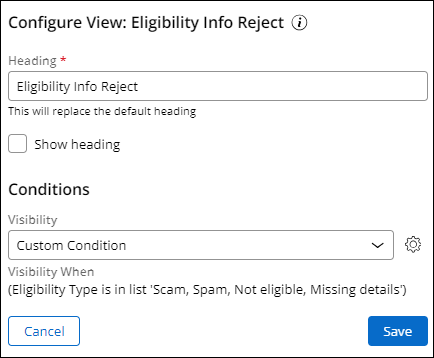
- In the Eligibility Info Reject View row, click the Gear icon, and then configure the View:
- Clear the Show heading checkbox.
- In the Visibility list, select Custom Condition.
- Configure the following custom Condition: Eligibility Type is in list "Scam, Spam, Not eligible, Missing details".
- Click Submit, and then click Save.
3 Update the display headers for Eligibility Info Partial Views
- Switch to Dev Studio.
- In the App Explorer, in the SL-TellUsMore-Work-Incident class, open the pyDefault Data Transform.
- In the pyDefault Data Transform, configure the following rows:
- Create a set action with a .EligibilityInfoAccept target with a source equal to "Incident will be approved for further processing".
- Create a set action with a .EligibilityInfoReject target with a source equal to "Incident will be rejected".
- Click Save.

4 Configure the Dispatch field group
- Switch to App Studio, and then return to the Edit View: Eligibility Check window.
- In the Dispatching field group, click Add, and then add the Dispatch Incident View.
- In the Dispatch Incident View row, click the Gear icon, and then clear the Show heading checkbox.
- Click Save.
5 Modify the Handle ticket View and routing
- On the Other Views tab, in the Form section, open the Handle ticket View.
- Create two field groups in the Handle ticket View:
Heading Collapsible Incident Info Yes Incident Resolution No 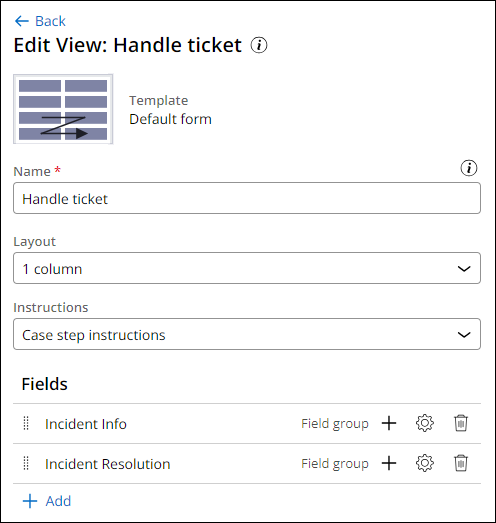
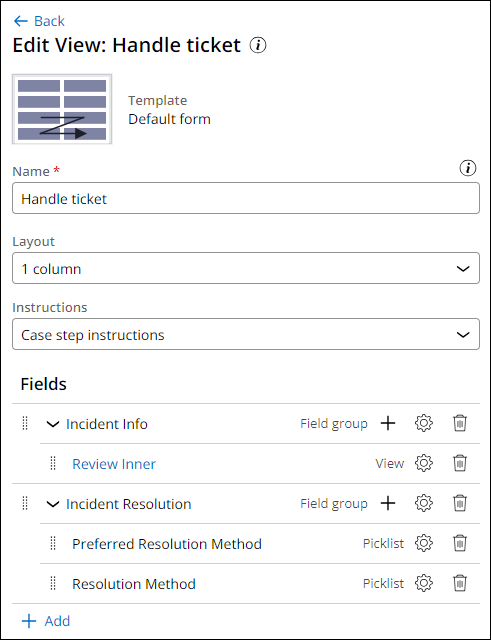
- In the Incident Info field group, click Add to add Review Inner View.
- In the Review Inner View row, click the Gear icon, and then clear the Show heading checkbox.
- In the Incident Resolution field group, add two fields with the following configurations:
- Add the PreferredResolutionMethod field, and then configure it as Read-only.
- Add the ResolutionMethod field.
- Switch to Dev Studio, and then open the Incident Case Type.
- Click on the Handle Ticket Step to open the contextual properties pane.
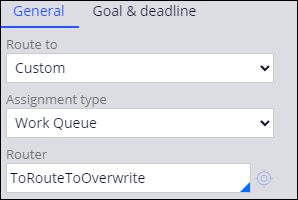
- In the properties pane, in the General tab, set up the following routing configuration:
- In the Route to list, select Custom.
- In the Assignment type list, select Work Queue.
- In the Router field, enter or select ToRouteToOverwrite.
 Note: At this time, it is not possible to set up custom routing in App Studio. Making this change in Dev Studio prevents you from making further changes to the assignment routing in App Studio.
 - Click Save
- Switch to App Studio.
- Open the Incident Case Type, and then click Actions > Refresh.
- Save your work.
This Challenge is to practice what you learned in the following Module:
Available in the following mission:
If you are having problems with your training, please review the Pega Academy Support FAQs.
Want to help us improve this content?