Populating sample data using Monte Carlo data sets
Archived
5 Tasks
20 mins
Intermediate
Next Best Action
Decision Management
English
Scenario
The U+ Bank project team built an implementation application of Pega Customer Decision Hub™ using the setup wizard, making use of the financial services data model. The initial sprint has begun, and the database team is building the integrations on the data warehouse, to build customer and account data into the structure that matches the data model in Pega. The integration work is in progress but currently there is no customer and account data in Customer Decision Hub. The lack of sample data is causing delays in development and unit testing because of the need to manually create test data.
As a decisioning architect, your role is twofold:
- Reuse the SampleCustomerDataRecord Monte Carlo data set that is included out of the box and update it in line with the project requirements to populate high quality sample data.
- Create a data flow to insert the customer and account records from the Monte Carlo data set into the customer and account database tables.
The Business team then provided you with additional requirements:
- After the data mapping workshop is completed, a new property was added to the customer class: GoPaperless. This property is used to determine if a customer has opted-in to paperless delivery for statements, and every customer must have the GoPaperless property populated as Y or N. To have a similar representation of the production data, business team wants 80% of the customers to have the GoPaperless property set to Y and 20% set to N.
- The customer account data must represent the actual product portfolio of the U+ Bank. The AccountSubtype property represents the types of different credit cards (Rewards, Standard, Plus,…) and ProductType represents the type of the credit card (Visa,…) that the customer uses. Other product types are not required in the initial phase of the project.
Use the following credentials to log in to the exercise system:
| Role | User name | Password |
|---|---|---|
| Decisioning architect | DecisioningArchitect | rules |
Your assignment consists of the following tasks:
Task 1: Prepare the SampleCustomerDataRecord Monte Carlo data set
Save the SampleCustomerDataRecord into the UBank-CDH-Data-Customer class in the implementation application. Reduce the sample size of the data set to one thousand. Update the .Accounts property of the credit card group to the .Accounts property in the UBank-CDH-Data-Accounts class. To simplify the output of the Monte Carlo data set, keep the credit cards data group and remove all other account groups from the Monte Carlo data set.
Task 2: Build an expression to generate data for the GoPaperless property
In the customer class, add the GoPaperless property as a new field to the Monte Carlo data set. Use the expression method to set the value of the property to Y or N.
Tip: You can use the if() function with randomTrueGenerator() function to build the 80/20 percent condition. For example: if(randomTrueGenerator(80),"Y","N").
Task 3: Update the Monte Carlo arguments for AccountSubtype and ProductType
Update the credit cards group in the Monte Carlo data set where the .AccountType is set to Credit card, and update the argument for .AccountSubtype and .ProductType to reflect the U+ Bank product portfolio. Use the following table to set the values for the AccountSubtype and ProductType:
| AccountType | AccountSubtype | ProductType |
|---|---|---|
|
Credit card |
Rewards Card |
Visa |
|
Rewards Plus Card |
||
|
Premier Rewards Card |
||
|
Standard Card |
Task 4: Create a data flow to insert data into Customer and Account tables
Create a new data flow which uses the SampleCustomerDataRecord Monte Carlo data set as the source and insert the records into the database using the Customer and Account data sets.
Task 5: Review the data that is inserted into Customer and Account tables
Use Profile Designer to see the generated sample data.
Challenge Walkthrough
Detailed Tasks
1 Prepare the SampleCustomerDataRecord Monte Carlo data set
- On the exercise system landing page, click Pega CRM suite to log in to Customer Decision Hub.
- Log in as the decisioning architect:
- In the User name field, enter DecisioningArchitect.
- In the Password field, enter rules.
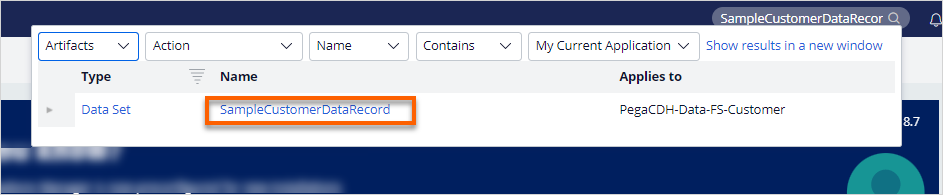
- In the header of Customer Decision Hub, in the Search field, enter SampleCustomerDataRecord, then click the rule to open the Monte Carlo data set.
- In the upper-right corner, click Actions > Save as.
- In the Apply to field, enter or select UBank-CDH-Data-Customer.
- In the Add to ruleset list, select CDH-Rules.
- In the upper-right corner, click Create and open.

- In the Data set: Sample customer data record, configure the following settings:
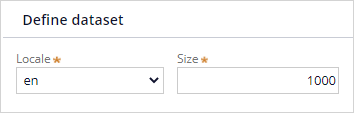
- In the Define data set section, in the Size field, enter 1000.
- In the Define groups section, in the first Group field, click the down arrow and select the Accounts page list in the UBank-CDH-Data-Customer class.
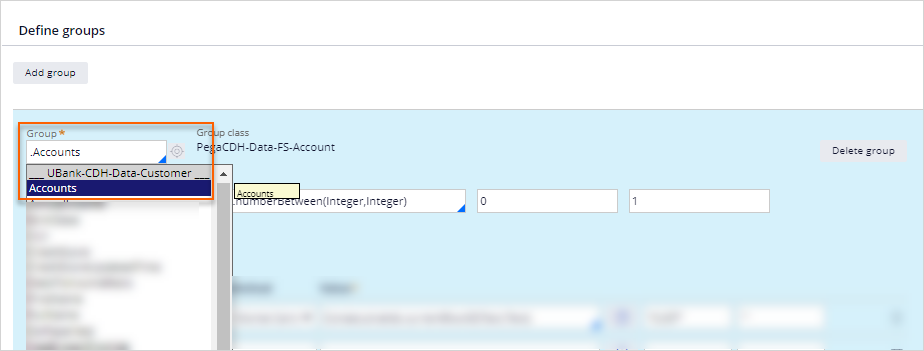 Note: Selecting the .Accounts page-list in UBank-CDH-Data-Customer class updates the Group class from PegaCDH-Data-FS-Account class to the account class of your application UBank-CDH-Data-Accounts.
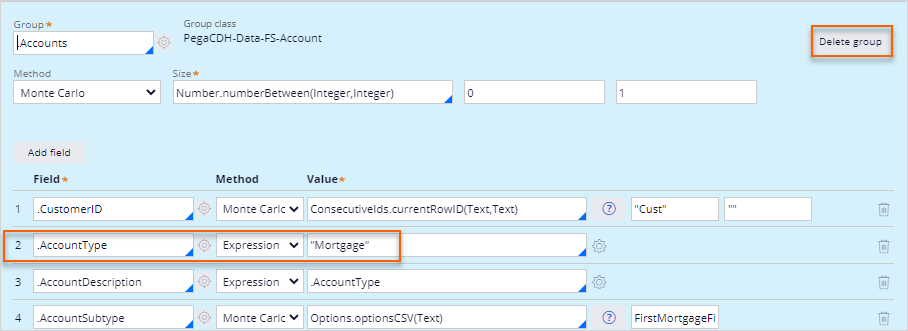
 - There are three more account groups defined in the data set. For the purposes of the exercise, delete the second, third and fourth account groups.
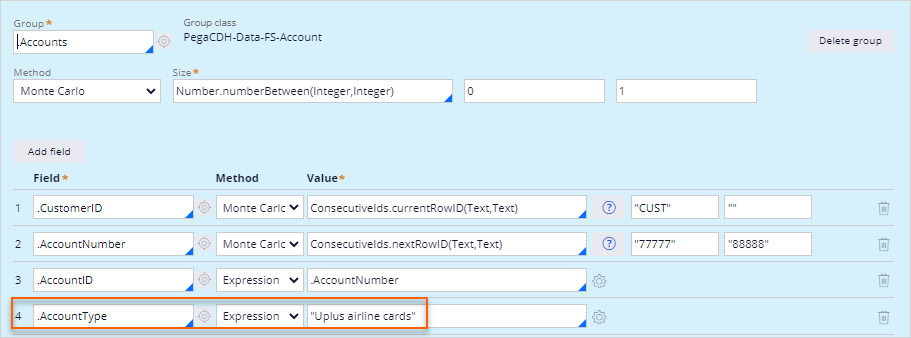
- In the upper-right corner of the group, where .AccountType is Mortgage, click Delete group.
- In the upper-right corner of the group, where .AccountType is Deposit, click Delete group.
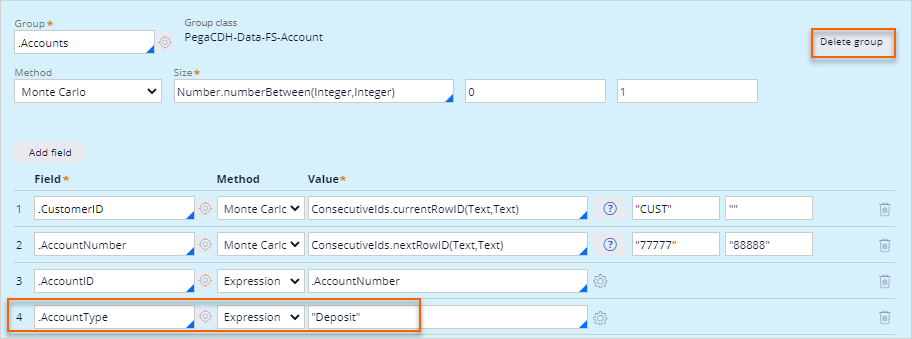
- In the upper-right corner of the group, where .AccountType is Uplus airline cards, click Delete group.
- In the upper-right corner of the group, where .AccountType is Mortgage, click Delete group.
- In the upper-right corner, click Save.
- In the Define data set section, in the Size field, enter 1000.
2 Build an expression to generate data for the GoPaperless property
- On the top of the rule form, in the Define fields section, click the Add field, to add a new property.
- In the new line, configure the following settings:
- In the Field column, enter or select .GoPaperless.
- In the Method column, select Expression.
- In the Value column, on the right, click the gear icon to enter a new expression.
- In the Expression Builder, enter if(randomTrueGenerator(80),"Y","N")
- In the upper-right corner click the Test button.
- Validate that there is a Result ("Y" or "N").
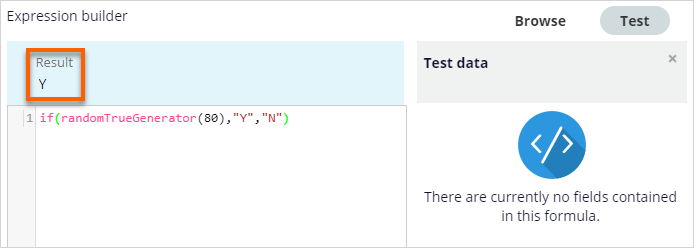
- Click Submit.

- In the upper-right corner, click Save.
- In the upper-right corner, click Run to browse the data set.
- On the Run Data Set: Sample customer data record screen, select the following configuration elements:
- In the Operation list, select Browse.
- In the upper-right corner, click Run.

- In the Data Set Preview window, confirm that the GoPaperless property has a value of "Y" or "N".
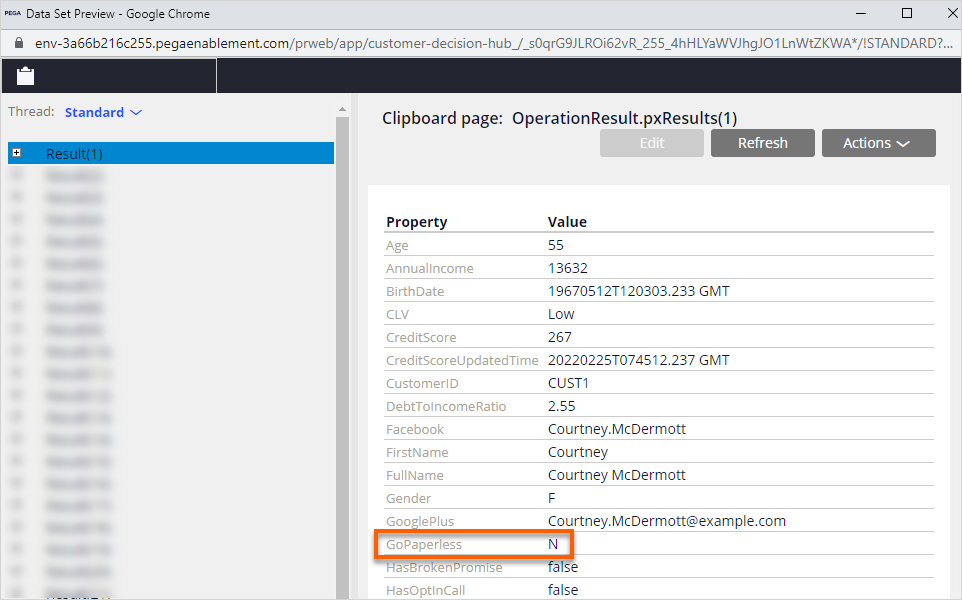
- Close the Data Set Preview window.
- Close the Run Data Set: Sample customer data record window.
3 Update the Monte Carlo arguments for AccountSubtype and ProductType
- In the Define groups section, configure the following settings:
- In the row where Field is .AccountSubtype, in the Value list, enter or select Options.options(Text,Text,Text,Text).

- In the Argument 1 field, enter Rewards Card.
- In the Argument 2 field, enter Rewards Plus Card.
- In the Argument 3 field, enter Premier Rewards Card.
- In the Argument 4 field, enter Standard Card.
- In the row where Field is .ProductType, in the Value list, enter or select Options.optionsCSV(Text).
- In the Argument 1 field, enter Visa.

- In the Argument 1 field, enter Visa.
- In the upper-right corner, click Save.
- In the upper-right corner, click Run to browse the data set.
- On the Run Data Set: Sample customer data record screen, select the following configuration elements:
- In the Operation list, select Browse.
- In the upper-right corner, click Run.
- On the left pane click the + icons to locate a Result(x) record that has one Accounts(1) page.
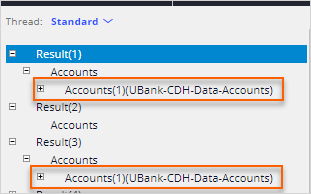
The number of account records that the system generates uses the Monte Carlo method, so the number of records that you see can vary.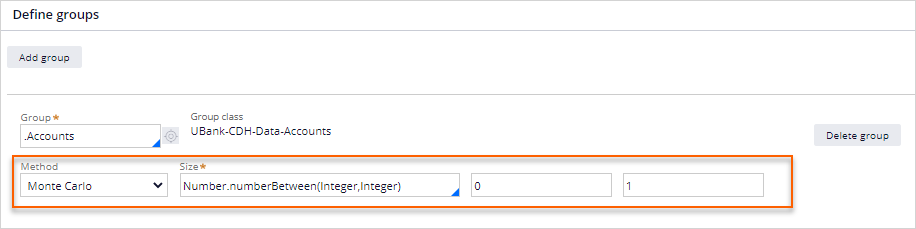
- Click on any Accounts(1)(UBank-CDH-Data-Accounts) record to confirm that AccountSubtype, AccountType and ProductType have values.

- Close the Data Set Preview window.
- Close the Run Data Set: Sample customer data record window.
4 Create a data flow to insert data into Customer and Account tables
- In the lower-left corner, click the Back to Customer Decision Hub button to return to Customer Decision Hub.
- In the navigation pane of Customer Decision Hub, click Data > Data Flows.
- In the upper-right corner, click Create.
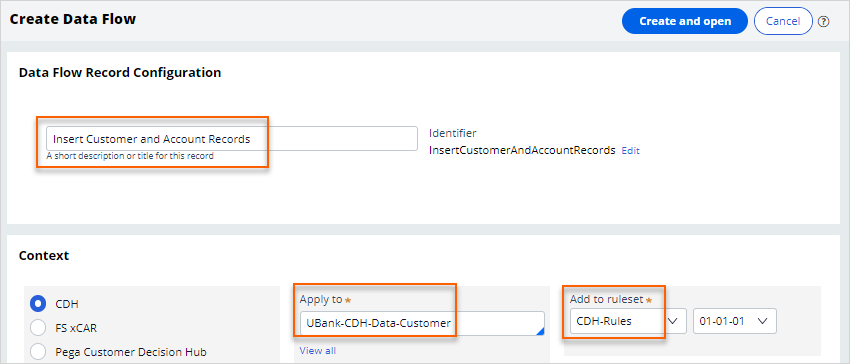
- In the Create Data Flow screen, complete the following settings to create a new data flow:
- In the Label field, enter Insert Customer and Account Records.
- In the Apply to field, enter or select UBank-CDH-Data-Customer.
- In the Add to ruleset list, select CDH-Rules.
- In the upper-right corner, click Create and open.
- On the canvas, double-click the first component to modify the source of the data flow.
- In the Source configurations window, set up the input data source:
- In the Source list, select Data set.
- In the Data set field, enter SampleCustomerDataRecord.
- Click Submit.
- On the canvas, click the Add branch button on the second component to add a new output destination.
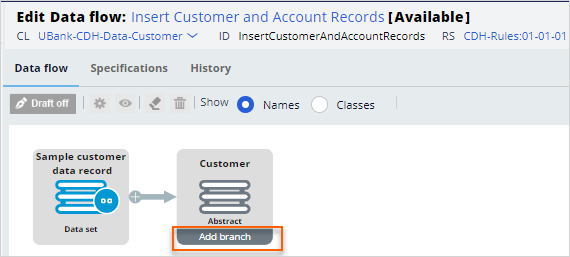
- On the canvas, double-click the Customer component to modify the destination settings.
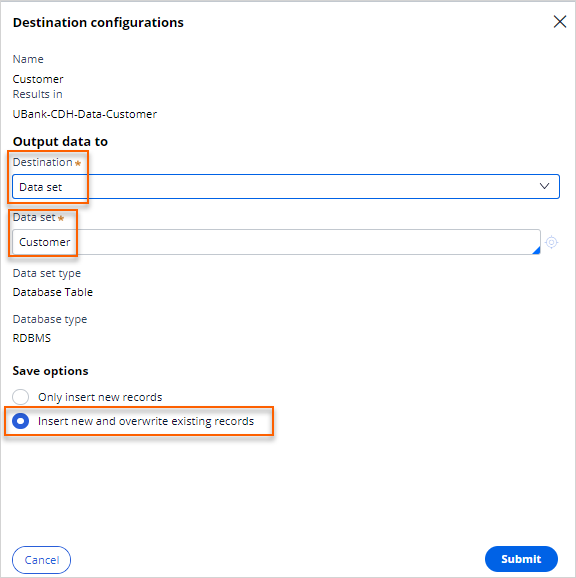
- In the Destination configurations window, set up the destination data source for customer records.
- In the Destination list, select Data set.
- In the Data set field, enter or select Customer.
- In the Save options section, select the Insert new and overwrite existing records radio button.
- Click Submit.
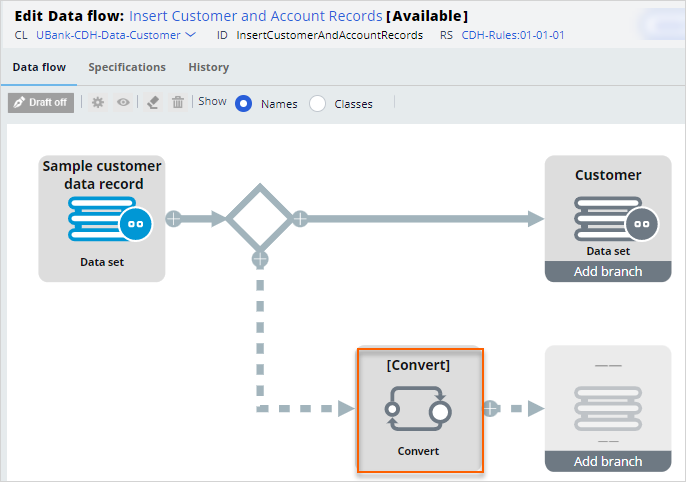
- On the canvas, click the + icon in the bottom of the branch shape and select Convert to add a new convert component.

- On the canvas, double click the [Convert] component.
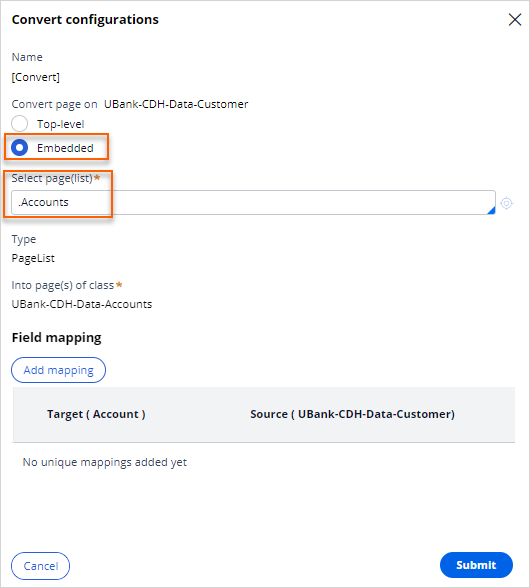
- In the Convert configurations window, complete the following settings:
- In the Convert page on UBank-CDH-Data-Customer section, select the Embedded radio button.
- In the Select page(list) field, enter or select .Accounts.
- Click Submit.
- On the canvas, double-click the unconfigured (- -) destination component after the Account convert component to set up the destination settings.
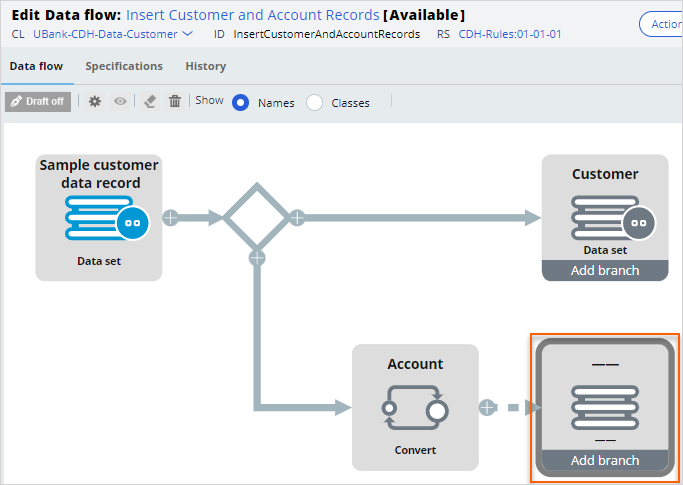
- In the Destination configurations window, set up the destination data source for account page records.
- In the Destination list, select Data set.
- In the Data set field, enter or select Account.
- In the Save options section, select the Insert new and overwrite existing records radio button.
- Click Submit.

- In the upper-right corner, click Save.
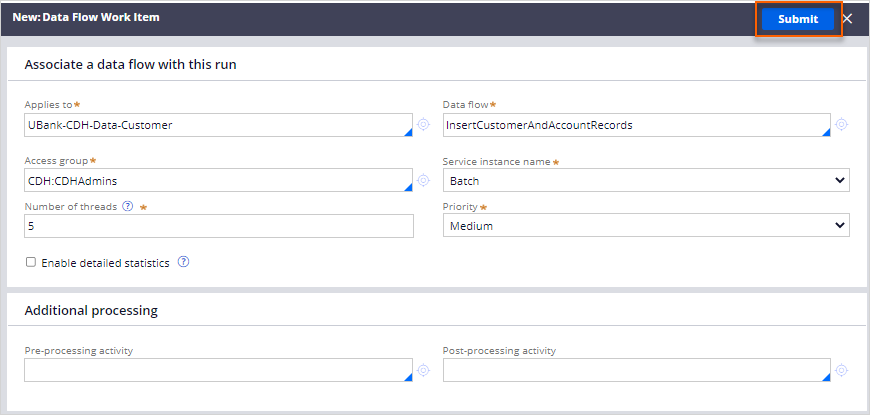
- In the upper-right corner, click Action > Run to configure the data flow run settings.
- On the New: Data Flow Work Item page, click Submit.
- On the Data Flow Run DF-Test-1 page, in the upper-right corner, click Start to run the data flow.
- Confirm that the run completes.
 Note: The number of Successful records varies for each data flow run.
5 Review the data that is inserted into Customer and Account tables
- In the navigation pane of Customer Decision Hub, click Data > Profile Data Sources to view the existing data sources.
- On the Profile Data Sources page, click Customer to open the customer data set.
- On the Data Set: Customer page, click the Records tab to confirm that the records are created.

- Optional: To confirm that the system imported the account records follow steps 2–3 for the Account data set.