Creating actions
Introduction
An action holds various details about a particular offering, such as Start Date, End Date, and Expected Revenue. Each action is backed by a decisioning proposition. The system automatically manages this relationship by creating, deploying, and deleting the proposition instances as needed. Since an action is closely tied to a proposition, it must always be created in the context of an issue and group.
Video
Transcript
This demo will show you how to create an Action. It will also explain how to create actions in bulk.
U+, a retail bank, recently introduced several new credit card offers that they would like to display to their customers. As a decisioning consultant, you have been tasked with creating these offers in the Sales Issue and CreditCards Group as per the pre-defined business hierarchy.
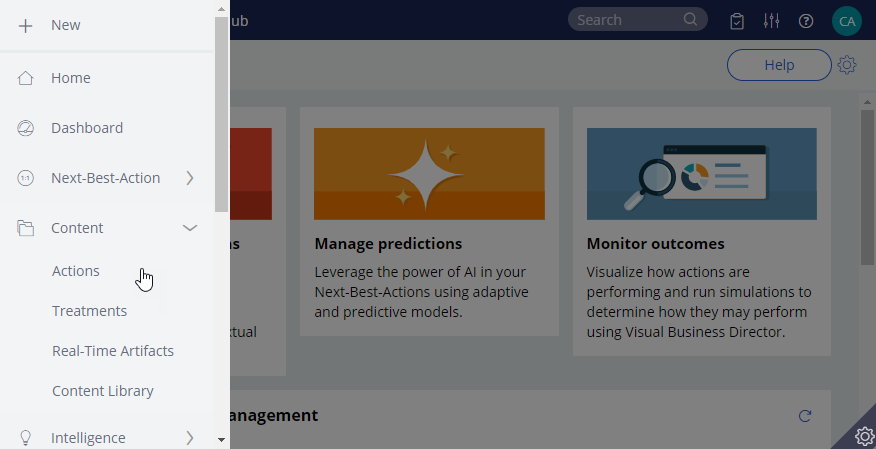
This is the Pega Customer Decision Hub™ portal. Actions are created and managed on the actions landing page.
You can either create a single action or actions in bulk.
To create a single action, enter a short description of the new action. Select the appropriate Issue and Group. Now, open the action.
The attributes of an action distinguish it from other actions. Attributes are used by the Customer Decision Hub to select the right action for a customer. Fill in the attributes relevant to this action. For example, provide a Description that explains its purpose and Benefits that describe how this action will benefit the customer.
Bear in mind that some of the values you enter may be customer-facing information. For example, U+ wants to display the content of the benefits attribute when this action is presented on its website. To complete the configuration, save the action.
To view actions within a certain group, you can filter by a specific Issue and Group. This is the action you just created. Thus far you have created a single action. However, sometimes you may want to create multiple actions at once. You can do that by uploading a list of actions from a Comma Separated Value (CSV) file. To create such a CSV file you need to download a CSV template and fill it in.
Open the downloaded CSV template. You can use this template to add/update actions. Add new Actions with corresponding attributes to the file.
Properties that start with py, such as pyName, pyIssue, pyGroup, pyLabel and pyIsPropositionActive are mandatory internal properties. It is important that you input these values in the correct format into the CSV file.
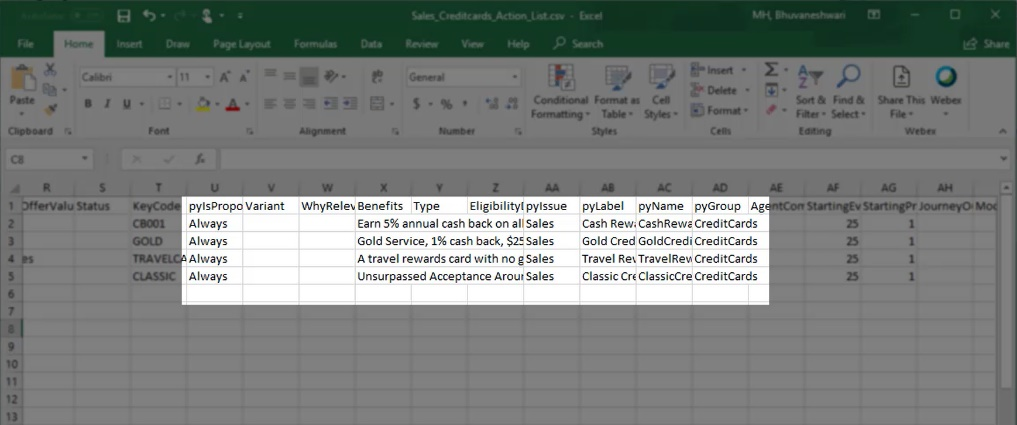
The property pyIsPropositionActive corresponds to the Availability property, which is visible on the Details tab of an action. Possible values for this property are 'Always', 'Never' and 'Date'.
Choose 'Always' to ensure that the action is selected during the Next-Best-Action decisioning process by the Customer Decision Hub.
Set it to 'Never' if you never want the Action to be selected, for example when you want to retire the action.
If you set the value to 'Date', you should enter a date range in the 'StartDate' and 'EndDate' fields. The Customer Decision Hub will select this action only during that time period.
pyIssue corresponds to the Issue the Action was created for.
pyLabel corresponds to a short description of the Action.
pyName corresponds to the Action name.
pyGroup is the Group to which the Action belongs.
Save and close the CSV file.
Now, import actions from the file. Select the CSV file that contains the list of actions you want to import. If you want to delete existing actions from this Issue/Group that have been created in the system but not in the CSV file, you can select this option.
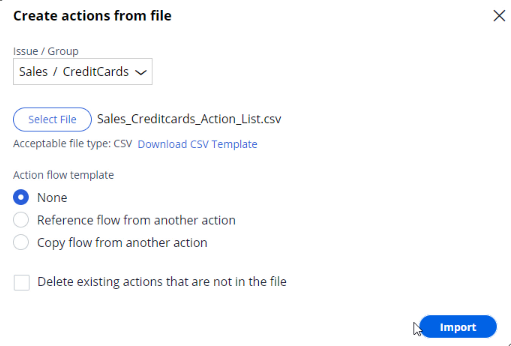
For now, you are only interested in adding new actions.
Notice that the window displays a summary of the result of the import.
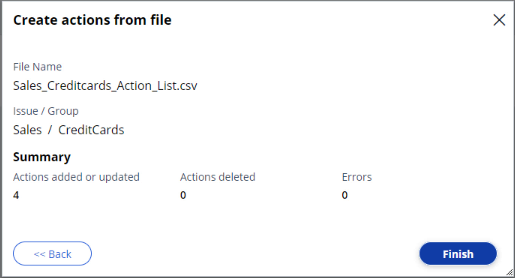
For example, when a duplicate action is added, the Errors count is incremented, and you can download the error file to learn the exact issue. Complete the import. Notice that the new actions are now listed on the Actions page.
This demo has concluded. What did it show you?
- How to create an action.
- How to set action attributes.
- The most important properties of actions in a CSV file.
- How to create multiple actions using a CSV file.
This Topic is available in the following Module:
If you are having problems with your training, please review the Pega Academy Support FAQs.
Want to help us improve this content?