Enhance the functionality of your web application by embedding elements of Pega UI in your code. You can render whole cases so that users can create work and manage assignments. For example, you can embed a feedback form within your website so that the users who access the page can share their comments.
- Ensure that you have an application built on Pega Platform 8.1 or later, and a web server to test your host page.
- Ensure that you have at least one case type in your application. For more information, see Creating a top-level case type.
- Ensure that SameSite cookies are disabled. For more information, see Enabling and configuring Cross-Site Request Forgery settings.
- To use mashups when the CSRF token check is enabled, add the domains where the mashup scripts are embedded to the Allowed referrers field on the Cross-Site Request Forgery landing page. For more information, see Enabling and configuring Cross-Site Request Forgery settings.
- In the navigation pane of App Studio, click Channels.
- In the Create new channel interface section, click Web mashup.
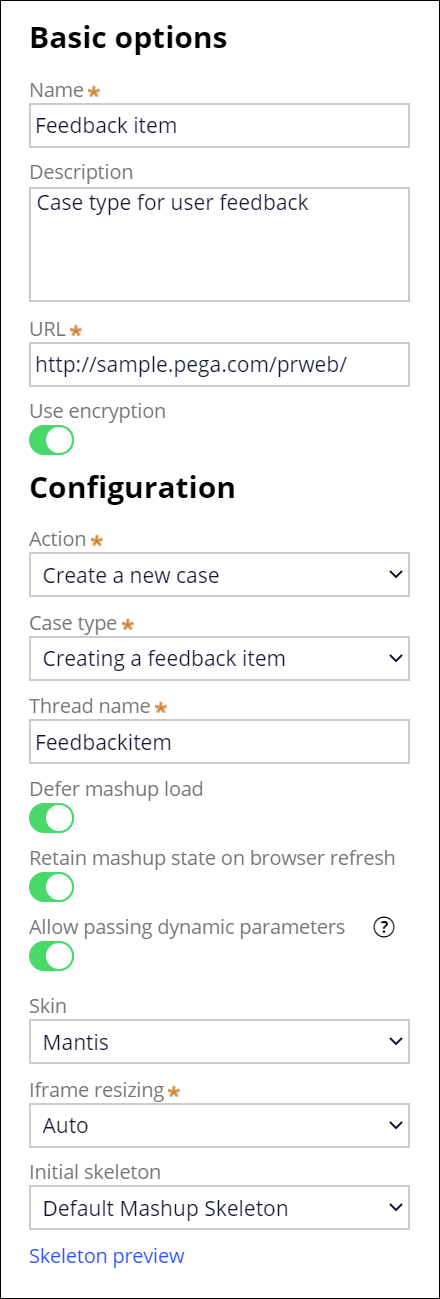
- On the New Web mashup interface form, in the Basic options section, in the Name field, enter a name for the mashup. For example: Enter Feedback item.
- Optional: To distinguish this channel interface from other mashup channel interfaces, in the Description field, specify the purpose of this channel interface. For example: Enter Case type for user feedback.
- In the autopopulated URL field, verify the URL for your Pega Platform instance.
- Optional:
To generate the mashup snippet with URL encryption, turn on the Use
encryption switch.
Note: When the Use encryption switch is on, dynamic parameters are not supported.
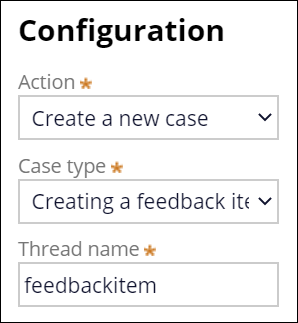
- In the Configuration section, in the Action list, select an action for the mashup. For example: Select Create a new case.
-
Depending on the selected action, complete the relevant settings:
For example: For the Create a new case action, in the Case type list, select the Creating a feedback item case type.Choices Actions Create a new case In the Case type drop-down menu, select the required case type. Display a page - In the Class field, select the required class.
- In the Harness field, select the required harness.
- Optional: To configure a data transform, in the Data transform field, configure a required setup.
- Optional: To block the page from editing, turn on the Read only toggle.
Get next work None Open an assignment In the Param key field, enter the required assignment key. Open a case by ID In the Work ID field, enter the required work object ID. Open a case by Handle In the Param key field, enter the required work object handle. Open a case by URL In the Query param field, enter the required query parameter. For example, to define a custom activity, you can use pyActivity=ClassName.activityName&Parameter1=ParameterValue1&Parameter2=ParameterValuSample configuration for the feedback case type 

- In the Thread name field, enter a name for the thread that handles the mashup.
- Optional: To defer the load of the mashup gadget, turn on the Defer mashup load switch, and then, in the page script, configure the initiation of the mashup loading process based on your preference. For example: You can make the mashup available to the application users after they click a button on the page to open the feedback form.
- Optional:
To retain the state of the case after the user refreshes the browser that
displays the mashup, turn on the Retain mashup state on browser
refresh switch.
Note: Consider the following limitations when you use this option:
- The option is not backward-compatible with earlier versions of Pega Platform by default.
- The option works only if the user loads the mashup gadget on the same thread, and the thread is available during a browser refresh. This setting does not work if the user sets the thread name dynamically while loading the mashup.
- The state is retained if the refresh occurs in the same session.
- The option to retain the case state does not work for temporary work objects, for which the system does not generate work IDs.
- Optional:
To validate a mashup gadget request that has dynamic parameters in the mashup
code, turn on the Allow passing dynamic parameters
switch.
Dynamic parameters are any parameters that you put in the mashup code on the external page. For example, if you have a custom parameter called CustomerID and you want to pass the value for this parameter, which is based on the ID of the user who visits the page, you include the parameter on the external page, which makes the parameter dynamic. Static parameters are all the parameters that the system generates with the mashup code.
-
Configure the output options for the mashup:
- In the Skin list, select the skin rule that you want to use for the mashup.
- In the Iframe resizing list, select the resize mode for the mashup.
-
In the Initial skeleton list, select the
skeleton to provide a template for the mashup.
Tip: You can check how the skeleton renders the content by clicking Skeleton preview.
Sample mashup configuration for the feedback case type 

- Optional: To add a custom parameter, in the Custom parameters section, click the Add a row icon, and then enter the parameter name and value.
-
In the What is a mashup section, click Generate
mashup code, and then, in the Mashup code
window, select the type of code that you want to copy:
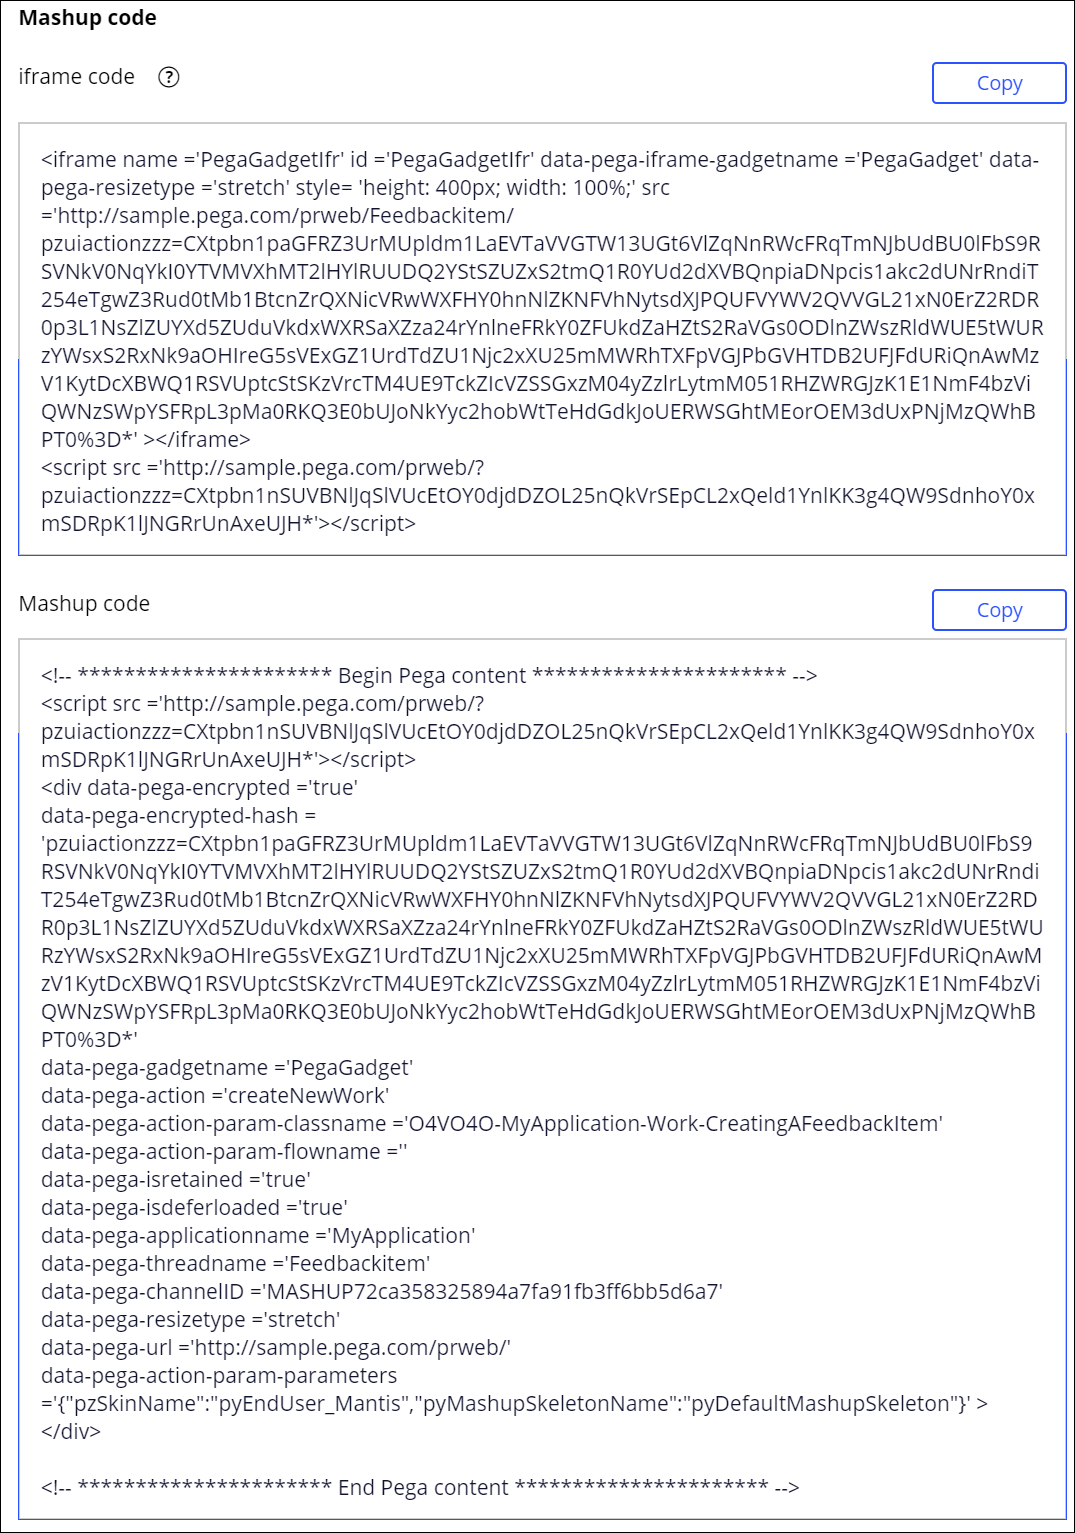
- To copy the iFrame code, above the iframe code window, click Copy.
- To copy the mashup code, above the Mashup code window, click Copy.
Note: Selecting the iframe code improves the response time of a mashup, but does not support passing dynamic parameters.Required mashup code 

- Close the Mashup code window.
- Click Save.
- Optional: To preview how different devices display the mashup code, in App Studio, click Preview application, and then select the channel that you want to preview by clicking the channel name next to the application name.
-
Paste the code that you copied from the Mashup code window
into a static web page or webview of an external web application to display your
embedded case.
At run time, the page HTML includes the mashup code as shown in the following example:
<!DOCTYPE HTML PUBLIC "-//example//443 HTML 4.01 Transitional//EN" "http://www.example.com.443"> <html lang="en"> <head> <meta http-equiv="content-type" content="text/html; charset=utf-8"> <title>Pega Web Mashup Page</title> </head> <body> <p>This page will host a Pega Web Mashup</p> <!-- ********************** Begin Pega content ********************** --> <script src ='http://sample.pega.com/prweb/?pzuiactionzzz=CXtpbn1nSUVBNlJqSlVUcEtOY0djdDZOL25nQkVrSEpCL2xQeld1YnlKK3g4QW9SdnhoY0xmSDRpK1lJNGRrUnAxeUJH*'></script> <div data-pega-encrypted ='true' data-pega-encrypted-hash = 'pzuiactionzzz=CXtpbn1paGFRZ3UrMUpldm1LaEVTaVVGTW13UGt6VlZqNnRWcFRqTmNJbUdBU0lFbS9RSVNkV0NqYkI0YTVMVXhMT2lHYlRUUDQ2YStSZUZxS2tmQ1R0YUd2dXVBQnpiaDNpcis1akc2dUNrRndiT254eTgwZ3Rud0tMb1BtcnZrQXNicVRwWXFHY0hnNlZKNFVhNytsdXJPQUFVYWV2QVVGL21xN0ErZ2RDR0p3L1NsZlZUYXd5ZUduVkdxWXRSaXZza24rYnlneFRkY0ZFUkdZaHZtS2RaVGs0ODlnZWszRldWUE5tWURzYWsxS2RxNk9aOHIreG5sVExGZ1UrdTdZU1Njc2xXU25mMWRhTXFpVGJPbGVHTDB2UFJFdURiQnAwMzV1KytDcXBWQ1RSVUptcStSKzVrcTM4UE9TckZIcVZSSGxzM04yZzlrLytmM051RHZWRGJzK1E1NmF4bzViQWNzSWpYSFRpL3pMa0RKQ3E0bUJoNkYyc2hobWtTeHdGdkJoUERWSGhtMEorOEM3dUxPNjMzQWhBPT0%3D*' data-pega-gadgetname ='PegaGadget' data-pega-action ='createNewWork' data-pega-action-param-classname ='O4VO4O-MyApplication-Work-CreatingAFeedbackItem' data-pega-action-param-flowname ='' data-pega-isretained ='true' data-pega-isdeferloaded ='false' data-pega-applicationname ='MyApplication' data-pega-threadname ='Feedbackitem' data-pega-channelID ='MASHUP72ca358325894a7fa91fb3ff6b5d6a' data-pega-resizetype ='stretch' data-pega-url ='http://sample.pega.com/prweb/' data-pega-action-param-parameters ='{"pzSkinName":"pyEndUser_Mantis","pyMashupSkeletonName":"pyDefaultMashupSkeleton","UserIdentifier":"MashupUser","Password":"Password"}' ></div> <!-- ********************** End Pega content ********************** --> </body> </html> - Optional: To put multiple mashups on a single web page, include the mashup static script pzIncludeMashupScripts in the HTML code only once.
-
In Dev Studio, click
Application name
Definition
, and then click the Integration &
security tab to configure the application permissions by
specifying a list of trusted domains in the Pega Platform application rule.
The list contains the URLs on which you are deploying the mashup. Ensure that you include the site that you intend to use to test the mashup. For more information, see Securing your application for mashup communication.
-
In the Mashup security section, in the list of trusted
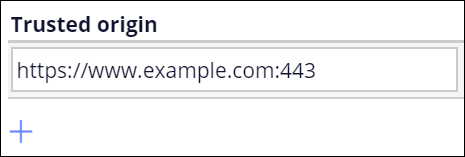
origins (URLs), click Add a row, and then enter a URL
that can access your application.
The list contains the URLs on which you are deploying the mashup. List only the origins you trust to use Pega Web Mashup gadgets from this application. Specify the host, port, and protocol for each of your websites, for example: https://www.example.com:443 Note: port # is optional for well-known ports.
The list of trusted URLs 

- Click Save.
Generating the mashup code in App Studio
Deploying the mashup on an external web page by pasting the mashup <div> code into the code of the host site
Configuring the application permissions to allow your application to accept incoming messages from the host site


