
Editing Pega Robot Manager reports
Editing Pega Robot Manager reports
Administrators can edit Pega Robot Manager™ reports several ways to suit business needs. By updating a predefined report's categories, administrators can change who can view a report, as well as under which category the report is stored. Custom reports and copies of predefined reports can be edited in additional ways, such as updating column names and adjusting duration metrics.
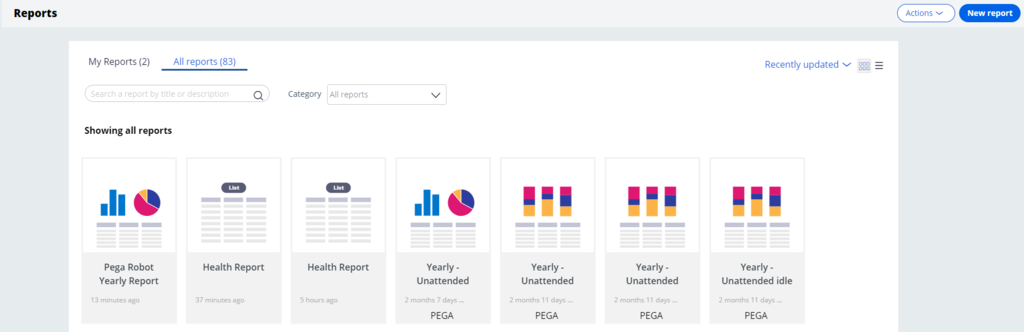
Changing report category
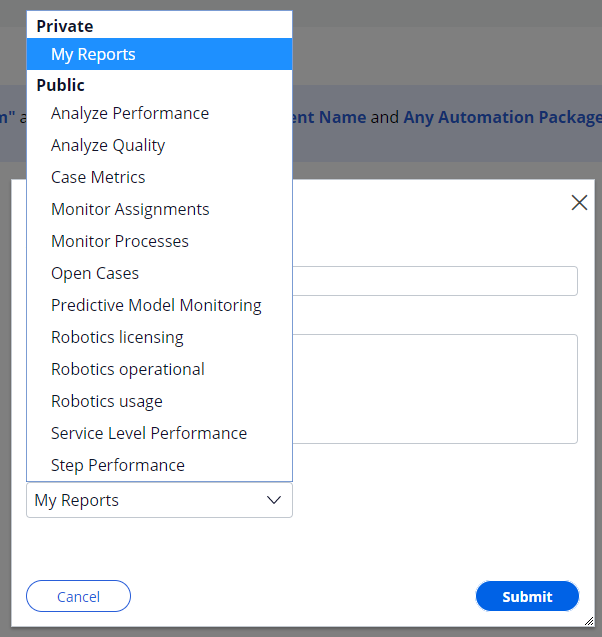
Within Pega Robot Manager, administrators can set a report’s category to either Public or private. Private reports reside in the My Reports folder and are only visible to you, while Public reports are those that can be viewed by others in the organization. You can arrange public reports into categories to make it easier to locate the report of interest, and you can also change the report category at any time. To change the report category, you can save a copy of the report to a different category, or you can move an existing report. The only way to edit a pre-defined report in the system is to save a copy of that report to your My reports folder.
Saving a copy of the report to a different category
- Log in to Pega Robot Manager by using a user role that has ReportAdmin or ReportWriter privileges.
- On the Pega Robot Manager dashboard, click Reports to open the reports landing page.
- On the My Reports tab, click the report of interest to open the report.

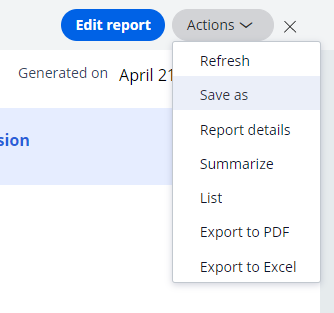
- Click Actions > Save as to save a copy of the report of interest.
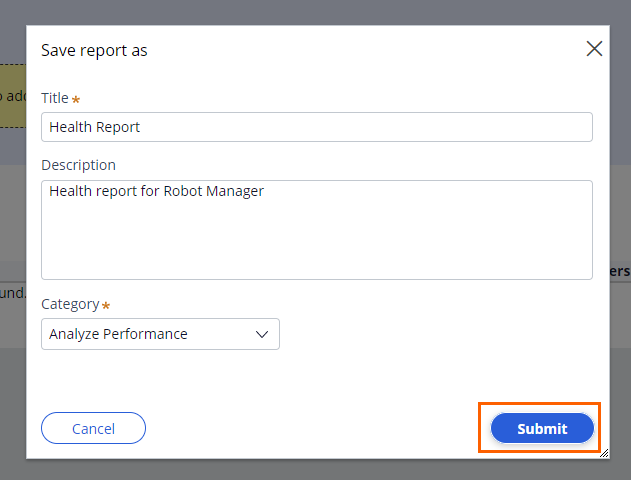
- In the Save report as dialog box, enter a title and description.
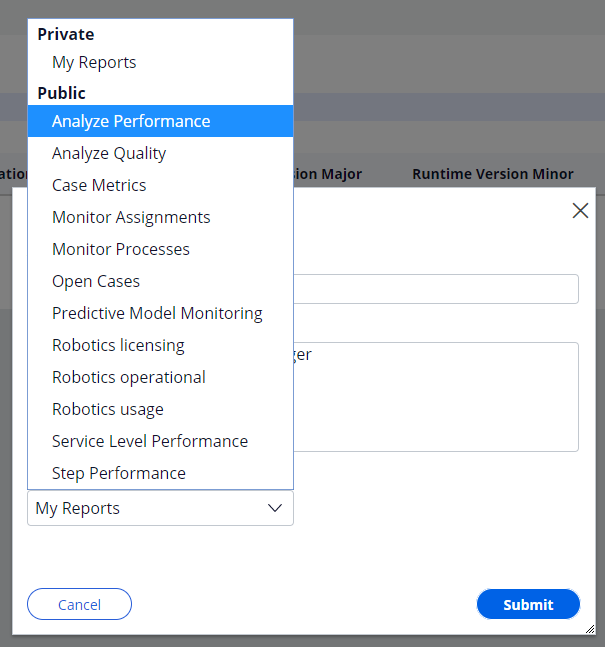
- In the Category drop-down, select the category of interest. The category of interest can be public or private.
- Click Submit to complete configuring report.
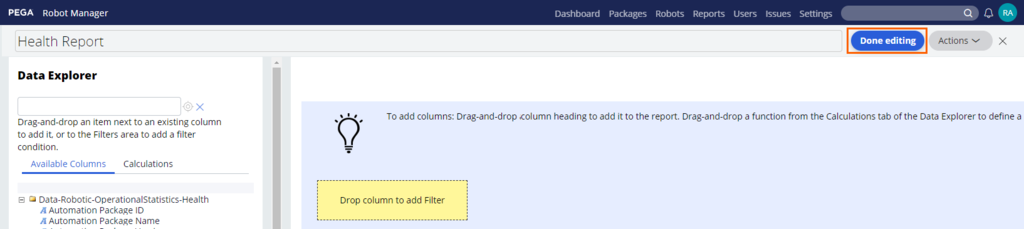
- Click Done editing to close the report.
Moving a predefined report to a different category
- Log in to Pega Robot Manager by using a user role that has ReportAdmin or ReportWriter privileges.
- On the Pega Robot Manager dashboard, click Reports to open the reports landing page.
- Click the All reports tab.
- On the report, click the Gear icon, and then click Move.
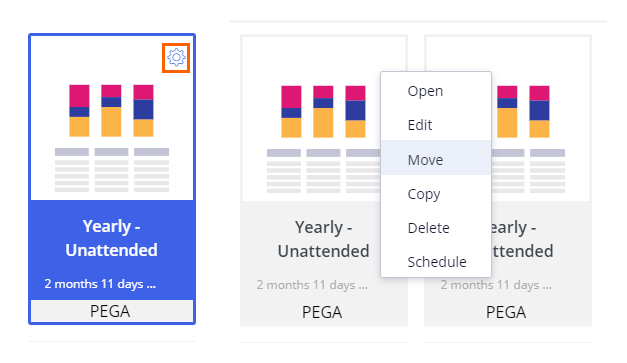
- In the Move report dialog box, in the Report category drop-down, select a category to which you want to move your report. For more information, see Report Categories.
Renaming report columns
You can customize the column names for any report created in Pega Robot Manager.
- Log in to Pega Robot Manager by using a user role that has ReportAdmin or ReportWriter privileges.
- On the Pega Robot Manager dashboard, click Reports to open the reports landing page.
- Select a report to modify, and then click Edit report.

- Hover over the column name, and then click the Open Menu icon.
- In the list of options, click Heading.
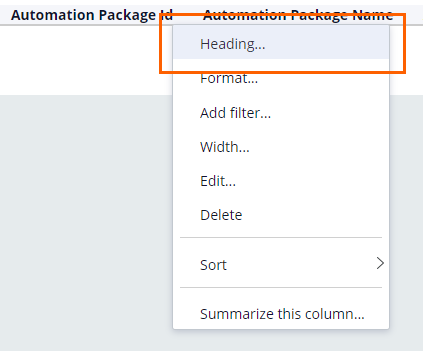
- In the Column heading field, enter a name for the column.
- Click Apply changes to finish configuring the report.
- Click Done editing to save and close the report.
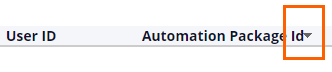
Replacing IDs with labels in reports
By default, some report data uses IDs instead of column names. When modifying a Pega Robot Manager report, you can utilize formatting options to replace table generated IDs with descriptive labels in the following columns: Organization ID, Division ID, Unit ID, User ID, and Workgroup ID.
- Log in to Pega Robot Manager by using a user role that has ReportAdmin or ReportWriter privileges.
- On the Pega Robot Manager dashboard, click Reports to open the reports landing page.
- Choose a report to modify, and then click Edit report.
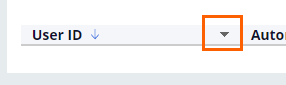
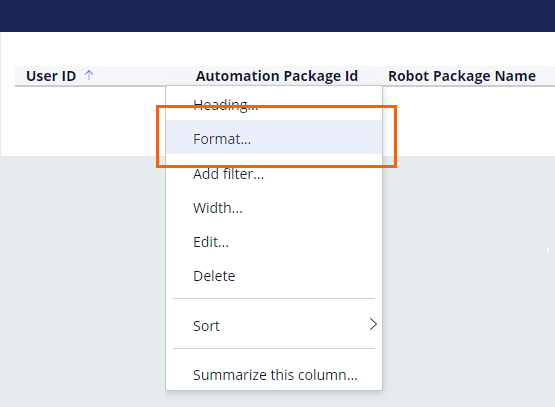
- Next to the column header, click the Open Menu icon.
 Note: If the report does not include the column for which you want to change the ID, drag the column from the Data Explorer section to the report.
 - In the list of options, click Format.
- In the Format values field, enter or select the appropriate value to update.
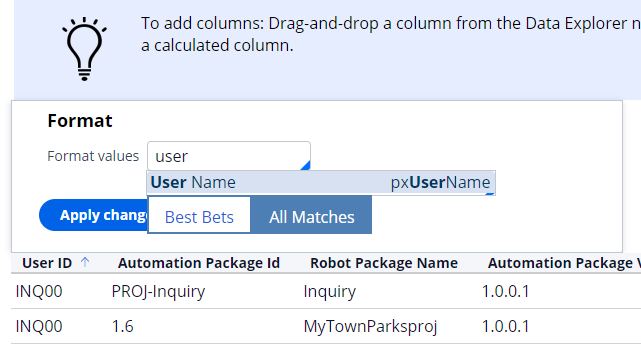
- Click Apply changes.
- Click Done editing to save and close the report.
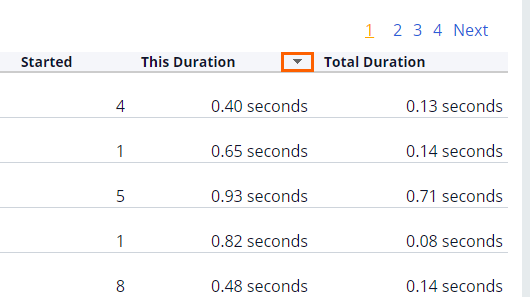
Adjusting duration
Within a report’s duration fields, you can use different time intervals to show duration values that are more applicable to your business needs. For example, using minutes instead of hours for a particular report can give administrators a more in-depth view of an automation’s response.
- Log in to Pega Robot Manager by using a user role that has ReportAdmin or ReportWriter privileges.
- On the Pega Robot Manager dashboard, click Reports to open the reports landing page.
- Choose a report to modify, and then click Edit report.
- Hover over the duration column, and then click the Open Menu icon.
- from the list of options, click Format.
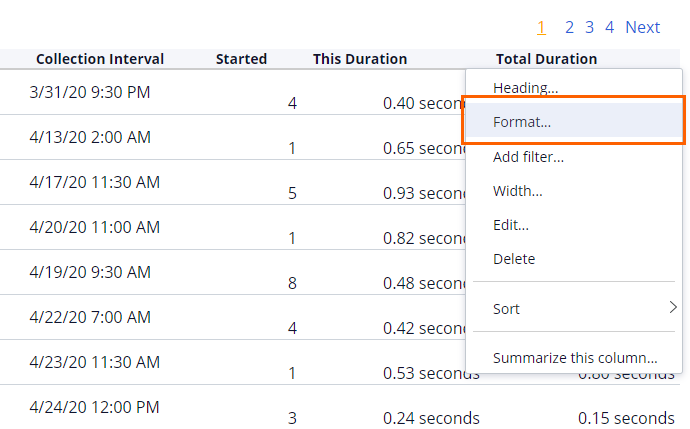
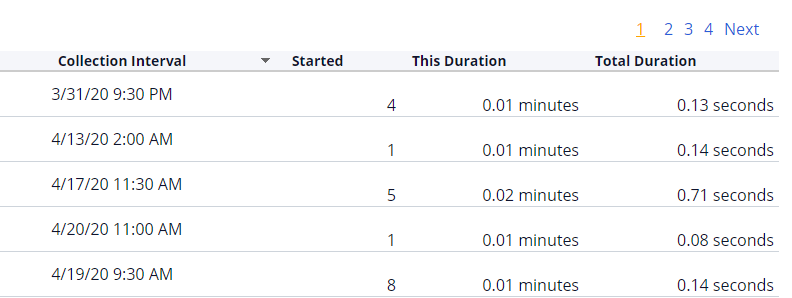
- In the Format values field, enter Duration, and then select one of the options.

- Click Apply changes. The selected column displays the calculated period.
If you are having problems with your training, please review the Pega Academy Support FAQs.
Want to help us improve this content?