
Working on the automation surface
Pega Robot Studio provides several shortcuts that facilitate automation building when adding items from the Palette or the Toolbox to the automation surface.
Displaying the Toolbox on the automation surface
Double-click on the automation surface to display the Toolbox.
Drawing an automation link
From an existing design block on an automation, drag the output automation link and release the mouse button to display the Toolbox. Then, search for and select the desired Toolbox item to add its design block to the automation.

Inserting design blocks from the Palette and Toolbox on an automation link
Drag an application control from the Palette, drop it onto an automation link between two existing design blocks, and then select the required property, method, or event.
If you want to add the first pinned item from the application control's dialog box, hold the key when dragging the block to the automation surface.
You can also insert a design block for an item from the Toolbox between two design blocks by dragging the Toolbox item onto the automation link.
Undo and redo design changes
To undo the previous action, right-click on the automation surface to open the context menu, and then select Undo. You can also use the Edit menu from the Menu toolbar, or the following hotkeys:
| Action | Hotkey |
|---|---|
| Undo | Ctrl + Z |
| Redo | Ctrl + Y |
Undo and Redo work for each automation tab separately. You can undo any action performed on an automation tab, including making changes to the .
Copy and paste
Select the design blocks that you want to edit, and then right-click to open the context menu. You can also use the Edit menu from the Menu toolbar, or the following hotkeys:
| Action | Hotkey |
|---|---|
| Cut | Ctrl + X |
| Copy | Ctrl + C |
| Paste | Ctrl + V |
| Delete | Del |
You can copy selected design blocks between automations.
If you copy design blocks containing application controls to a new automation, the application is automatically included in the target automation. If any design blocks are connected with local instances of Toolbox components, the proper elements are also added as locals within the new automation.
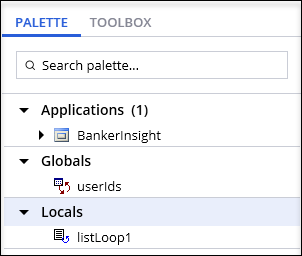
The copy area contains a listLoop component and a text field from the bankerInsight application used in the previous example. After copying, Pega Robot Studio adds the listLoop and the text field to the Palette of the new automation.
Shortcuts on the automation surface
Entering the following shortcuts adds specific items to the automation surface. Right-clicking the automation surface, and selecting Add also allows access to the available shortcuts for your automation.
|
Action |
Hotkey |
|---|---|
|
Comment |
Ctrl+Shift+M |
|
Entry point |
Ctrl+Shift+E |
|
Exit point |
Ctrl+Shift+X |
|
Label |
Ctrl+Shift+L |
Note: After you add an Entry point to an automation, the option in the context menu becomes an Exit point.
Arrange blocks
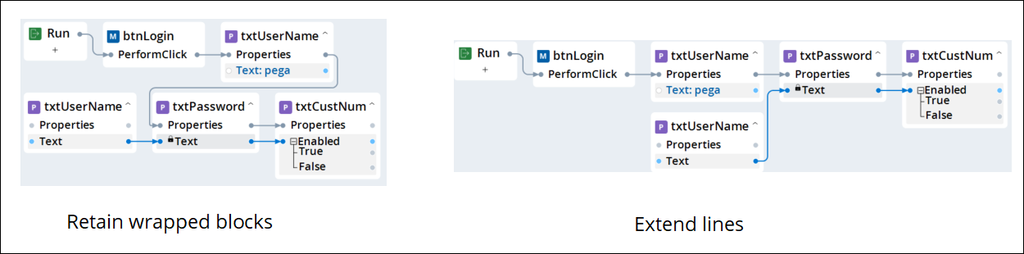
With a single click, the Arrange blocks option groups and aligns design blocks by either extending them into a single line (Extend lines) or wrapping them into a series of rows (Retain wrapped blocks), as shown in the following figure:
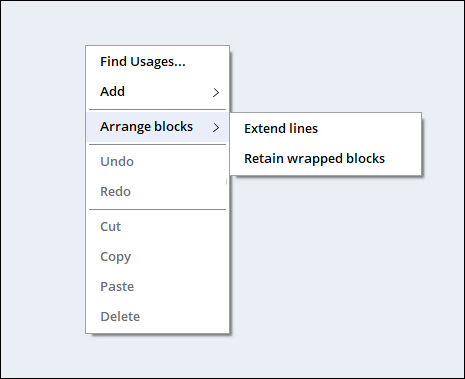
Right-clicking the automation surface, and then selecting Arrange blocks displays the options, as shown in the following figure:
In addition to using the menu option, you can set your preferred Arrange blocks option using the Ctrl+Shift+A hotkey. For more information on configuring the Arrange blocks option, see Automation designer options.
Find Usages
The Find Usages option determines how frequently a design block occurs in the project where the window groups usages by where the automation uses them. The first step in replacing all controls or values occurrences is to locate usages, as shown in the following figure. For more information, see Replacing usages of design blocks.
Replace
Use the option to open the Select action dialog box and change the selected property, method, or event. You can only use the option to change a property to a different one, not a method or event. The following figure shows how you can access by right-clicking a design block:
Note: The Select action dialog shows only the options for the type of control selected: property, method, or event.
Check your knowledge with the following interaction:
This Topic is available in the following Modules:
If you are having problems with your training, please review the Pega Academy Support FAQs.
Want to help us improve this content?