Adding fields to Views
4 Tasks
20 mins
Beginner
Data Integration
User Experience
Constellation
English
Scenario
Now that the Stages, Steps, and data objects for the MyTown 311 Service Request Case Life Cycle are configured, the Mayor and the Services coordinator have determined that additional information is necessary for the Services coordinator and Technical team to complete their Tasks more efficiently. Configure the additional fields needed to collect the information and add them to the Views for the associated Steps.
Some of the Service Request Case Type Views have previously been configured by a different MyTown developer.
Note: The framework of this challenge uses the Constellation architecture of Pega Platform™. To practice this challenge on the Traditional UI architecture, see the Adding fields to Views version 8.7 challenge.
The following table provides the credentials you need to complete the challenge.
| Role | User name | Password |
|---|---|---|
| Application Developer | author@mytown | pega123! |
Note: Your practice environment may support the completion of multiple challenges. As a result, the configuration shown in the challenge walkthrough may not match your environment exactly.
Challenge Walkthrough
Detailed Tasks
1 Add a picklist field to the Request data object
- In the Pega instance for the challenge, enter the following credentials:
- In the User name field, enter author@mytown.
- In the Password field, enter pega123!.
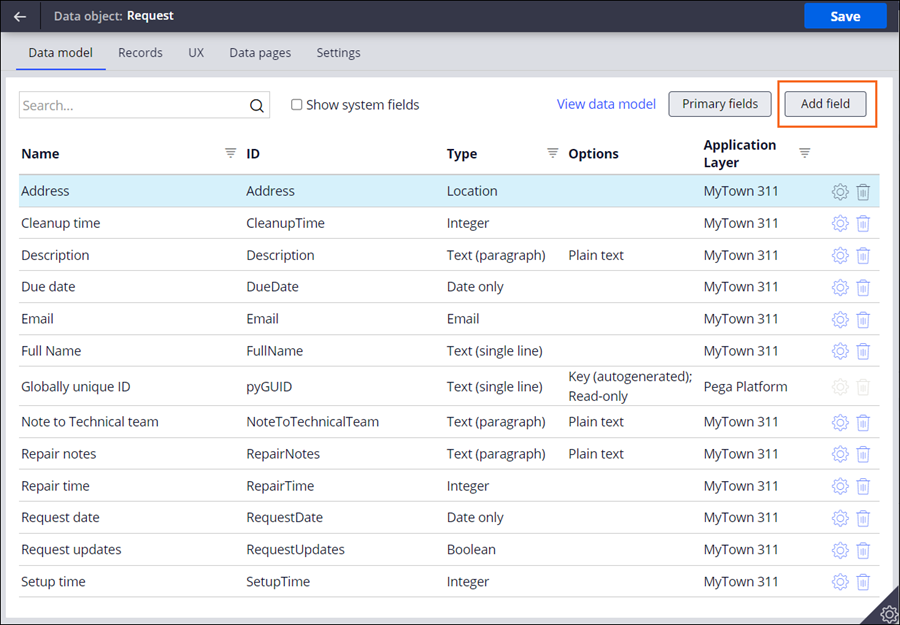
- In the App Studio navigation pane, click Data > Request to display the Request data object.
- In the Request data object, click Add field to add a new field.
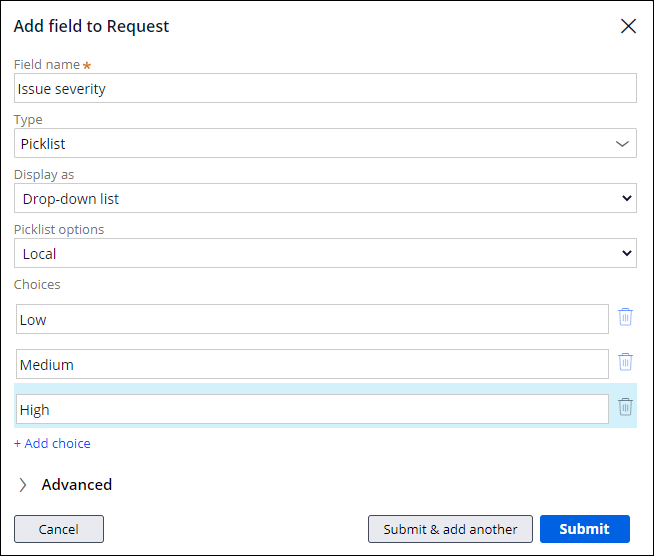
- In the Field name field, enter Issue severity.
Tip: The system uses the name of the field to predict the Field Type. When creating a field, make sure to always verify the Field Type by clicking or tabbing to the Field Type list before clicking Submit.
- In the Type list, select Picklist.
- In the Display as and Picklist options fields, keep the default values.
- In the Choices section, click Add choice. An empty field is displayed.
- In the Empty field, enter Low as a picklist value.
- Repeat steps 5b-5c to create two additional picklist values, Medium and High.
- Click Submit & add another to add another field to the Request data object.
2 Add a calculated field to the Request data object
- In the Field name enter Total time.
- From the Type list, select Integer.
- Expand the Advanced section, and then select This is a calculated field (read-only).
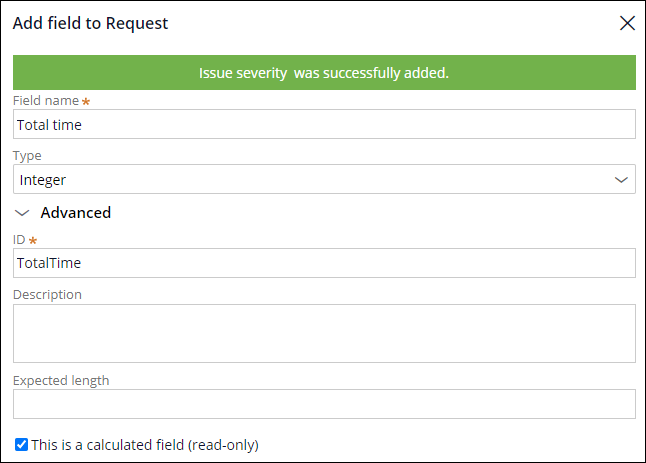 Note: Calculated fields are automatically displayed as Read-only. These fields cannot be edited during run-time.
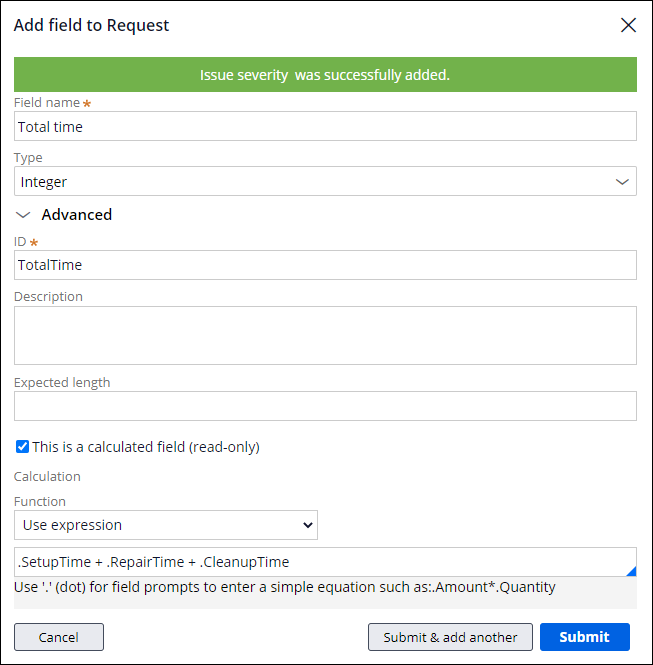
 - In the Function list, select Use Expression. An empty field is displayed below.
- In the empty field, enter .SetupTime + .RepairTime + .CleanupTime.
- Click Submit to add the calculated field to the Request data object.
- Click Save to save your changes to the Request data object.
3 Adding fields to Views
- In the App Studio navigation pane, click Case Types > Service Request to display the Service Request Case Life Cycle.
- In the Service Request Case Type, click the Report problem Step to open the contextual property pane on the right.
- In the contextual property pane, click Configure View to add a field to the View.
- Under the Fields section, click Add.
- Click Fields.
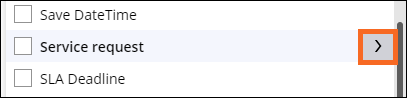
- To the right of Service request, click the arrow.
- Click Fields.
- Select Issue severity.
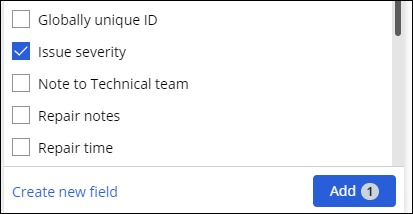
- Click Add.
- Using the left-side Direction icon, drag the Issue severity (ServiceRequest) field and drop it above the Description (ServiceRequest) field.
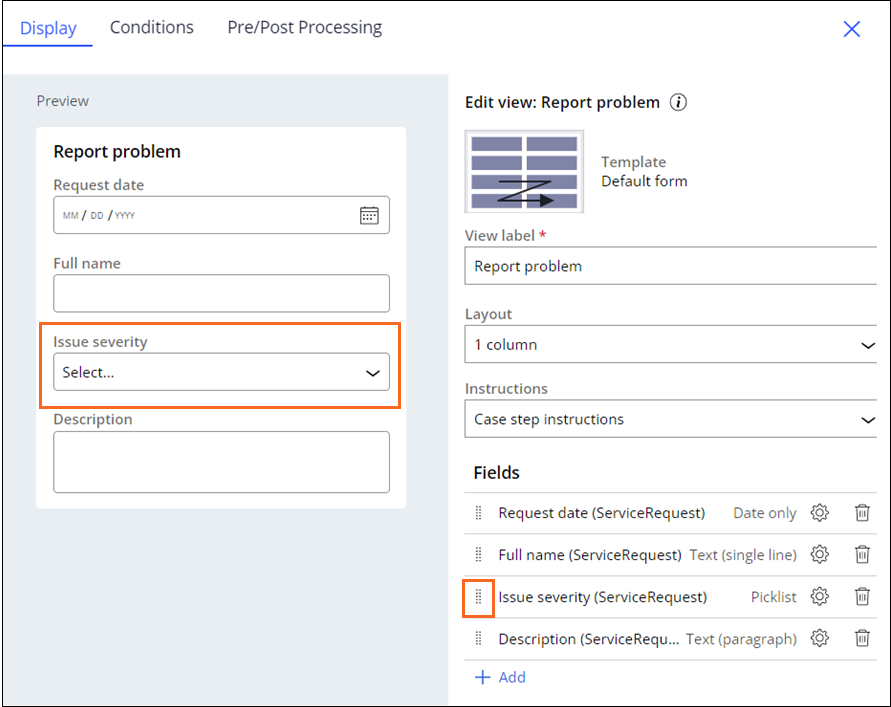
- Click Submit.
- In the Service Request Case Type, click the Perform repair Step to open the contextual property pane on the right.
- In the contextual property pane, click Configure View to add a field to the View.
- Under the Fields section, click Add.
- Click Fields.
- To the right of Service request, click the arrow.
- Click Fields.
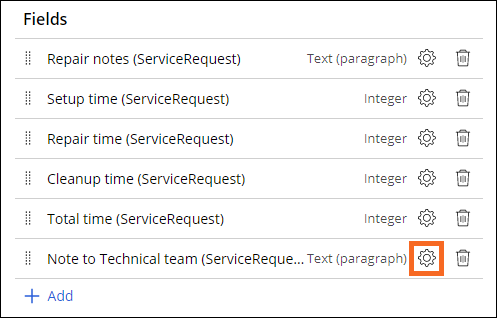
- Select Note to Technical team and Total time and click Add.
4 Configuring a read-only field in the Perform repair View
- In the Perform repair View, click the Configure icon to the right of Note to Technical team (ServiceRequest).
- In the Edit mode list, select Read-only.
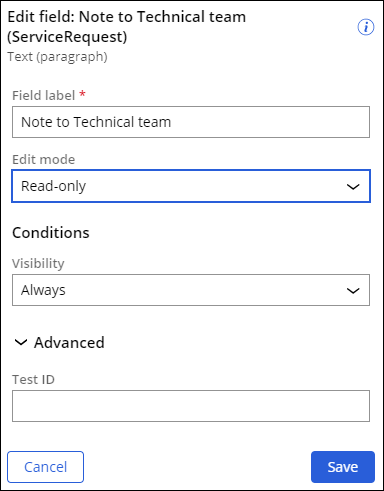
- Click Save.
- Using the left-side Direction icon, drag the Note to Technical team (ServiceRequest) field and drop it above the Repair notes (ServiceRequest) field.
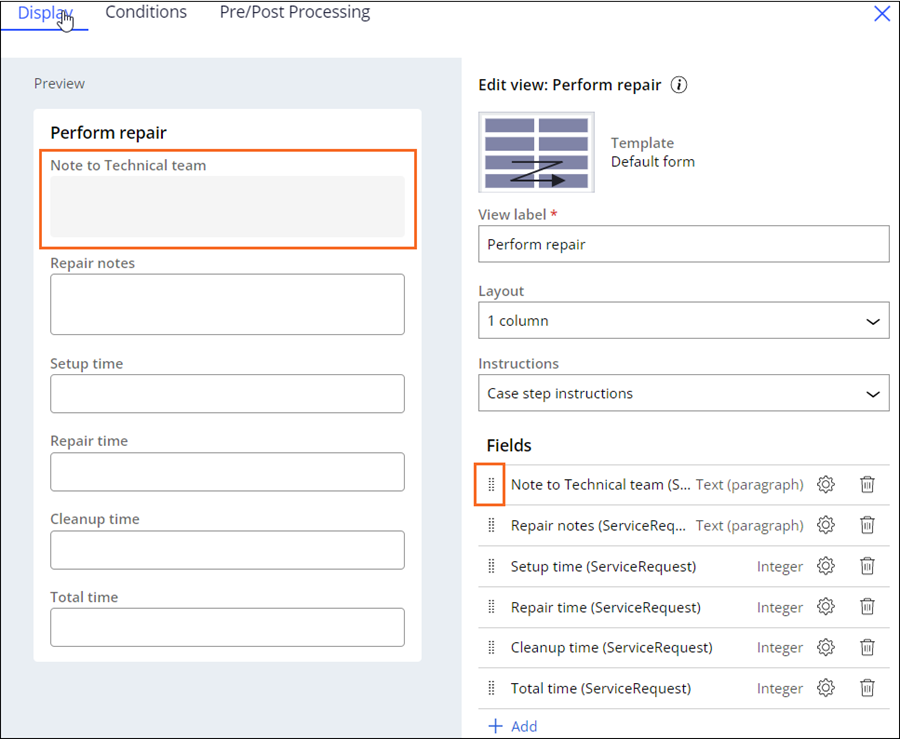
- Click Submit.
- In the upper right of the Service Request Case Life Cycle, click Save.
This Challenge is to practice what you learned in the following Module:
Available in the following missions:
If you are having problems with your training, please review the Pega Academy Support FAQs.
Want to help us improve this content?