Adding a new property to an existing entity
4 Tasks
20 mins
Intermediate
English
Scenario
U+ Bank wants to improve the experience of its customers with personalized decisions that are driven by customer-centric engagement policies and predictive models. After an initial data mapping exercise, U+ Bank confirms that the Pega financial data model is a great match. Following the Pega-recommended approach, the project team built the implementation application of Pega Customer Decision Hub™ using the setup wizard.
As a decisioning architect, your role is two-fold:
- Review the data model that is set up by the wizard
- Perform a gap analysis by leading a data mapping workshop with the stakeholders.
As the output of the gap analysis, the project team identified the need to create the following extension for the existing customer entity:
- The business leads need a new property: GoPaperless. This property is used to determine if a customer has opted-in to paperless delivery for statements.
As the decisioning architect, first capture the requirements into the Pega Financial Services xCAR Data Model, and then work with the system architects to extend the data model in Customer Decision Hub.
Use the following credentials to log in to the exercise system:
| Role | User name | Password |
|---|---|---|
| System architect | SystemArchitect | rules |
| Decisioning architect | DecisioningArchitect | rules |
Your assignment consists of the following tasks:
Task 1: Download the data model documentation
As a decisioning architect, download the Financial Services Customer Analytical Data Model documentation from Pega Marketplace.
Task 2: Review and extend the data model documentation
As a decisioning architect, review the downloaded data model and capture the following requirements to the Pega Financial Services xCAR Data Model Excel.
- Review the data model.
- Update the documentation and add the following property to the customer data model:
Attribute Description Update frequency Data type GoPaperless
A flag that identifies if the customer has opted-in to paperless delivery. The property can be added to the customer class. "Y" indicates opt-in, "N" indicates the opt-out.
Updated daily
Text
Caution: For the purposes of the exercise, this task is added to raise awareness. There is no integration between the XLSX file and the Pega data model. The changes made in the XLSX file are for documentation purposes and help you understand the existing data model.
Task 3: Expose and map a single property
As a system architect, create and expose the GoPaperless property. Update the customer record for Troy (CustomerID : 14) and set the GoPaperless property value with "Y".
Caution: For the purposes of the exercise, the customer data is pre-populated for you.
Task 4: Verify your work
As a system architect, use the Customer data set to confirm the value of GoPaperless property is updated with the value "Y" for Troy.
Challenge Walkthrough
Detailed Tasks
1 Download the data model documentation
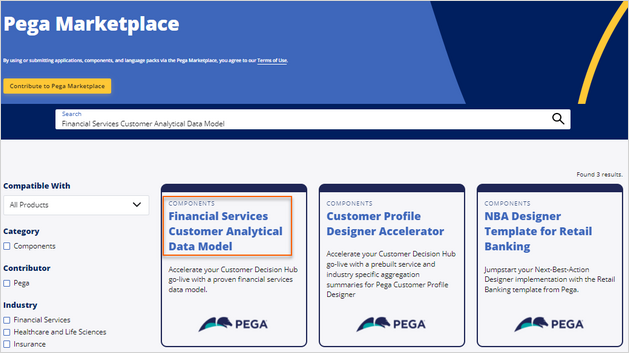
- On your browser, go to Pega Marketplace.
- In the search field, enter Financial Services Customer Analytical Data Model, then click the search icon.
- On the results page, click Financial Services Customer Analytical Data Model.
- On the Financial Services Customer Analytical Data Model page, under Resources, click Data model documentation to download the latest Pega Financial Services xCAR data model documentation file.

- Open the downloaded XLSX file to review the contents.
2 Review and extend the data model documentation
Caution: For the purposes of the exercise, this task is added to raise awareness. There is no integration between the XLSX file and the Pega data model. The changes made in the XLSX file are for documentation purposes and help you understand the existing data.
- In the XLSX file, click the Data Model tab, to review the data model
- On the Data Model tab, add the new GoPaperless property and its details.
 Note: The figure uses sample values of the GoPaperless property and are not required for the completion of the challenge.
- In the XLSX file, on the Technical Details tab, add the new GoPaperless property and its technical details.
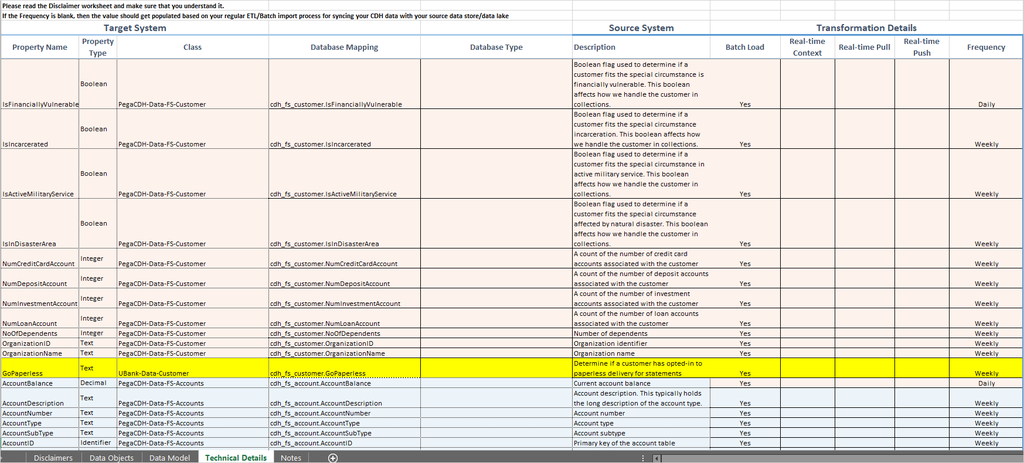 Note: The figure uses sample values of the GoPaperless property and are not required for the completion of the challenge.
3 Expose and map a single property
- On the exercise system landing page, click Pega CRM suite to log in to Customer Decision Hub.
- Log in as the system architect with User name SystemArchitect and Password rules to open Dev Studio.
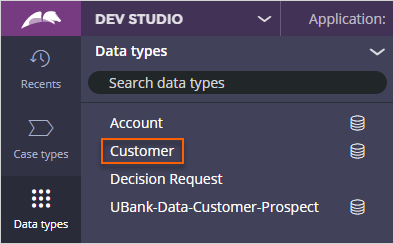
- In the navigation pane of Dev Studio, click Data types.
- In the list of Data types, click Customer to see the customer data model.
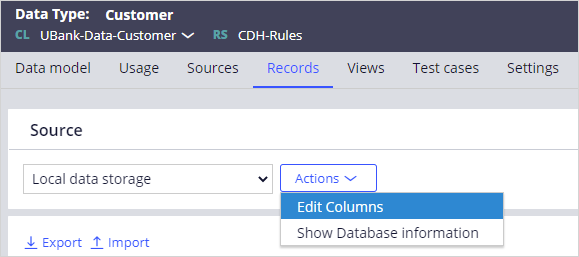
- In the Data Type: Customer page, click the Records tab.
- On the Records tab, in the Source section, in the Actions list, select Edit Columns to add a new column.
- In the Edit Columns window, at the end of the list, click the + icon to add a new row.
- In the first field, enter GoPaperless, and then click Submit to add the new property.
 Tip: Now you created a new database column in the database and a corresponding property in Pega.
- On the Records tab, scroll to the right of the page to locate the recently added GoPaperless column.
- In the GoPaperless column, in the first row, click the field to edit.
- In the GoPaperless column, enter Y .
- Click outside the row to save the value.
 Note: For the purposes of the exercise, the customer data is pre-populated for you.
 - On the upper-right, click Save.
Tip: Now you updated the database record for Troy and set the GoPaperless property with the value "Y" (CustomerID = 14).Note: In a real-life scenario, you can create a new database column in other ways. Choose the method that fits your use case.
A database administrator can run scripts to extend the database table and add new columns. You can then manually create the property in Pega.
You can expose the property from Dev Studio using Property Optimization tool, which creates the database column. For more information, see the Pega System Administration Guide.
You can expose the property from Dev Studio using Data type explorer, which creates the database column. For more information, see the Pega Data Management and Integration Guide.
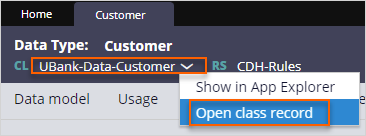
- In the header of the Data Type: Customer tab, click UBank-Data-Customer > Open class record to open the class definition.
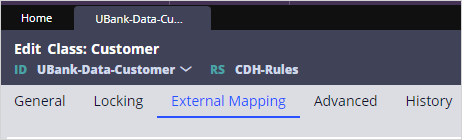
- Click the External Mapping tab to add a new mapping.
- Scroll down and click the + icon to add a new row.
- In the first field, enter gopaperless.
- In the second field, enter .GoPaperless.
 Caution: If you use Customer Decision Hub for outbound marketing, specifically the segmentation feature, update the external mapping tab of your class.
- On the upper-right corner, click Save.
- Click the General tab to test your connection.
- At the bottom of the page, in the Test connection section, click the Test connection button to confirm that the GoPaperless mapping has no issues.
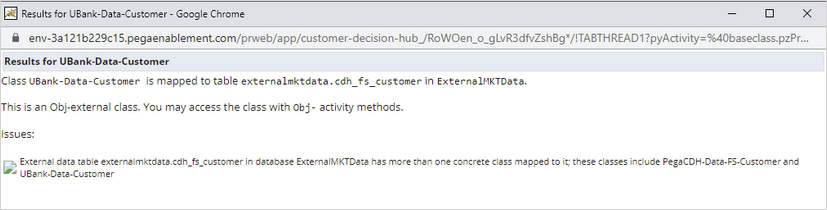 Note: In this exercise system both PegaCDH-Data-FS-Customer and UBank-Data-Customer classes that is set up by the wizard share the same database table. This is expected.
- Close the confirmation window.
- On the upper-right corner, click Save.
4 Verify your work
- In the header of Dev Studio, in the Search field, enter Customer, and then press Enter.
- In the third list, select Exact Match.

- In the results, select the Customer data set in the UBank-Data-Customer class.

- In the third list, select Exact Match.
- In the upper-right corner, click Actions > Run, to browse the customer data set.
- In the Run Data Set: Customer window, select the following configuration elements:
- In the Operation list, select Browse by keys.
- In the Key list, select CustomerID.
- In the Value field, enter 14.
- On the upper-right, click Run.
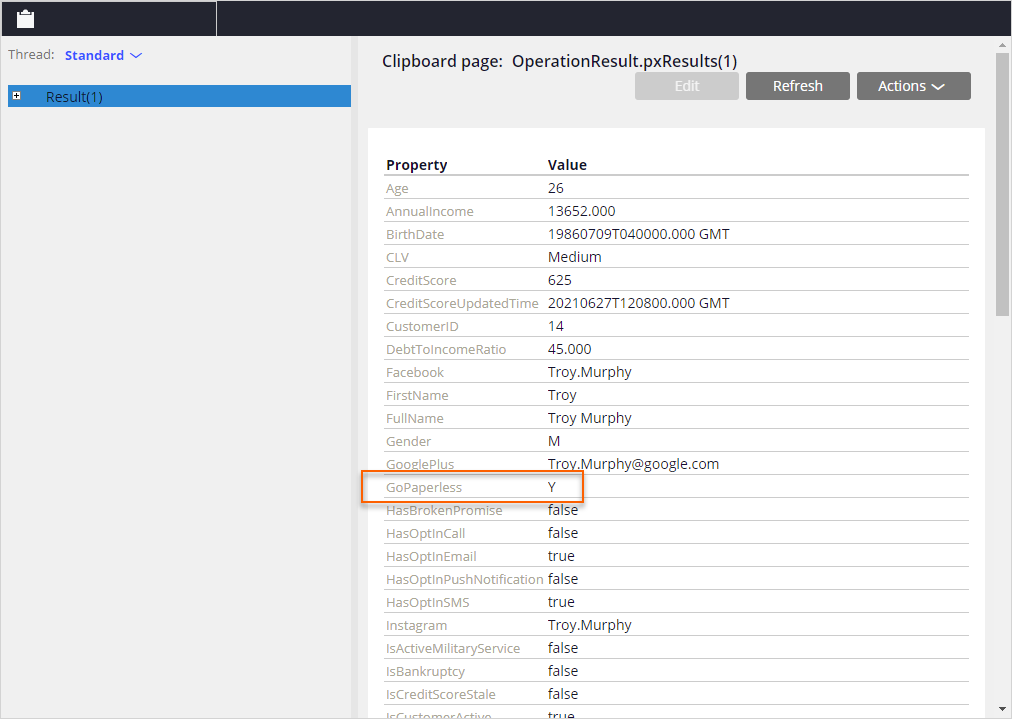
- Confirm that the GoPaperless property has the value Y.
If you are having problems with your training, please review the Pega Academy Support FAQs.
Want to help us improve this content?