Queuing a task for background processing
1 Task
30 mins
Scenario
To reduce errors and complaints with payroll processing, the Human Resources department allows employees of TGB to enroll in direct deposit. When employees enroll, their paycheck is automatically deposited into their checking account when the accounting department processes the company payroll.
To automate payroll processing and avoid both case processing delays and performance impacts during peak business hours, add a step to the case life cycle to queue the creation and sending of an email once the user completes a Payroll Setup case.
The following table provides the credentials you need to complete the challenge.
| Role | User name | Password |
|---|---|---|
| Senior System Architect | SSA@TGB | pega123! |
Note: Your practice environment may support the completion of multiple challenges. As a result, the configuration shown in the challenge walkthrough may not match your environment exactly.
Challenge Walkthrough
Detailed Tasks
1 Create Run in background and confirmation steps
- In Dev Studio, configure the Payroll Setup case as shown in the following image.
- Change the name of the Run in background step to Upload payment information.
-
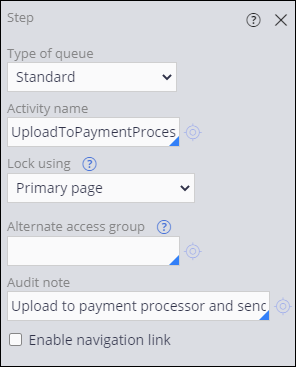
In the contextual properties panel for the Run in Background step, use the information in the following table to configure a standard queue type to run the UploadToPaymentProcessor activity.
Field Value Type of queue Standard Activity name UploadToPaymentProcessor Lock using Primary page Alternate access group Audit note Upload to payment processor and send confirmation email Tip: The activity must already exist prior to the configuration of a standard queue processor. The UploadToPaymentProcessor activity sends an email using the call method.Note: By default the queue processor uses the access group of the user who queued the item. - After the Upload payment information step, add a Payroll information received send email step, to confirm that the payroll information is received.
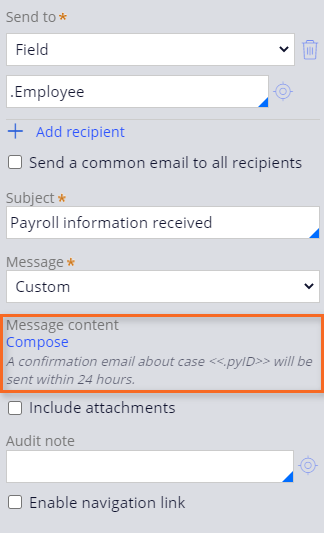
- In the contextual properties panel for the Payroll information received step, update the fields to match the table and image below:
Field Value Send to drop-down Field Send to recipient .Employee Subject Payroll information received Message Custom Compose A confirmation email about case <<.pyID>> will be sent within 24 hours. - Save your changes.
Confirm your work
- Create a new Payroll Setup case.
- Complete the Collect employee information form by using a valid email address.
- Click Submit
- Advance the case to the Complete enrollment stage.
- In the Review selections view, click Submit to complete the case with a Resolved-Completed status.
- Verify the confirmation emails are present on the case.
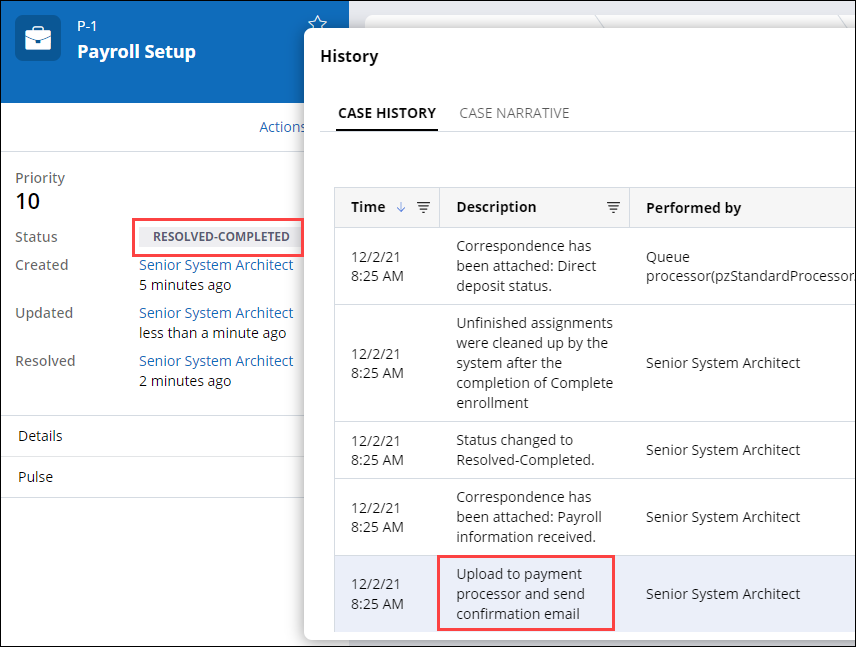
- Click Actions > View history and locate the audit note you entered for the Run in Background step to verify the standard queue processor ran.
Note: You may need to refresh the case after 1-2 minutes to see the audit note and the email sent by the activity.
- From Admin Studio, click the Queue processors tile to view the list of queue processors.
- Verify that the Ready to process column is zero to confirm the case step processed.
Note: The Processed in the last hour column may reflect the standard queue item you just ran. However, the field may also reflect other background processes occurring in the system at the same time.
This Challenge is to practice what you learned in the following Module:
Available in the following mission:
If you are having problems with your training, please review the Pega Academy Support FAQs.
Want to help us improve this content?


