
Configuring a full Case View
2 Tarefas
10 min
Beginner
User Experience
Constellation
Inglês
Scenario
The Mayor and Services Coordinator requested a single View to track updates while running Service Cases. The Services Coordinator requested a History tab on the full Case View instead of History being under the Pulse tab. Configure the full Case View to display the requested information when processing a Service Case.
Nota: The framework of this challenge uses the Constellation architecture of Pega Platform™.
The following table provides the credentials you need to complete the challenge:
| Role | User name | Password |
|---|---|---|
| Application Developer | author@mytown | pega123! |
Nota: Your practice environment may support the completion of multiple challenges. As a result, the configuration shown in the challenge walkthrough may not match your environment exactly.
Challenge Walkthrough
Detailed Tasks
1 Configure the summary information in the full Case View
- In the Pega instance for the challenge, enter the following credentials:
- In the User name field, enter author@mytown.
- In the Password field, enter pega123!.
- Click Case Types > Service Request to display the Case Life Cycle.
- Click the UX tab to display the Full Page View configuration pane.
- In the Heading list, select Case ID to display the Case ID at the top of the Preview View.
- In the Subheading list, select Label to display the Case Type label below the Case ID.
- In the Highlighted fields area, confirm that the Urgency and Work Status fields are present.
- In the Summary area, click Add > Fields to add information to display in the Case summary data.

- Select the Create date/time, Create Operator, Update date/time, and Update operator name fields, then click Add.
- To the right of the Create operator widget, click the Remove icon.
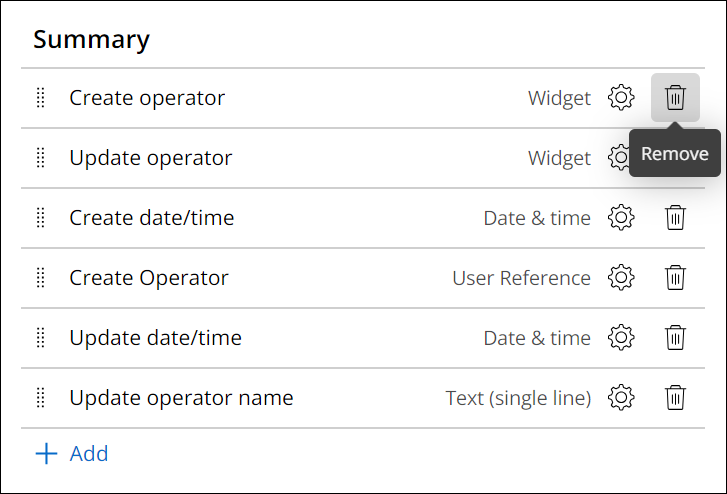
- Repeat step 9 to remove the Update operator widget.
2 Configure the tabs and utilities in the full Case View
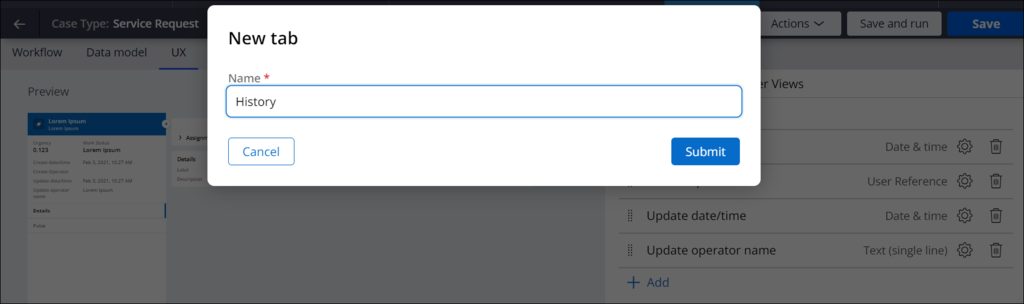
- In the area, click Add to display the dialog box.
- In the Name field, enter History to name the new tab and then click Submit.
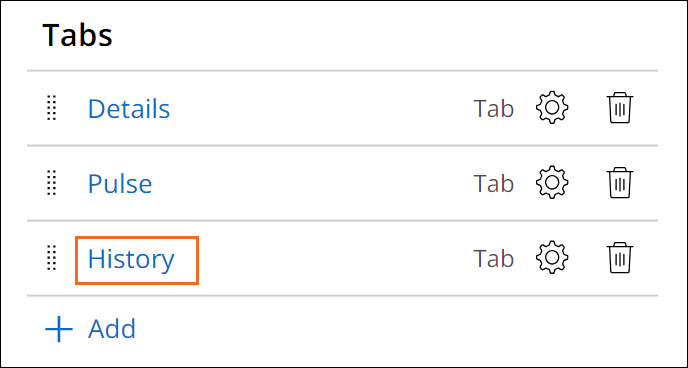
- Click History to display the Edit tab: History configuration pane.
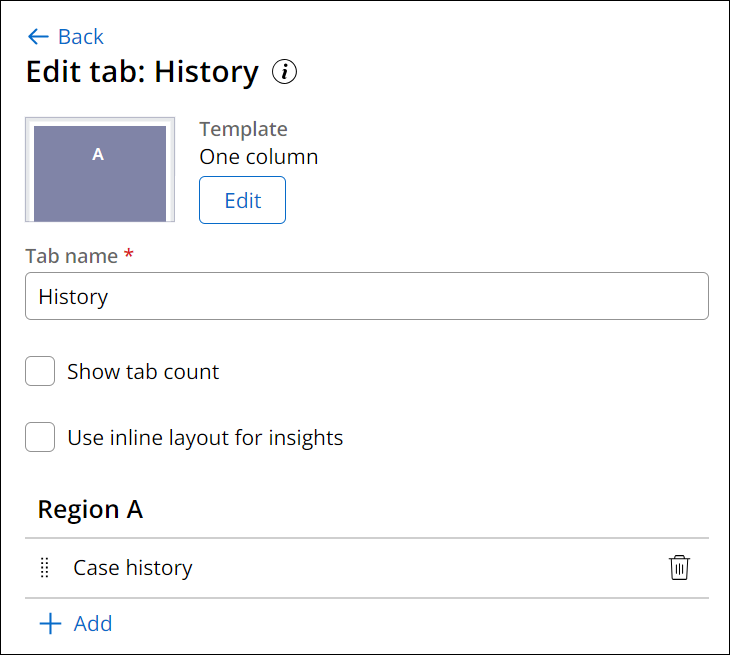
- In the Region Asection, click Add > Widgets > Case history and then click Add.
- Click Back to return to the Full Page View configuration pane.
- Click Pulse to display the Edit tab: Pulse configuration pane.
- To the right of the History tab, click the Remove icon.
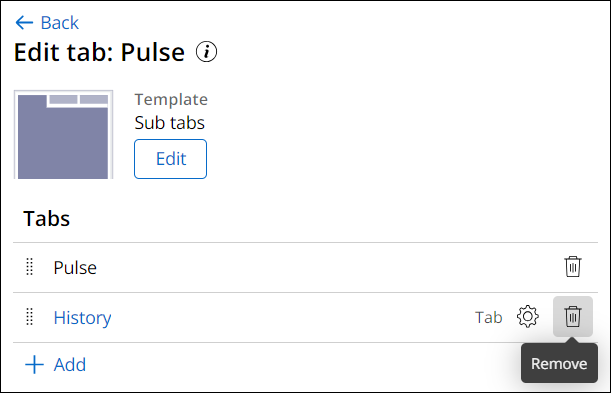
- Click Back to return to the Full Page View configuration pane.
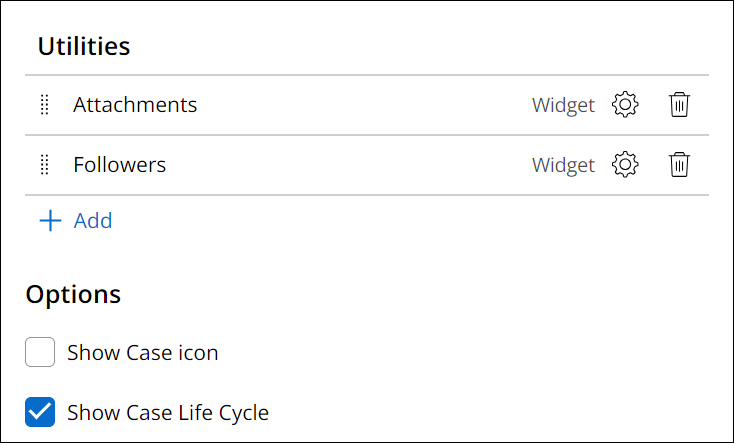
- In the section, confirm that the Attachments and Followers widgets are present.
- In the section, clear the Show Case icon checkbox.
- Click Save to save the changes to the Service full Case View.
Este Desafio serve para praticar o que você aprendeu nos seguintes Módulo:
Disponível na seguinte missão:
If you are having problems with your training, please review the Pega Academy Support FAQs.
Quer nos ajudar a melhorar esse conteúdo?