
Configuring Message Manifest
Configuring Message Manifest
Configuring Message Manifest in a project requires two processes: adding message definitions and adding the MessageManifest component.
Add message definitions
- In the Solution Explorer, right-click the project and select Properties to display the properties of the project.
- On the Application tab of the project properties, select the Message Definitions property to highlight it and display the ellipses.
- In the Message Definitions property, click the ellipses to display the Message Definitions window.
- In the Message Definitions window, click Add to create a row to add a message definition.
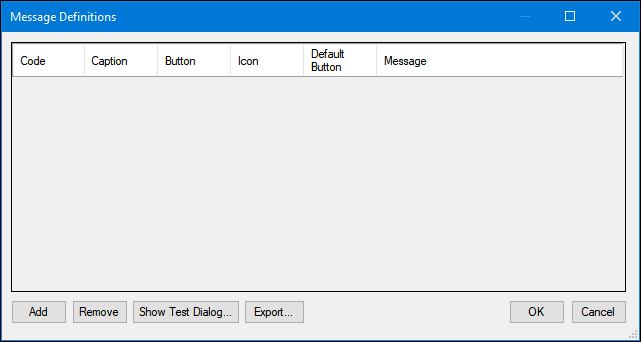
- In the definition row:
- Enter a Code.
- Enter a Caption.
- Select a Button combination.
- Select an Icon.
- Select the Default Button.
- Enter a Message
Note: Click the ellipses to access the Editor window. To include variable inputs, insert a number within braces, beginning with zero. Click OK to close the Editor Window.
- On the Message Definitions window, click OK to close the window.
- On the menu bar, click File > Save All to save the message definitions.
Note: Repeat this for each message definition and for each project in a solution.
Add MessageManifest component
- In the Solution Explorer, double-click the global container in the project to open the item in the design area.
- In the Toolbox window, click the Search field to enter a value.
- In the Search field, enter message and press the Enter key.
- In the Toolbox window, drag and drop the MessageManifest component to the global container.
- From the menu bar, click File > Save All to save your changes.
If you are having problems with your training, please review the Pega Academy Support FAQs.
Want to help us improve this content?