
Creating a composite tab
Customer Composite Tabs
Customer composite tabs allow you to customize the user interface and display the most relevant data to a customer service representative (CSR) during a call in an organized way. You can add required tabs quickly from App Studio and start realizing value quickly.
Once you add a tab, you can configure it in Design mode. In Design mode, you can configure the layout and widgets in the tab.
Create a customer composite tab
Myco, a telecommunications company, deals with a large amount of customer data, which leads to content overload on the business users. To avoid overload, the company decides to organize data by using the customer composite feature. The company now wants to create a composite tab to organize the customer account summary.
To start, log in as the customer service application administrator, and then click Settings > Interactions > Customer composite.
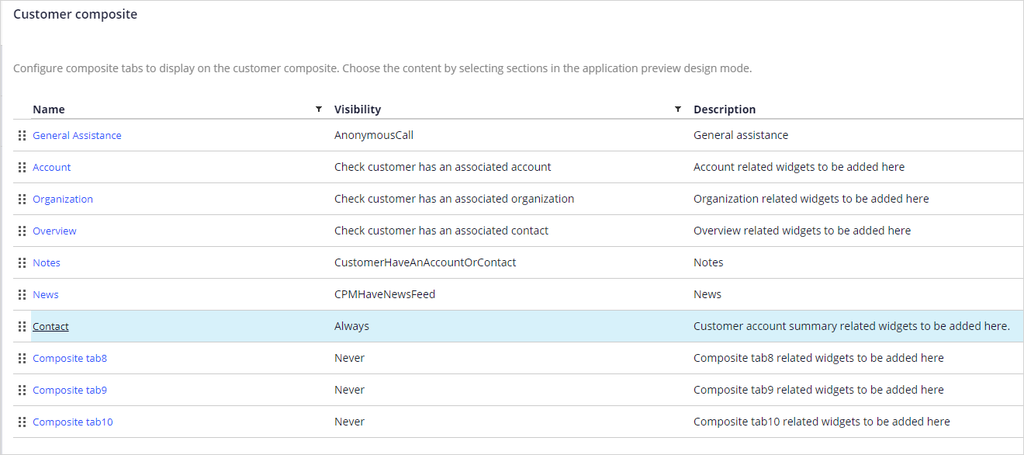
On the Customer composite landing page, click Configure tabs to see the list of pre-populated composite tabs. Now, the system supports only ten composite tabs. You can update the existing composite tabs as per the business requirement.
In this scenario, you can double-click the unconfigured composite tab.
Enter a Name and Description for the composite tab. In the Name field, enter a unique composite name. In the Description field, enter details about the purpose of the composite tab.
Now add visibility conditions on the composite tab. Using the visibility conditions, you can show or hide the composite tab to the CSR during a call with a customer in the Interaction Portal. For example, a bank might show only a corporate Account tab if it is working with a business and not an individual.
If you set the visibility condition as Always visible, then the composite tab is visible in all the customer interactions. If you select Visibility is conditional, then all the business conditions defined in Tools appear in the visibility list. In this scenario, you can select default option, Always visible, to display the Contact tab in all interactions.

Submit and then Save to save the changes.
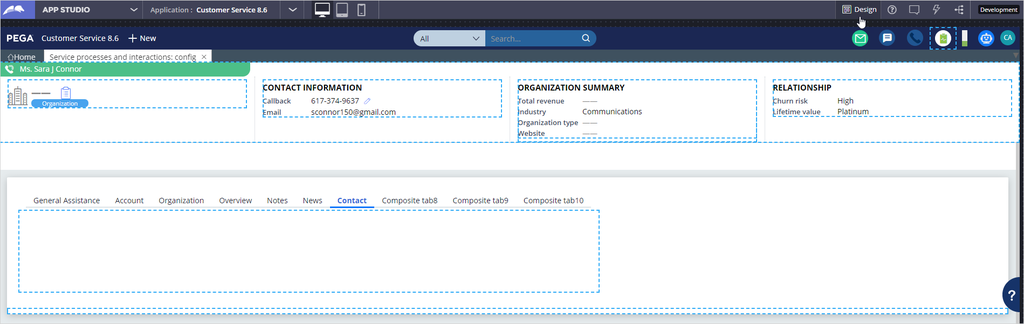
Click Preview application to launch the Interaction Portal.
In the Interaction Portal, click New > Configure customer composites to add sections to the Contact tab.

In this scenario, the company wants to organize the customer account summary. Click the Contact tab, and then click Design mode to add the content by selecting sections per the business requirement.
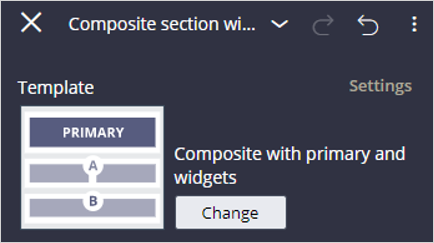
Now, edit the Workarea to add sections to the tab. The default template format of all the composite tabs is the composite with primary and widgets template. If you add sections in the Primary view, then the added sections occupy the full screen in the horizontal view. If you add sections in the A and B, then each section takes up half of the screen in the vertical view. You can change the template by clicking the Change option on the upper-right corner of the pane.
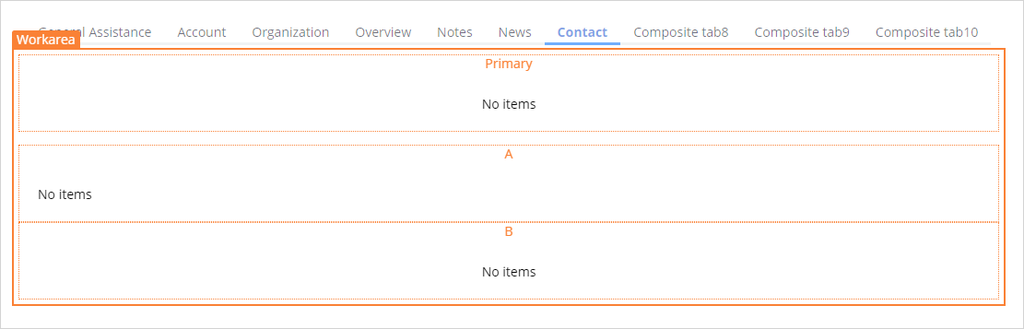
For this scenario, add the content by selecting sections in the default template to display the customer account summary.
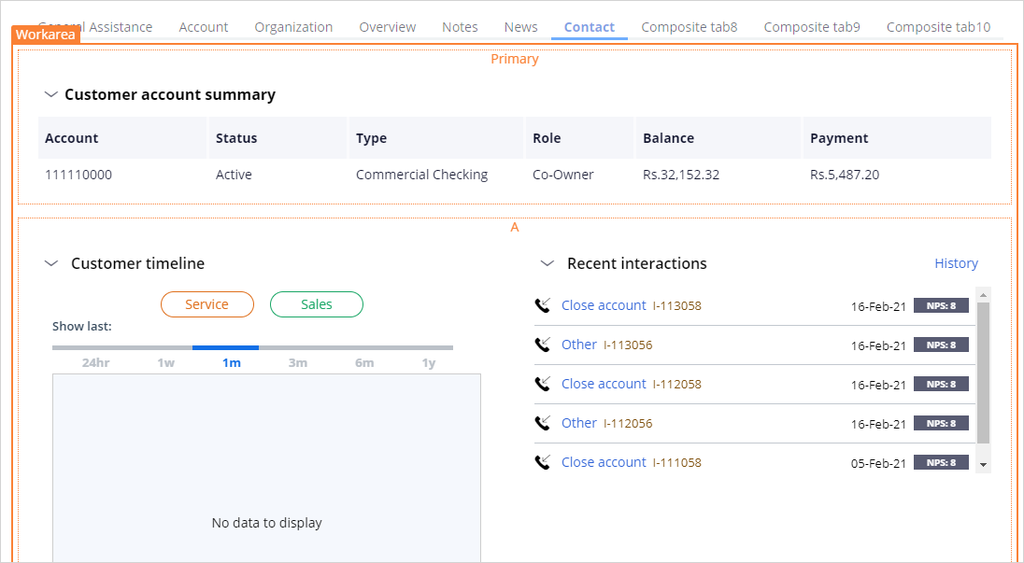
Once you successfully add the sections, close the pane, and click the Design tab to freeze the data in the Contact tab.

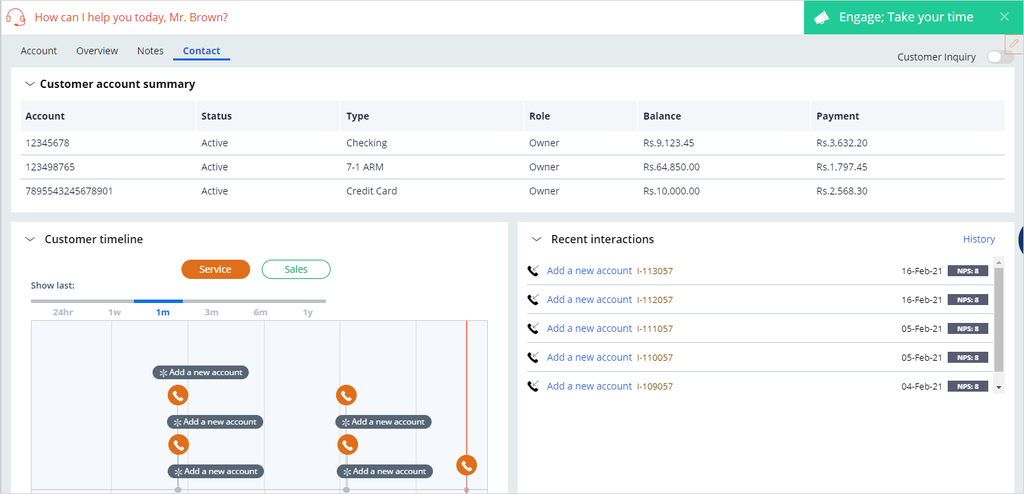
In the Interaction Portal, click New > Demo Screen Pops > Demo Pop - BROWN to interact with John Brown. Notice that the Contact tab you added is displayed with the data.
Now, start an interaction with Sara Connor and check. Do you see the Contact tab? If yes, why does it show up on her profile? The tab is displayed because you set the visibility condition as Always visible. As a result, the Contact tab is displayed for all customer interactions.
This topic has concluded. You learned:
- What customer composite is
- How to create the composite tabs to meet the business requirements
If you are having problems with your training, please review the Pega Academy Support FAQs.
Want to help us improve this content?