Adding dynamic functionality to a button
Archived
3 Tasks
10 mins
Beginner
User Experience
English
Scenario
After a request for roadside assistance is approved, a service provider is dispatched to the location provided by the customer. To perform this task, customer service representatives (CSRs) request the ability to verify and modify the service address when selecting the service provider.
Add a button to the Select service provider view so that the CSR can verify the service address submitted by the customer.
The following table provides the credentials you need to complete the challenge.
| Role | User name | Password |
|---|---|---|
| Application Developer | author@gogoroad | pega123! |
Note: Your practice environment may support the completion of multiple challenges. As a result, the configuration shown in the challenge walkthrough may not match your environment exactly.
Challenge Walkthrough
Detailed Tasks
1 Add a button to the Select service provider view
- In the navigation pane of App Studio, click Case types > Assistance Request.
- Click Save and run to create a new Assistance Request case.
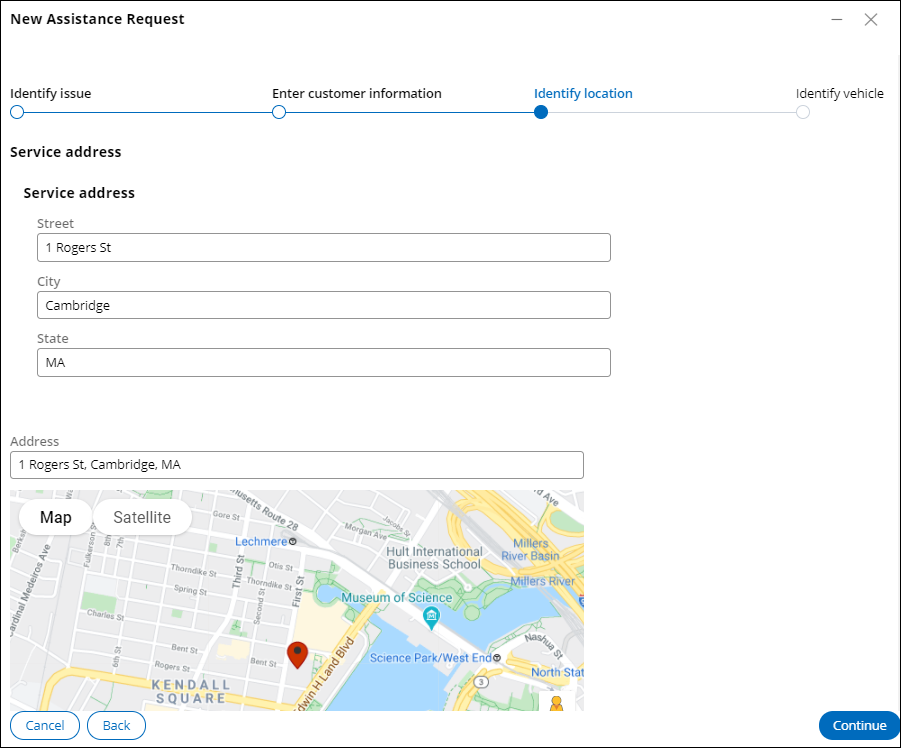
- Advance the case to the Identify location step, and then enter an address in the Street, City, and State fields.
Note: The Address field is populated when you progress to the Identify vehicle step.
- Advance the case to the Select service provider step, entering information in all required fields.
- In the header of App Studio, click Design to enter the design mode.
- Under the Select service provider label, hover over the map section, and then click Edit this section to open the Select service provider configuration pane on the right.
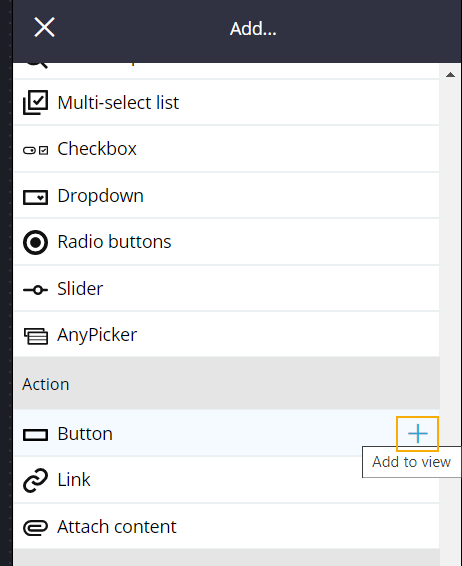
- In the configuration pane, click the Add icon to select a UI element.
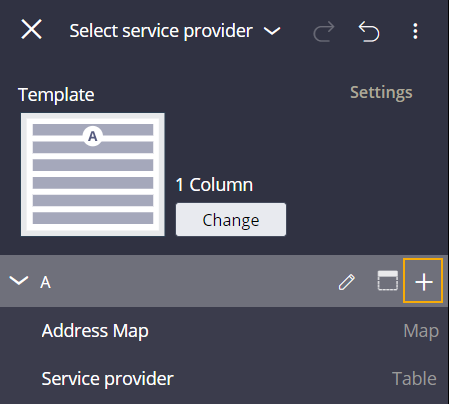
- In the Controls section, hover over Button, and then click the Add to view icon to add the new UI element to the bottom of the region.
 Note: Scroll down to see the button under the Service provider table.
 - Close the Add pane.
2 Configure the Modify service address button
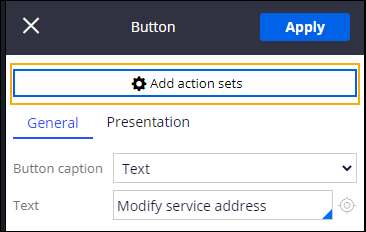
- In the configuration pane, hover over the Button label and click the Edit this "Button" icon to open the Button configuration pane.
- On the General tab, in the Text field, enter Modify service address.
- Click Add action sets to define the action sets for the button.
- Click Create an action set.
- In the Action set 1 section, click Add an event to select an event for the button.
- In the Mouse events section, click Click.

- In the Action set 1 section, click Add an action > All actions to display all the available actions.
- In the Launch section, click Local action.

- In the Local Action field, enter or select IdentifyLocation.
- In the Target list, select Modal Dialog.

- Click Add another action set.
- In the Action set 2 section, click Add an event.
- In the Mouse events section, click Hover.
Tip: As a best practice, the Hover mouse event should be disabled on a mobile device.
- Click Add an action > All actions.
- In the Display section, click Show smart info.
- Select the Display header check box.
- In the Header Source drop down, select Plain text.
- In the Plain Text field, enter Current service address.
- In the Section field, enter or select ServiceAddress.
- Click OK to complete the action set configuration.
- In the Button configuration pane, click Apply to save changes to the button.
- Close the Button configuration pane.
- Drag and drop the Modify service address button above the Address Map.
- Click Design to toggle out of design mode.
3 Confirm your work (section not graded)
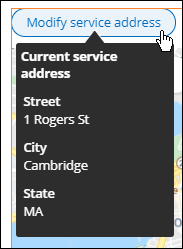
- In the Select service provider view, hover over the Modify service address button.
- Verify the Street, City, and State display the values you entered in the Identify location view.
- Click the Modify service address button to modify the current address.
- Change the address in the Identify location modal dialog box.
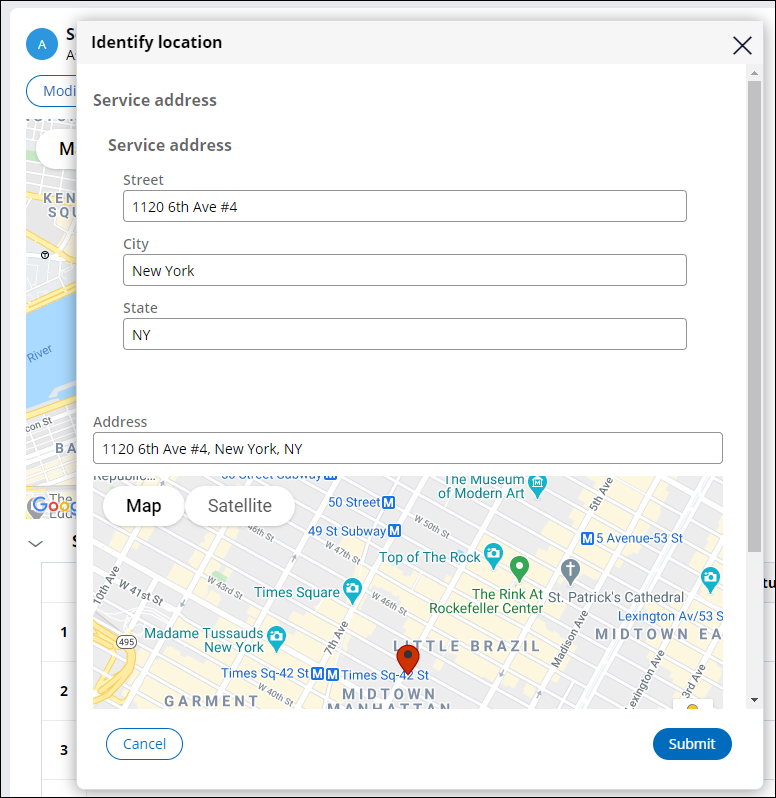
- Click Submit.
- Verify the changes to the address by hovering on Modify service address. The Service provider list updates to display a list of providers near the current address.