Adding an external data source to a data type
6 Tasks
30 mins
Scenario
Requests for roadside assistance must identify the vehicle so that a service provider can prepare for the service call. For example, certain vehicles may require a flat-bed tow truck or a higher octane blend of fuel. To better prepare service providers for a service call, stakeholders want to ensure that users only enter a valid combination of make, model, and model year for a vehicle. After evaluating several possible sources for vehicle models, stakeholders decided to source this information from a US National Highway Traffic Safety Administration (NHTSA) web service available at https://vpic.nhtsa.dot.gov/api.
Replace the current simulated data source with an integration to source the model information for passenger cars and trucks using a Representational State Transfer (REST) service provided by the NHTSA. Populate the D_VehiclemodelsList data page with NHTSA response data, based on the model year and make entered by the user.
Note: NHTSA data includes information on other types of vehicles, such as buses, that are not supported by GoGoRoad roadside assistance service. To display only relevant vehicle models, configure the integration to support two calls to the NHTSA service: one for passenger cars, and one for trucks.
The following table provides the credentials you need to complete the challenge.
| Role | User name | Password |
|---|---|---|
| Application Developer | author@gogoroad | pega123! |
Note: Your practice environment may support the completion of multiple challenges. As a result, the configuration shown in the challenge walkthrough may not match your environment exactly.
Challenge Walkthrough
Detailed Tasks
1 Create a data object with an external data source
- In the App Studio navigation pane, click Data.
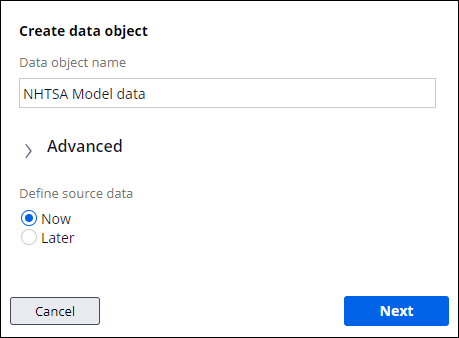
- In the upper-right corner of the Data objects and integrations landing page, click New to open the Data Object wizard and create a data object to access the NHTSA service.
- In the Data Object wizard, in the Data object name field, enter NHTSA Model data.
- Click Next to create and configure the data object connection details.
- In the System drop-down, select Create new. The wizard updates to display additional fields to define the new data source.
- In the Name field, enter NHTSA vPIC.
- In the Description field, enter NHTSA Product Information Catalog Vehicle Listing.
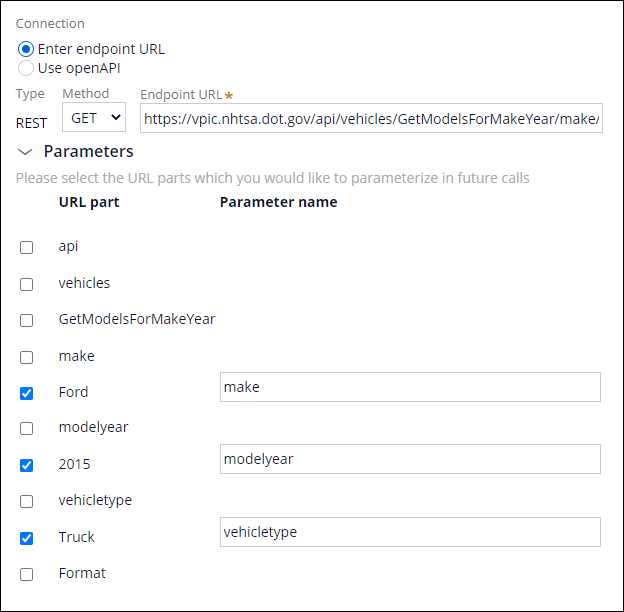
- In the Endpoint URL field, enter https://vpic.nhtsa.dot.gov/api/vehicles/GetModelsForMakeYear/make/Ford/modelyear/2015/vehicletype/Truck?format=json to specify the URL for the NHTSA web service.
- Expand the Parameters section to display the URL parts for the service URL.
- Using the following table, add parameters for the make, model year, and vehicle type parts of the service URL.
URL part Parameter name Ford make 2015 modelyear Truck vehicletype - Click Initialize call to call the REST service and advance to the third step of the wizard.
2 Map the response from the data source
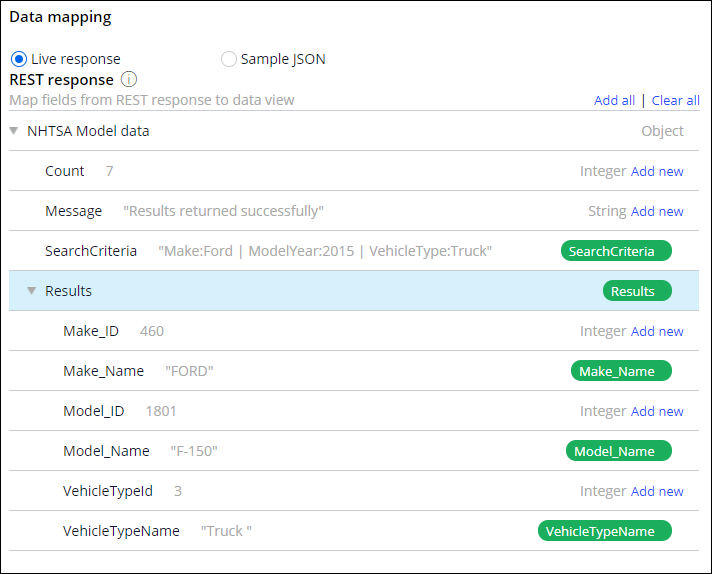
Note: The response indicates seven results were returned and displays data for one of the seven results. The number of results returned varies according to the parameters passed to the service.
- In the SearchCriteria row of the data mapping dialogue box, click Add new to map the SearchCriteria field from the REST response to a field for the data object. The contents of the row update to display the Map to field and a drop-down listing field types.
- In the SearchCriteria row, click the Add/Edit map to icon to accept the default mapping and create a text field named SearchCriteria in the data object.
- Repeat steps 1 and 2 for the Make_Name, Model_Name, and VehicleTypeName response fields.
- Click Next to complete the data mapping and advance to the fourth step of the wizard.
3 Define the endpoint settings for the integration
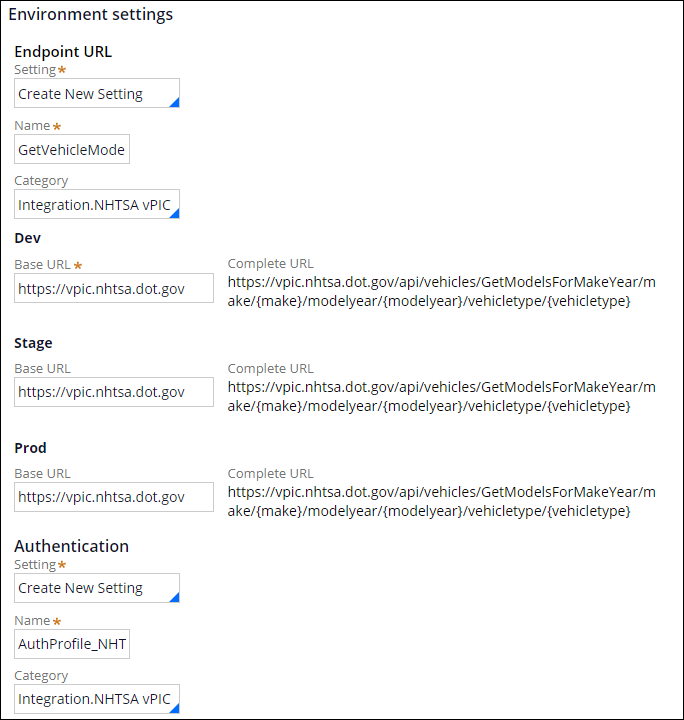
Note: The NHTSA does not require user authentication to access the service and receive response data. Other data providers may require authentication. Verify any authentication requirements when you configure an integration to a web service.
- Under Endpoint URL, in the Name field, enter GetVehicleModels_BaseURL to identify the connection settings.
- Under Stage, in the Base URL field, enter https://vpic.nhtsa.dot.gov to complete the URL used after migrating the application to a staging system.
- Under Prod, in the Base URL field, enter https://vpic.nhtsa.dot.gov to complete the URL used after migrating the application to a production system.
- Under Authentication, in the Name field, enter AuthProfile_NHTSA_vPIC.
- Click Submit to complete the configuration of the data object and REST integration.
4 Aggregate the responses from the data source
- In the Dev Studio navigation pane, click Data types to list the data objects defined for the GoGoRoad application.
- Click Vehicle models to open the data type.
- Click the Sources tab to view available sources and click List Vehicle models to open the D_VehiclemodelsList data page, which caches a listing of vehicle models.
- In the Data Sources section, clear the Simulate data source check box to remove the simulated data source from the data page.
- In the Source drop-down, select Aggregate sources to source the data page using two REST calls.
- In the Aggregate source name field, enter NHTSA vPIC to identify the data source for the data page.
- In the Source drop-down, select Data transform.
- Click Add source to add a second source for the data page.
- In the second Source drop-down, select Data transform.
5 Configure the source data transform
- For the first source, in the Data transform name field, enter MapModels.
- Click the Open icon to create the data transform.
- Click Create and open to accept the default settings and open the data transform rule form.
- Click the Parameters tab to define the three parameters required by the NHTSA service.
- On the Parameters tab, click the Add icon to add a row to define a parameter.
- In the empty parameter row, in the Name field, enter make.
- In the Required drop-down, select Yes.
- Repeat steps 4a-4c to add two more parameters to the data transform, using the information in the following table.
Name Required modelyear Yes vehicletype Yes
- Click the Pages & Classes tab to identify the pages used by the data transform and the class of each page.
- On the Pages & Classes tab, in the Page name field, enter Primary.pxResults to identify the page that contains the output of the data transform.
- In the Class field, enter or select GoGo-GoGoRoad-Data-VehicleModels to identify the class of the output page.
- Click the Add item icon to add a second row to the Pages & Classes tab.
- In the Page name field, enter D_NHTSAModelData.Results to identify the page that contains the output of the data transform.
- In the Class field, enter or select GoGo-GoGoRoad-Data-NHTSAModelData-Results to identify the class of the output page.
- Click the Definition tab to configure the data transform logic.
- For step 1, in the Action drop down, select Append and Map to to create a new results page for each result returned. The data transform adds a child row labeled 1.1 below step 1.
- For step 1, in the Target field, enter Primary.pxResults.
- In the Relation drop-down, select each page in.
- In the Source field, enter D_NHTSAModelData[vehicletype:param.vehicletype,modelyear:param.modelyear,make:param.make].Results to pass the required parameters to the data page that calls the NHTSA service and caches the response.
- For step 1.1, in the Target field, enter or select .Make to set the value of the Make property on the target page.
- In the Source field, enter or select .Make_Name to identify the property to copy to the target.
- Click the Add a row icon twice to add steps 1.2 and 1.3 to the data transform.
- Complete the fields of steps 1.2 and 1.3 by using the information in the following table.
Action Target Source 1.2 Set .Model .Model_Name 1.3 Set .VehicleType .VehicleTypeName
- Click to complete the configuration of the data transform.
6 Parameterize the data page to configure both service calls
- In Dev Studio, click the D_VehiclemodelsList tab to return to the data page rule form.
- On the D_VehiclemodelsList data page rule form, click the Parameters tab to add parameters to the data page.
- In the empty row, in the Name field, enter make to define a parameter for the make to pass to the data transform.
- In the Required drop-down, select Yes to mark the parameter as required.
- Click the Add item icon to add a second parameter to the data page.
- In the second row, in the Name field, enter modelyear to define a parameter for the model year to pass to the data transform.
- In the Required drop-down, select Yes to mark the parameter as required.
- Click the Definition tab to resume configuration of the aggregate sources.
- Below the Data transform name field, click Parameters to open a dialog box for setting values to pass to the data transform.
- In the dialog box, in the Value field for the make parameter, enter param.make to pass the value of the make parameter passed to the data page.
- In the Value field for the modelyear parameter, enter param.modelyear to pass the value of the model year parameter passed to the data page.
- In the Value field for the vehicletype parameter, enter Passenger Car to pass a constant string.
- Click to close the modal dialog and save the parameter configuration.
- For the second aggregate source, in the Data transform name field, enter or select MapModels to call the data transform a second time to populate the data page.
- Press the Tab key to exit the field. The Parameters link is displayed below the Data transform name field.
- Repeat step 9 for the second aggregated source to add parameter values for the MapModels data transform by using the information in the following table.
Parameter Value make param.make modelyear param.modelyear vehicletype Truck - Click to complete the configuration of the data page.
Confirm your work
- In App Studio, click Preview to return to the User Portal.
- Create a new Assistance Request case.
- Advance the case to the Identify vehicle step, completing any required fields.
- In the upper right corner, click the Design icon to open Design mode.
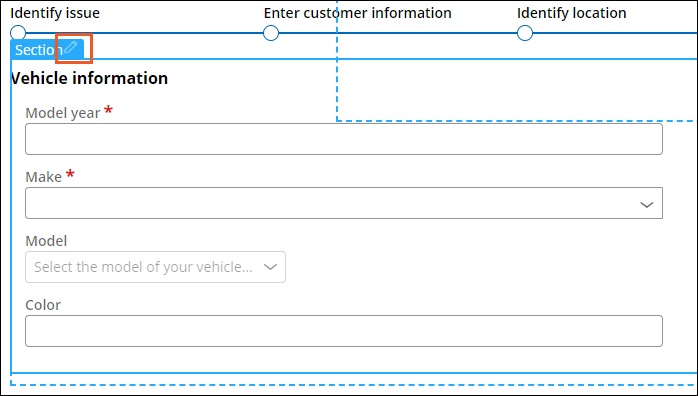
- On the Vehicle Information section, click the Edit this section icon.
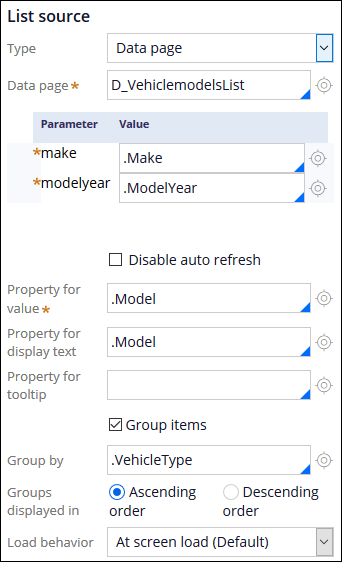
- On the Model field, click the Edit this field icon to configure the Model drop-down list to pass the required parameters to the data page. A configuration pane is displayed on the right side of the browser window.
- In the List source section, clear the contents of the Data page field.
- In the Data page field, enter or select D_VehiclemodelsList to re-select the page and update the properties pane to display the required parameters.
- In the Value field for the make parameter, enter or select .Make.
- In the Value field for the modelyear parameter, enter or select .ModelYear.
- In the Property for value field, enter or select .Model.
- In the upper right corner of the pane, click Apply to complete the configuration of the drop-down.
- Click Design to toggle Design mode.
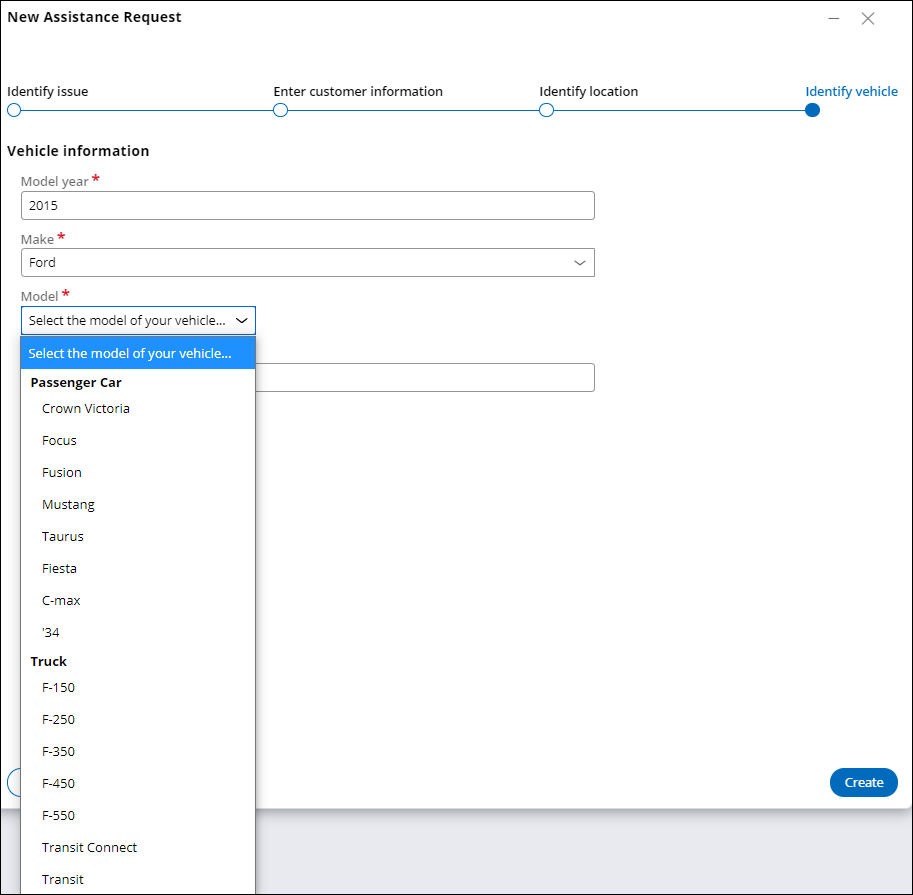
- In the Model year field, enter 2015.
- In the Make field, enter Ford.
- Click the Model drop-down to display a list of vehicle models, grouped by vehicle type.
This Challenge is to practice what you learned in the following Modules:
Available in the following missions:
If you are having problems with your training, please review the Pega Academy Support FAQs.
Want to help us improve this content?


