
Designing a Case Life Cycle for BAs
8 Tasks
40 mins
Scenario
GoGoRoad is growing. The company wants to transform its manual business process by creating a Pega Platform™ application that is driven by workflow automation. As a Pega Business Architect (BA), you and various stakeholders from the project team, including other Pega BAs, a Subject Matter Expert (SME), System Architects, the Product Owner, and the Project Delivery Lead, have been hard at work during the Discover phase of the project to evaluate the current process and transform GoGoRoad's workflow, all while remaining in the defined time and budget constraints. To ensure alignment between the Business team stakeholders and IT for the redesigned process, you volunteer to develop a prototype of the application in App Studio. The application prototyping process begins by designing Case Life Cycle, complete with Stages, Processes, Steps, Personas, and data.
User stories
As a GoGoRoad CSER, I want to track a request for assistance from initiation through to notifying the customer that the service is complete, so that I can ensure our customers have their issues resolved in a timely manner.
Technical notes documented by the System Architect
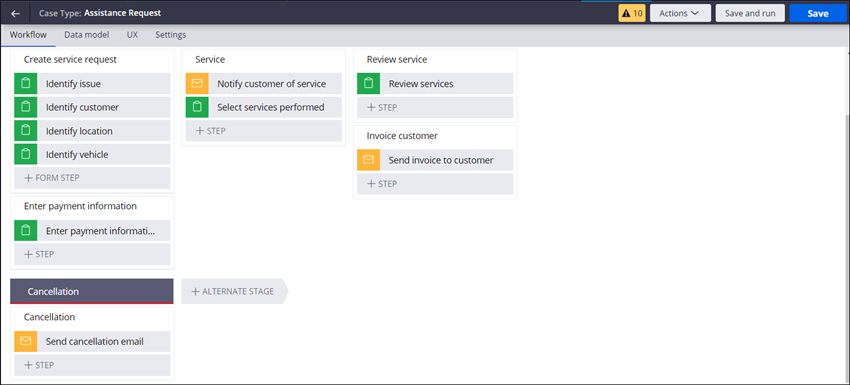
- The GoGoRoad application has an Assistance Request Case Type.
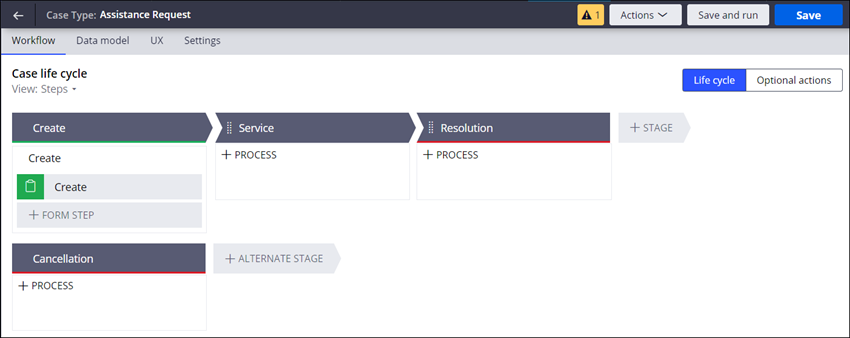
- The Assistance Request Case Type has three Primary Stages: Create, Service, and Resolution.
- The Assistance Request Case Type has one Alternate Stage: Cancellation.
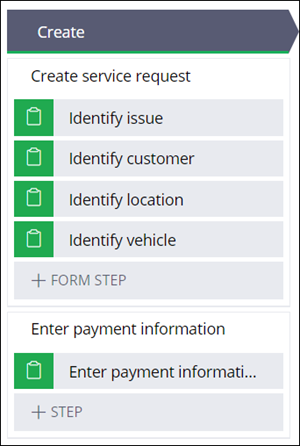
- In the Create Stage, the Create service request process has a multi-step form with four Collect information Steps: Identify issue, Identify customer, Identify location, and Identify vehicle.
- In the Create Stage, the Enter payment information Process has one Collect information Step: Enter payment information.
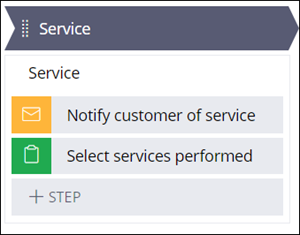
- The Service Stage has one Process labeled Service.
- The Service Process has a Send email automation Step, Notify customer of service arrival, and a Collect information Step, Select services performed.
- The Resolution Stage has two Processes: Review services and Invoice customer.
- The Review services Process has a Collect information Step, Review services.
- The Invoice customer Process has a Send email Automation Step, Send invoice to customer.
- The Cancellation Stage has one Process that consists of a Send email Automation Step, Send cancellation email.
- The Assistance Request Case Type has two Personas: User and CSR.
- The Assistance Request Case Type has five data objects: Customer, Service address, Vehicle information, Payment information, and Selected service.
The following table provides the credentials you need to complete the challenge.
| Role | User name | Password |
|---|---|---|
| Business Architect | author@gogoroad | pega123! |
Challenge Walkthrough
Detailed Tasks
1 Hide items from the Case Life Cycle View
- In the Pega instance for the challenge, enter the following credentials:
- In the User name field, enter author@gogoroad.
- In the Password field, enter pega123!.
- In the navigation pane of App Studio, click Case Types > Assistance Request to display the Assistance Request Case Life Cycle.
- In the Case Life Cycle section, click the View: Steps, Personas, Data, Releases (All) menu to display a list of checkbox items.
Note: As a best practice, first define the Case Life Cycle at a high level to help you determine the Personas, channels, and data objects. Hide Personas and Data for now.
- Clear the Personas checkbox to hide the Personas & Channels section in the Case Life Cycle.
- Clear the Data checkbox to hide the Data & Interfaces section in the Case Life Cycle and automatically clear the Releases checkbox.
- Click outside the menu to hide the View: Steps, Personas, Data, Releases menu.
2 Add Service, Resolution, and Cancellation Stages
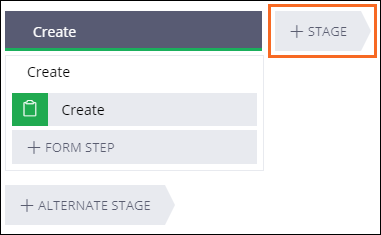
- To the right of the Create Stage, click Stage to add a second Stage.
- In the text box that is displayed, enter Service to add the second Stage name and display the contextual property pane on the right.
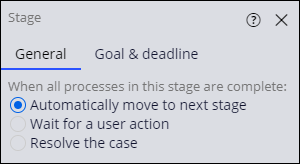
- In the General tab of the contextual property pane, select Automatically move to next stage to enable the case to advance automatically when the Service Stage is complete.
- To the right of the Service Stage, click Stage to add a third Stage.
- In the text box that is displayed, enter Resolution to add the third Stage name and display the contextual property pane on the right.
- In the General tab of the contextual property pane, select to resolve the case automatically when the Resolution Stage is complete.
- In the Alternate Stage section of the Case Life Cycle, click Alternate Stage.
- In the text box that is displayed, enter Cancellation to add the Stage name.
- In the General tab of the contextual property pane, select to resolve the case automatically when the Cancellation Stage is complete.
- In the upper-right corner of the Case Life Cycle, click Save to save your work.
3 Build the Create Stage
- In the Create Stage, in the Create Process, hover over the Create Step, and then click the Delete icon to remove the Create Step.

- Click to add a Step to the multi-step form, and then, in the field that is displayed, enter Identify issue.
- Repeat step 2 to add the following Steps:
- Identify customer.
- Identify location.
- Identify vehicle.
- Click the Create Process, and then enter Create service request to update the label.
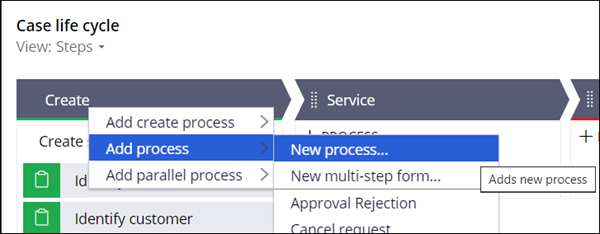
- Hover over the Create Stage, and then click the icon.
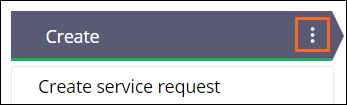
- From the More icon, select Add process > New process to add a new Process to the Create Stage.
- In the Create (1) Process, hover over the Create (1) Step, and then click the Delete icon.
- Click Step > Collect information to add a Step that collects user input.
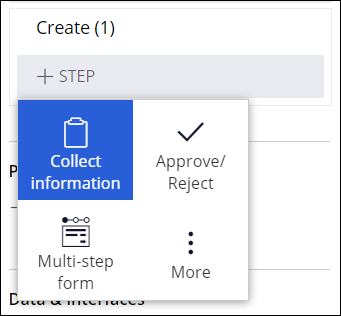
- In the Process label field that is displayed, enter Enter payment information.
- Click the Create (1) Process, and then enter Enter payment information to update the label.
 Note: When you create a new Process, Pega Platform™ automatically assigns the Process name based on the Stage name. You can change the default Process name after creating the first Step in that Process.
4 Build the Service Stage
- In the Service Stage, hover over Process, and then click Step > More > Automations > Send email > Select to add a Step that sends an automated email notification.
- In the Send email field, enter Notify customer of service to name the Step.
- Click Step to add a second Step to the Service Process.
- Click Collect information to add a Step that collects user input.
- In the Collect information field, enter Select services performed to name the Step.
5 Build the Resolution Stage
- In the Resolution Stage, hover over Process, and then click Step > Collect information to add a Step that collects user input.
- In the Collect information field, enter Review services to name the Step.
- Click the Resolution Process, and then enter Review service to update the label.
- Hover over the Resolution Stage, and then click Add process New process.
- In the Resolution(1) Process, hover over the Resolution(1) Step, and then click the Delete icon.
- Click Step > More > Automations > Send email > Select to add a Step that sends an automated email notification.
- In the Send email field, enter Send invoice to customer to name the Step.
- In Resolution (1) Process, enter Invoice customer to update the label.

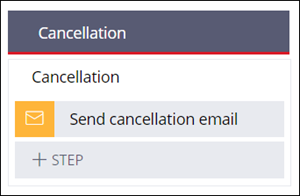
6 Build the Cancellation Alternate Stage
- In the Alternate Stage section of the Case Life Cycle, in the Cancellation Stage, hover over Process, and then click Step to select a Step type.
- Click More > Automations > Send email > Select to add a Step that sends an automated email notification.
- In the Send email field, enter Send cancellation email to name the Step.
- In the upper-right corner, click Save to save your work.
7 Identify the Personas and Channels
- In the upper-left corner of the Case Life Cycle, click the View: Steps menu to display a list of checkbox items.
- Select the Personas and Releases checkboxes to display the Personas & Channels section in the Case Life Cycle.
- In the Create Stage, in the Personas & Channels section, click Persona to display the list of available Personas.
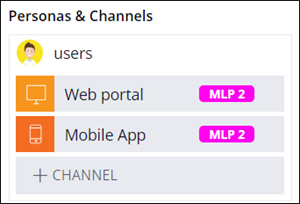
- Select Users to add the existing Users Persona to the Create Stage.
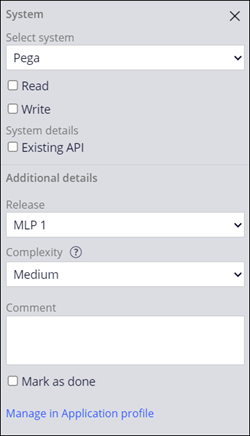
- In the Users Persona, click the channel to display the configuration pane on the right.
- In the configuration pane, in the Additional details section, in the Release list, select MLP 2.
The MLP 2 tag is displayed on the Web Portal channel in the Case Life Cycle.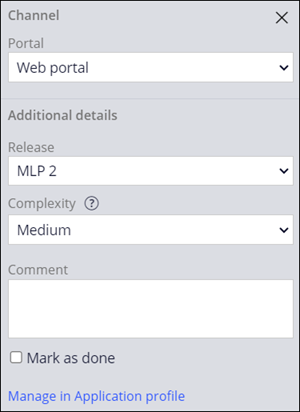
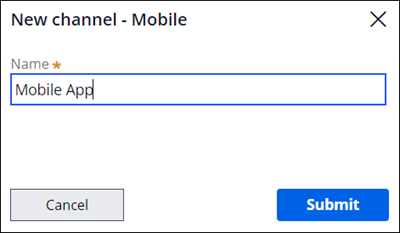
- In the Users Persona, click Channel > Mobile to add a new Mobile Channel.
- In the New channel - Mobile dialog box, enter Mobile App, then click .
- In the configuration pane for the Mobile App channel, in the Additional details section, in the Release list, select MLP 2.
- Add a new Persona to the Create Stage :
- Click Persona > New persona to display the New persona dialog box.
- In the Persona name field, enter CSR.
- Click an Avatar icon to represent the image of the new CSR Persona, and then click Submit to dismiss the New persona dialog box and display the CSR Persona and Web Portal channel, which the system adds by default.
Note: To update the Persona name or icon, in the navigation pane of App Studio, click Users > User Management > Personas. Click on the name of the Persona you want to update and select the Configuration tab. After making the updates, click Save.
- In the CSR Persona, click the Web Portal channel to display the configuration pane on the right.
- In the configuration pane, in the Additional details section, in the Release list, select MLP 1.
The MLP 1 tag is displayed on the Web Portal channel in the Case Life Cycle.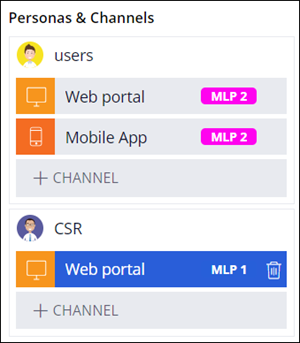
- In the Service and Resolution Stages, in the Personas & Channels section, click Persona > CSR to add the CSR Persona to the Stage.
- Repeat steps 11-12 to tag the CSRs Web Portal Channel with MLP 1.
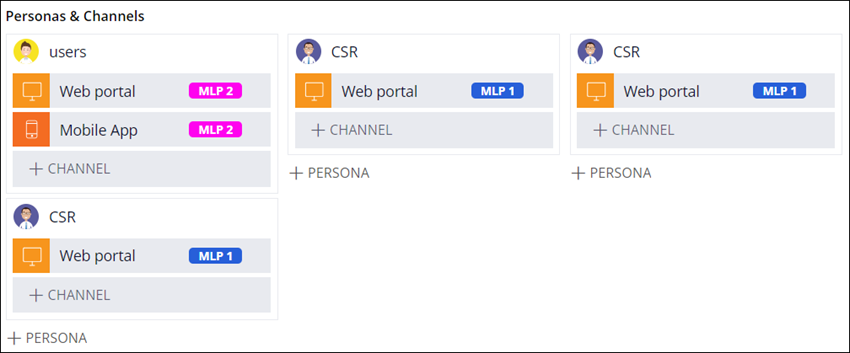
- Click Save.
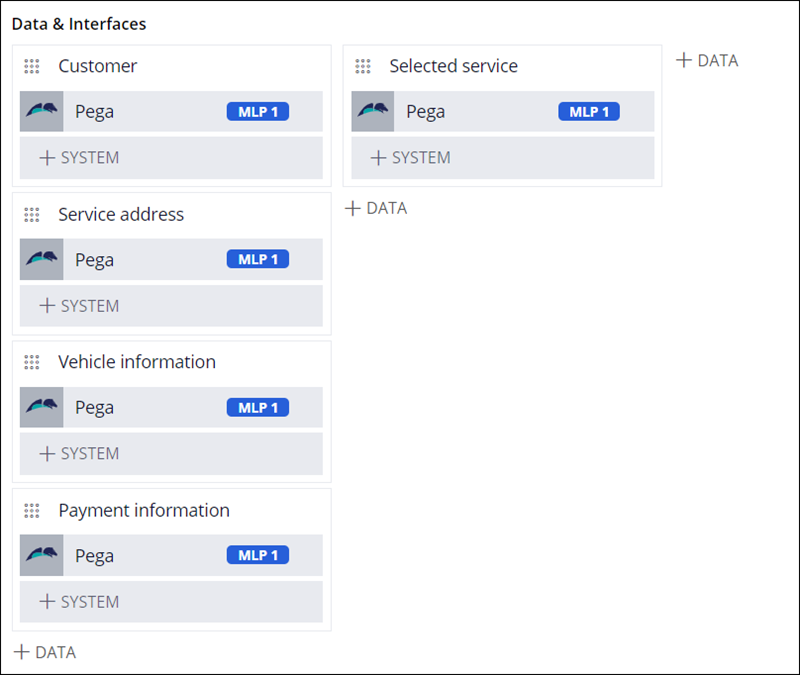
8 Identify the data objects for MLP 1
- In the upper-left corner of the Case Life Cycle, click the View: Steps, Personas, Releases (All) menu to display a list of checkbox items.
- Select the Data checkbox to display the Data & Interfaces section in the Case Life Cycle.
- In the Create Stage, in the Data & Interfaces section, click Data > Data object > New data object to display the New data object dialog box.
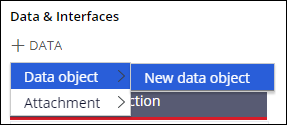
- In the Name field, enter Customer.
- Click Submit to dismiss the New data object dialog box and display the Customer data object and Pega system of record, which the system adds by default.
Tip:
If the Customer data object is not displayed, click and then log out of the application and then log back in with the following credentials:
- In the User name field, enter author@gogoroad.
- In the Password field, enter pega123!.
In the navigation pane of App Studio, click Case Types > Assistance Request to display the Assistance Request Case Life Cycle. The Data & Interfaces section now contains the Customer data object.
- Click Pega to display the configuration pane on the right.
- In the configuration pane, in the Additional details section, in the Release list, select MLP 1.
- Repeat only steps 3-7 to add the Service address, Vehicle information, and Payment information data objects to the Create Stage with the MLP 1 tag.
- Repeat steps 3-7 to add a Selected service data object to the Service Stage with the MLP 1 tag.
- Click Save.
Confirm your work
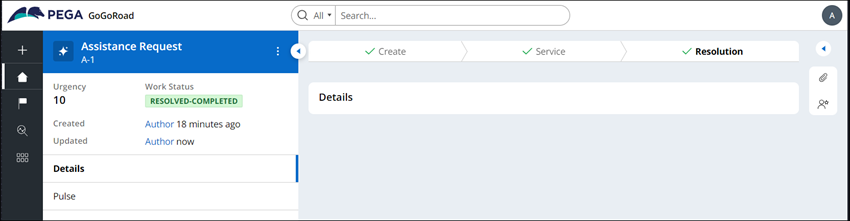
- In the upper-right corner of the Assistance Request Case Type, click Save and run to save changes and open an Assistance Request Case instance in the Web portal.
- In the Identify issue Step, click .
- In the Identify customer Step, click .
- In the Identify location Step, click .
- In the Identify vehicle Step, click .
- In the Enter payment information Step, click .
- In the Select services performed Step, click .
- In the Review services Step, click .
- Confirm that the Work Status for the Assistance Request Case instance is RESOLVED-COMPLETED.
This Challenge is to practice what you learned in the following Module:
Available in the following mission:
If you are having problems with your training, please review the Pega Academy Support FAQs.
Want to help us improve this content?