Merging a development Branch
Archived
4 Tasks
30 mins
Intermediate
Installation and Deployment
English
Scenario
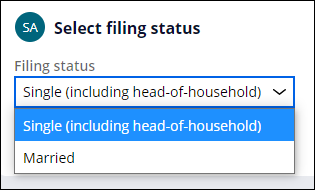
The Payroll Setup case type provides automatic tax withholdings calculated based on the selected filing status. The current version of the case type has two designated options: Single (including head-of-household) and Married.
You have been asked to replace the Married filing status with more specific options: Married filing jointly and Married filing separately. Another team is working on a separate part of the case type. To avoid conflicts, configure these changes in a development branch. Create and merge the contents of the development branch labeled ExpandedFiling into the HRApps ruleset.
The following table provides the credentials you need to complete the challenge.
| Role | User name | Password |
|---|---|---|
| Senior System Architect | SSA@TGB | rules |
Note: Your practice environment may support the completion of multiple challenges. As a result, the configuration shown in the challenge walkthrough may not match your environment exactly.
Challenge Walkthrough
Detailed Tasks
1 Create and add a new development branch
- In the App Explorer, click the Branches tab to open the branch options menu.
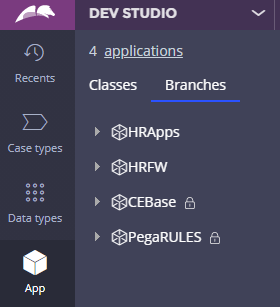
- Right-click the HRApps application, and then select Create branch to create a new branch and add it to the HRApps application.
- In the Branch name field, enter ExpandedFiling as the name for the new branch.
- Optional: In the Description field, enter a description for the branch.
Tip: If you use Live UI, you can set up and manage a run-time branch so that fewer technical users can modify common properties of a control or a layout on rules in the branch. For more information, see Enabling run-time branching and editing.
. - Click Submit to create the branch.
2 Update filing status Prompt values
- Open the FilingStatus property that applies to the PegaHR-FW-HRFW-Work-PayrollSetup class.
- Click Save As to save a new version named Filing status expanded.
- In the Context section, confirm that ExpandedFiling is selected as the development branch and PegaHR-FW-HRFW-Work-PayrollSetup is selected in the Apply to field.
Note: When you create rules, you can select the branch and ruleset into which you want to save them. Rulesets are automatically created. For more information, see Rule development in branches.
- Click Create and open to create and open the property.
- In the Prompt values section, to the right of the Married row, click the Delete icon to remove the option from the prompt values.
- Click the Add icon to add the following values to the Standard value and Prompt value fields:
Standard value Prompt value Married filing jointly Married filing jointly Married filing separately Married filing separately 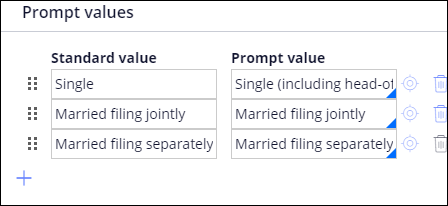
- Check in the property.
3 Update filing status section rule
- Open the SelectFilingStatus_0 section rule that applies to the TGB-HRApps-Work-PayrollSetup class.
- Click Save as to save a new version, confirm ExpandedFiling is selected in the Development branch field, and click Create and open.
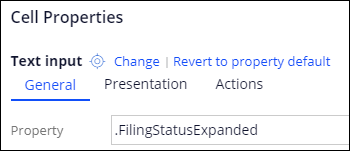
- In the Dynamic layout, click View properties for the Text input element to open the cell properties.

- In the Property field, change the .FilingStatus value to .FilingStatusExpanded.
- To the right of Text input, click Change, and then Dropdown.
- Change the Label value to Filing status, and then click Submit.

- Check in the section rule.
4 Merge the branch contents
- In the Development branches section of the application record, click ExpandedFiling to display the content of the branch. The branch displays a table of the rule names and other metadata fields.
- Click the Branch quality tab to review guardrails warnings, merge conflicts, and unit test coverage for all rules contained in the branch.
- From the Actions menu, select Merge to display a branch dialog box.
- Confirm ExpandedFiling is displayed as the merging branch and click Proceed.
- From the Create new version dropdown, choose the highest available ruleset.
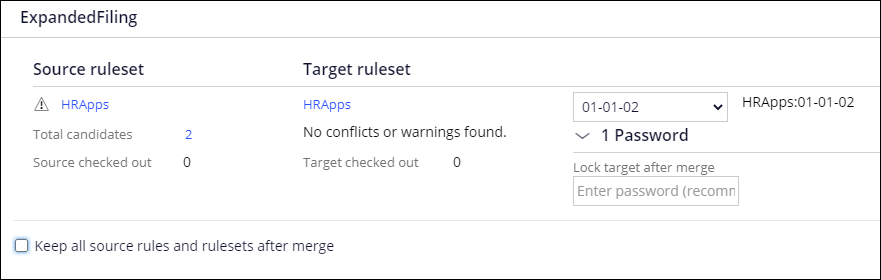
-
For each ruleset, in the Password field, enter rules as the password.
Note: By default, the system removes the branch rulesets and the rules that they contain after a successful merge. You can select the Keep all source rules and rulesets after merge check box to retain all the branch rulesets and the rules they contain after merging the rules into the base rulesets. Check this box if you plan to repeat this challenge. -
Click Merge to display the Merge Branches wizard, which displays a confirmation page to indicate that the merge was successful.
Note: The counts for Target checked out and Warnings should be zero (0) but may vary according to how you have developed your application. If the Target checked out count for a target ruleset is not zero, click the number to identify the rule or rules that are checked out in the application ruleset. Then, click the Total candidates number for the branch ruleset and confirm that the rules in the branch are not the same rules that are checked out.. - Return to the application record.
- In the Development branches section, next to the branch, click the Delete icon to remove the branch from the application.
- Save the change to the application record.