Refining an Agile Workbench backlog
5 Tasks
30 mins
Scenario
Stakeholders at GoGoRoad want to develop a new roadside assistance application to streamline operations for customer roadside assistance requests. Using the scope for the Minimum Loveable Product (MLP) and incremental releases, stakeholders want to track the current progress of the Assistance request case type, and determine the next highest priority functionality to develop in the future. To facilitate progress tracking, stakeholders and the Pega team have identified and prioritized a product backlog.
To prepare for development, the business architect (BA) must populate the backlog and update the user stories to include the feature, subfeature, owner, and the due date. GoGoRoad uses Agile Workbench to manage and prioritize the work. The team created the user stories in an Excel spreadsheet specially formatted for Agile Workbench import. Use the Excel spreadsheet to import user stories and populate the backlog.
The following table provides the credentials you need to complete the challenge.
| Role | User name | Password |
|---|---|---|
| Application Developer | author@gogoroad | pega123! |
Challenge Walkthrough
Detailed Tasks
1 Import the backlog of user stories
- Download the Excel GoGoRoadUserStoriesforDPP.xlsx workbook to your desktop.
GoGoRoadUserStoriesforDPP.xlsx (14.36 KB)
- In the Pega instance for the challenge, enter the following credentials:
- In the User name field, enter author@gogoroad.
- In the Password field, enter pega123!.
- In App Studio, in the upper-right corner of the browser window, click the Bolt icon to open the Agile Workbench tool.
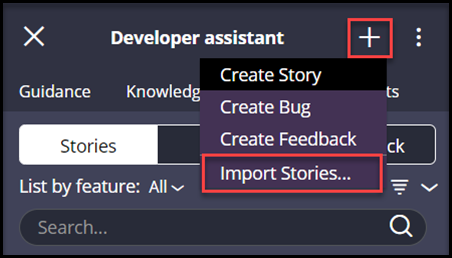
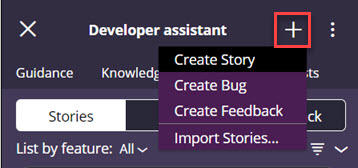
- In the Agile Workbench tool, in the upper-right corner, click the Add icon to display a list of actions.
- From the list, click Import Stories to display the Import Stories window.
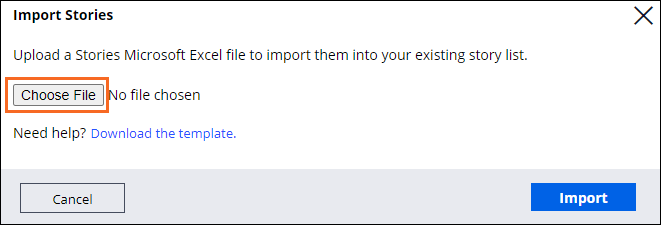
- In the Import Stories window, click Choose File to open the file browser.
- From the file browser, navigate to and select the GoGoRoadUserStoriesforDPP.xlsx file you downloaded.
- Click Open to add the file to the Import Stories dialog box.
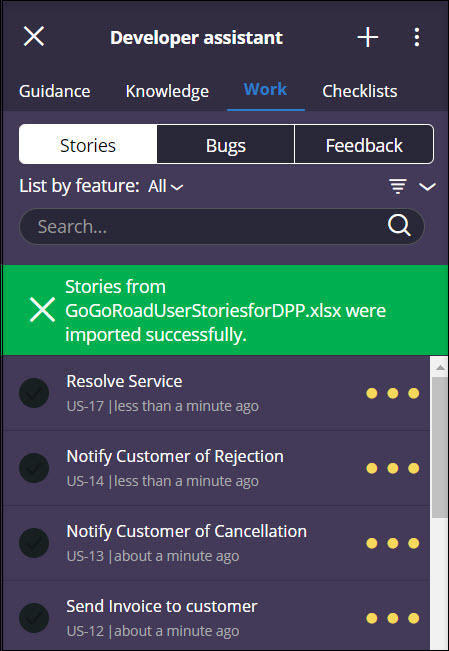
- In the lower-right corner of the Import Stories dialog box, click Import to import the file into the Agile Workbench tool.
2 Add features and subfeatures to the application
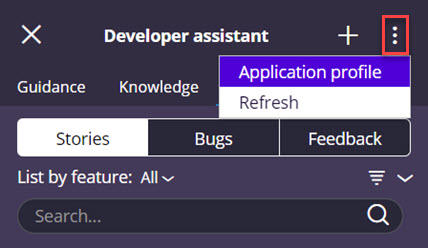
- In the Agile Workbench tool, in the upper-right corner, click the More icon and from the menu, select Application profile to display the Application profile landing page.
- At the top of the dashboard, click the Feature map tab.
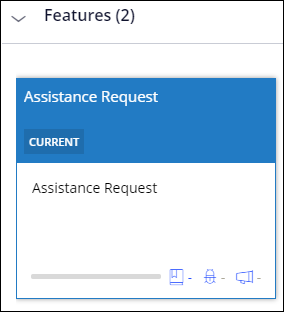
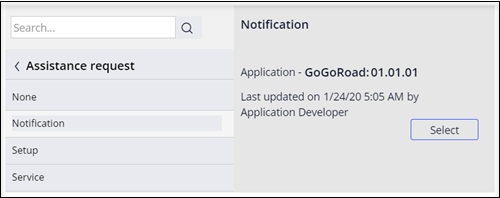
- In the tab, in the Features section, double-click the Assistance Request feature to open the Assistance request feature.
- In the Subfeatures section, click the Plus icon to display the Create feature window and add a new subfeature.
- In the Create feature window, in the Name field, enter Notification.
- In the lower-right corner of the Create feature window, click Create to close the window and add the new subfeature.
- Repeat steps 4-6 to add the remaining Assistance request subfeatures — Setup and Service.
3 Associate a feature and owner to the user stories
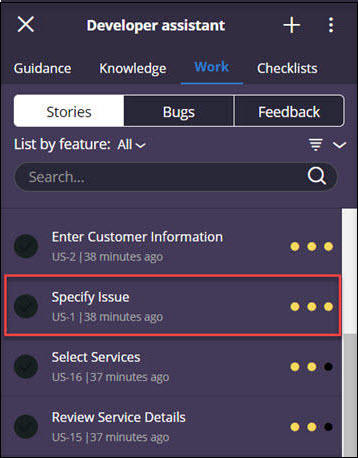
- In the pane of the Agile Workbench tool, select the Specify Issue user story in the list to open the user story.
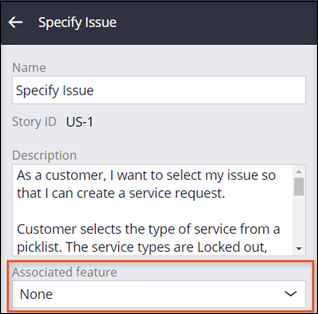
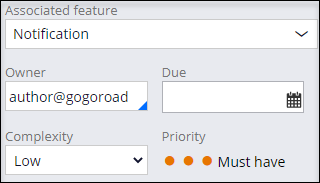
2. In the open user story, in the Associated feature field, click the down arrow to open the available feature list.
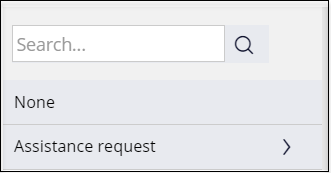
3. From the list, to the right of the Assistance request field, click the arrow to display the subfeatures.
4. Click the Notification subfeature to display the Select option.
5. Click Select to add the subfeature to the user story.
6. Below the Associated feature field, in the Owner field, enter or select the user story owner name. For this exercise, the owner is author@gogoroad.
7. In the Due field, click the calendar icon to display a calendar.
8. Select a future due date.
Selecting a date closes the calendar window.
9. In the lower-right corner of the Agile Workbench tool, click Save to save the configuration.
10. Repeat steps 1-9 to update the remaining user stories using the values set out in the following table.
|
Story name |
Feature > Subfeature |
Owner |
|---|---|---|
|
Enter Customer information |
Assistance request > Notification |
author@gogoroad |
|
Enter Location information |
Assistance request > Notification |
author@gogoroad |
|
Enter Vehicle information |
Assistance request > Notification |
author@gogoroad |
|
Enter Payment information |
Assistance request > Notification |
author@gogoroad |
|
Verify Coverage |
Assistance request > Setup |
author@gogoroad |
4 Add a new priority user story
- In the Agile Workbench tool, in the upper-right corner, click the Add icon to display a list of actions.
- From the list, click Create Story to add a new Must have priority user story.
- Populate the new story using the following information:
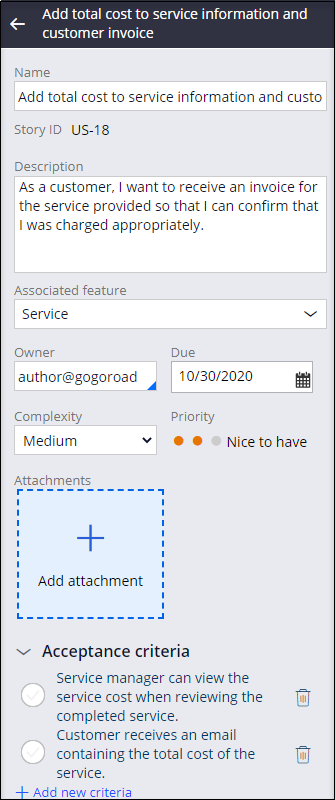
Field Details Name Add total cost to service information and customer invoice Description As a customer, I want to receive an invoice for the service provided so that I can confirm that I was charged appropriately. Associated feature Assistance request > Service Owner author@gogoroad Due Any date in the future Complexity Medium Priority Must have Acceptance criteria Service manager can view the service cost when reviewing the completed service.
Customer receives an email containing the total cost of the service.
5 Change the priority of a user story
Due to inclement weather, the project team starts several days later than expected. The team decides to minimize scope in order to deliver the MLP by the agreed target date.
- Click the middle priority dot to change the new user story to Nice to have.
- In the lower-right corner of the Agile Workbench tool, click Save to save the configuration.
Confirm your work
- In the Agile Workbench tool, open the user story you created and confirm that the details align with the following image.
- In the pane of the Agile Workbench tool, click the More icon, and then select Application profile to access the Application profile landing page.
- On the landing page, in the Feature map tab, in the Features section, double-click the Assistance request feature to view the Assistance request subfeatures.
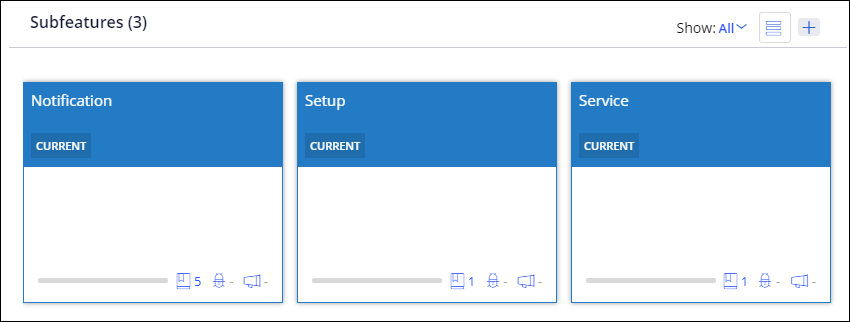
- In the Subfeatures section, confirm that the subfeatures you created are listed.
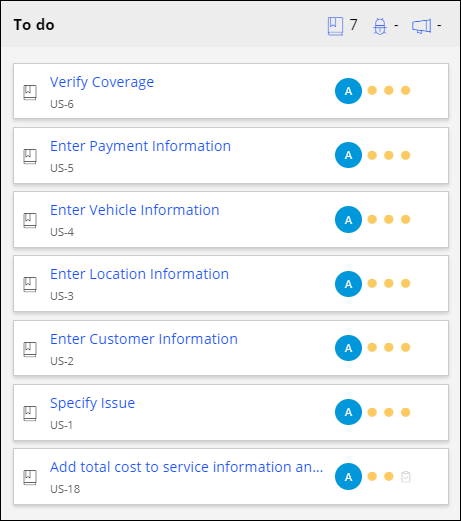
- In the Work items section, confirm that the user stories all indicate ownership by author@gogoroad. The author@gogoroad ownership is indicated by the letter A in a blue circle, as shown in the following image.
- Click each subfeature to confirm that the list of user stories adjusts to only the stories associated with the subfeature.
- In the Service subfeature, confirm the user story you created is in the To do list.
This Challenge is to practice what you learned in the following Module:
Available in the following missions:
Want to help us improve this content?

