Agile Workbenchバックログの改善
6 タスク
30 分
シナリオ
GoGoRoadの利害関係者は、顧客のロードサイド サポートリクエストの業務を簡素化する新しいロードサイド サポート アプリケーションの開発を希望しています。 Minimum Lovable Product(MLP)のスコープと増分リリースを使用し、利害関係者はAssistance requestケースタイプの現在の進捗を追跡し、今後開発する次にプライオリティの高い機能を判断したいと考えています。 進捗状況の追跡を促進するため、利害関係者とPegaチームは、製品バックログを特定し優先順位を付けました。
開発の準備のため、ビジネスアーキテクト(BA)は、バックログに入力し、ユーザーストーリーを更新して、機能、補助機能、所有者、締め切り日を追加する必要があります。 GoGoRoadはAgile Workbenchを使用して作業を管理し、優先順位を決定しています。 チームは、Agile Workbenchへのインポート用に特別にフォーマットされたExcelスプレッドシートでユーザーストーリーを作成しました。 このExcelスプレッドシートを使用してユーザーストーリーをインポートし、バックログに入力します。
以下の表は、チャレンジに必要なログイン情報をまとめたものです。
| ロール | ユーザー名 | パスワード |
|---|---|---|
| アプリケーションデベロッパー | author@gogoroad | pega123! |
チャレンジ ウォークスルー
詳細なタスク
1 Import the backlog of user stories
- Download the Excel GoGoRoadUserStoriesforDPP.xlsx workbook to your desktop.
GoGoRoadUserStoriesforDPP.xlsx (14.36 KB)
- In App Studio, in the upper-right corner of the browser window, click the Bolt icon to open the Agile Workbench tool.
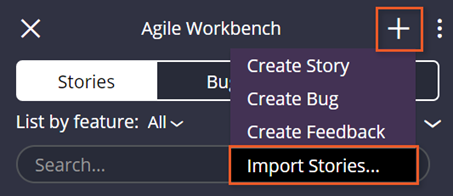
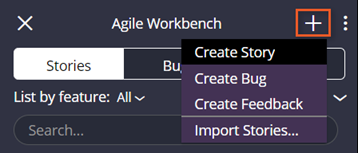
- In the Agile Workbench tool, in the upper-right corner, click the Plus icon to display a list of actions.
- From the list, click Import Stories... to display the Import Stories window.
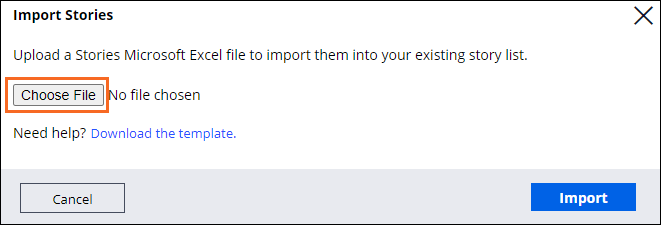
- In the Import Stories window, click Choose File to open the file browser.
- From the file browser, navigate to and select the GoGoRoadUserStoriesforDPP.xlsx file you downloaded.
- Click Open to add the file to the Import Stories dialog box.
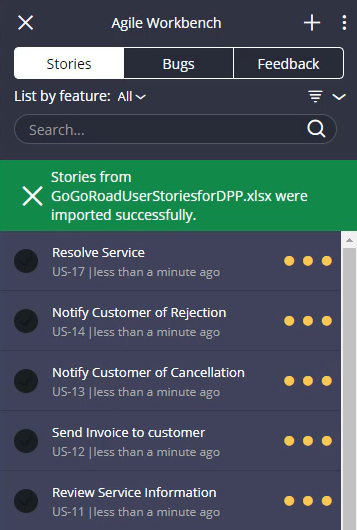
- In the lower-right corner of the Import Stories dialog box, click Import to import the file into the Agile Workbench tool.
補足: The imported stories may be displayed in a different order.
2 Add features and subfeatures to the application
- In the Agile Workbench tool, in the upper-right corner, click the More icon and from the menu, select Application profile to display the Application profile landing page.
- At the top of the dashboard, click the Feature map tab.
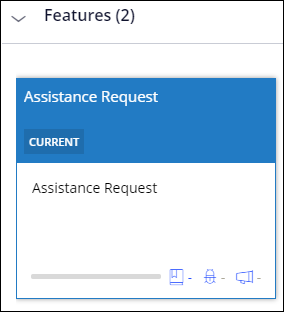
- In the tab, in the Features section, double-click the Assistance Request feature to open the Assistance request feature.
- In the Subfeatures section, click the Plus icon to display the Create feature window and add a new subfeature.
- In the Create feature window, in the Name field, enter Notification.
- In the lower-right corner of the Create feature window, click Create to close the window and add the new subfeature.
- Repeat steps 4-6 to add the remaining Assistance request subfeatures — Setup and Service.
3 Associate a feature and owner to the user stories
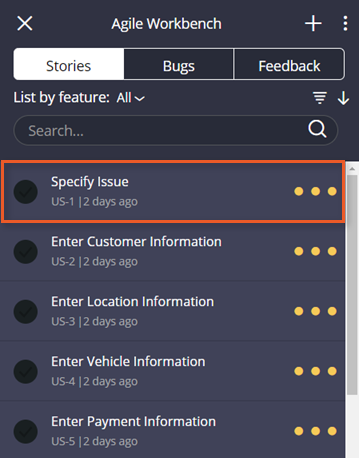
- In the pane of the Agile Workbench tool, select the Specify Issue user story in the list to open the user story.
補足: The user stories may appear in a different order.補足: You can also select user stories from the Application profile in the Work items section of the Feature map. If you select a user story from the To do list, you may encounter a loading error for the Associated feature and Attachments fields. This is a known issue that will be addressed in a future release.
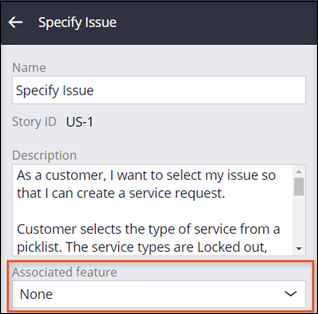
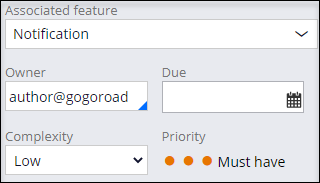
- In the open user story, in the Associated feature field, click the down arrow to open the available feature list.
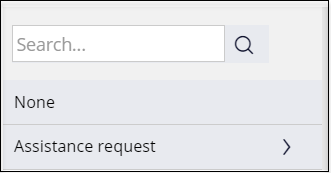
- From the list, to the right of the Assistance request field, click the arrow to display the subfeatures.
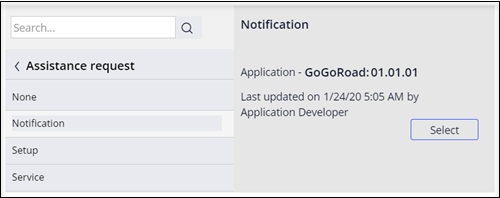
- Click the Notification subfeature to display the Select option.
- Click Select to add the subfeature to the user story.
- Below the Associated feature field, in the Owner field, enter or select the user story owner name. For this exercise, the owner is author@gogoroad.
- In the Due field, click the calendar icon to display a calendar.
- Select a future due date.
補足: Selecting a date closes the calendar window.
- In the lower-right corner of the Agile Workbench tool, click Save to save the configuration.
- Repeat steps 1-9 to update the remaining user stories using the values set out in the following table.
Story name Feature > Subfeature Owner Enter Customer information Assistance request > Notification author@gogoroad Enter Location information Assistance request > Notification author@gogoroad Enter Vehicle information Assistance request > Notification author@gogoroad Enter Payment information Assistance request > Notification author@gogoroad Verify Coverage Assistance request > Setup author@gogoroad
4 Add a new priority user story
- In the Agile Workbench tool, in the upper-right corner, click the Plus icon to display a list of actions.
- From the list, click Create Story to add a new Must have priority user story.
- Populate the new story using the following information:
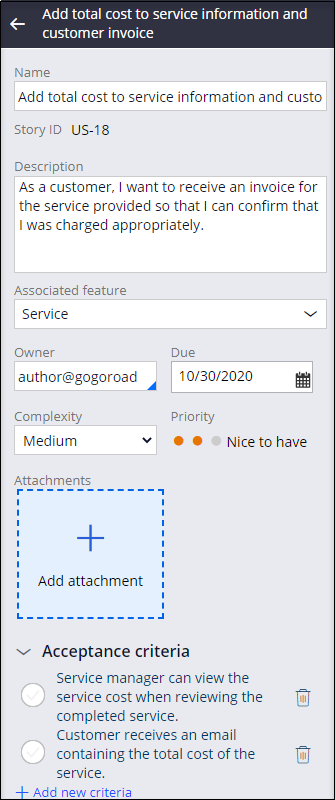
Field Details Name Add total cost to service information and customer invoice Description As a customer, I want to receive an invoice for the service provided so that I can confirm that I was charged appropriately. Associated feature Service Owner author@gogoroad Due Any date in the future Complexity Medium Priority Must have Acceptance criteria Service manager can view the service cost when reviewing the completed service.
Customer receives an email containing the total cost of the service.
5 Change the priority of a user story
Due to inclement weather, the project team starts several days later than expected. The team decides to minimize scope in order to deliver the MLP by the agreed target date.
- Click the middle priority dot to change the new user story to Nice to have.
- In the lower-right corner of the Agile Workbench tool, click Save to save the configuration.
6 Confirm your work
- In the Agile Workbench tool, open the user story you created and confirm that the details align with the following image.
- In the pane of the Agile Workbench tool, click the More icon, and then select Application profile to access the Application profile landing page.
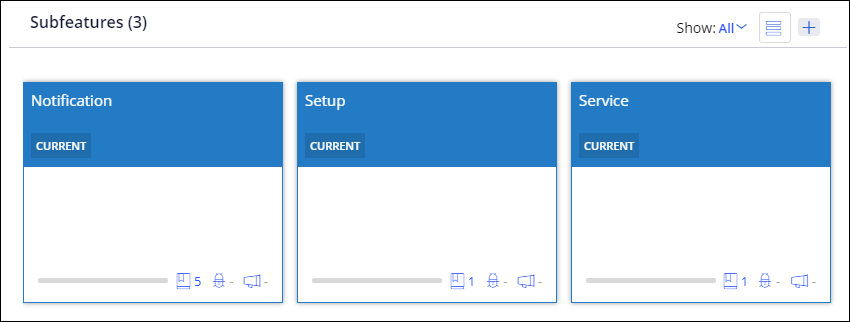
- On the landing page, in the Feature map tab, in the Features section, double-click the Assistance request feature to view the Assistance request subfeatures.
- In the Subfeatures section, confirm that the subfeatures you created are listed.
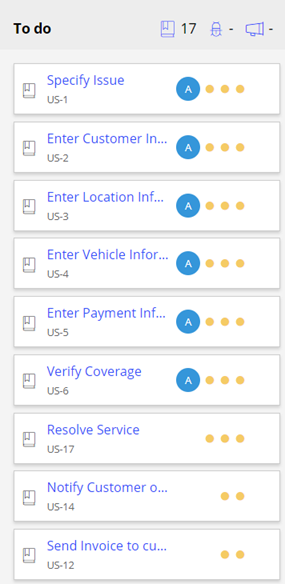
- In the Work items section, confirm that the user stories you designated as Must have all indicate ownership by author@gogoroad. The author@gogoroad ownership is indicated by the letter A in a blue circle, as shown in the following image.
- Click each subfeature to confirm that the list of user stories adjusts to only the stories associated with the subfeature.
- In the Service subfeature, confirm the user story you created is in the To do list.

