
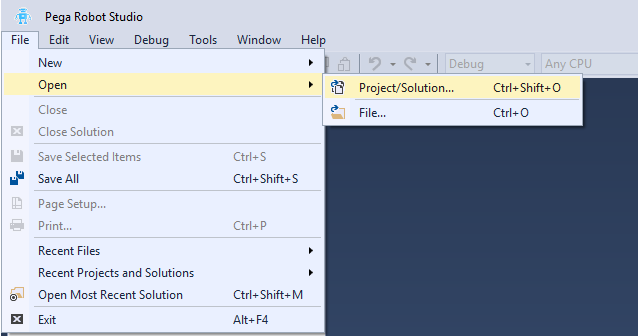
Configuring a Citrix Context
Using Citrix contexts
Pega Robot Studio requires you to specify information about the Citrix environment for your robotic solution. The Citrix context contains any adapters, properties, and automations needed for defining this host as well as project information.
Note: You cannot import any projects into a Citrix context within Robot Studio. Although the system will allow the configuration of more than one context with a max of two, it is best practice to limit the use of the Citrix context to one per project or solution. Robot Studio does not support multiple projects in a solution when using Citrix.
Changing configuration settings
When a developer designs a robotic solution for the mix mode Citrix configuration and runs the solution in a local environment, deserialization errors can hinder testing. To suppress these errors for testing, you must change the local and the server-side copy of the runtime configuration files.
- On the client machine, open the
RuntimeConfig.xml file in the %appdata%\Pegasystems directory path. - Locate the IgnoreRuntimeDeserializationErrors key and change the value to True, as shown in the following image.
- Save and close the RuntimeConfig.xml file.
- Update the same line in the RuntimeConfig.xml file on the Citrix server.
Note: It is a best practice to update the RuntimeConfig.xml file in both the client and server machines.
- Launch Pega Robot Studio on your workstation.
Configuring a Citrix context
Before using your Citrix context, you must configure multiple properties to test and run the solution. Understand which features must be updated as well as how the updates can affect your robotic solution in either testing or production. Update the following settings during the creation, testing, and final production deployment of your robotic solutions.
You must ensure that the Citrix administrator defines these properties; otherwise, Pega Robot Runtime™ does not work correctly. The primary problem that automation developers encounter when creating automations for Citrix environments is not having specific properties set.
Updating settings for local development and testing
If all of the target applications do not have the ability to be run locally, this type of testing will not work to verify your configuration. When running a configuration that is strictly local, you can verify the following properties for testing and development:
- In Pega Robot Studio, create a new solution or open an existing solution.
- In the Solution Explorer, right-click the Citrix context, and then select Properties to open the Properties window.
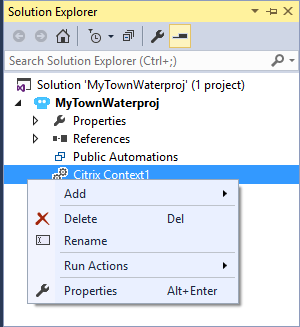
- Set the Run Local property to True so that the project can run the solution through Pega Robot Studio locally to test functionality.

Note: Running the solution on a local machine works only if all the applications are installed and working on the development workstation locally. Before completing the solution deployment, set the Run Local property to False to allow the project to connect across the Citrix channel to the server.
Updating settings for Citrix environment development and testing
Verify the following properties for testing and development:
- In Pega Robot Studio, create a new solution or open an existing solution.
- In the Solution Explorer, right-click the Citrix context, and then select Properties to open the Properties window.
- Set the Run Local property to False so that you can run the solution through Pega Robot Studio to test functionality, unless you are ready for deployment.

- Set the Project to Load property.
This property is the fully qualified path to the solution deployment package. The Project to Load property must run on the same deployment package that is on the client side. For example, if you create a folder named C:\Citrix solutions, you enter the following solution name, including the Windows folder path:

- Set the Published application name property.The name value in the form is not case sensitive. In the following example, this name points to the Pega Robot Runtime-published application on the Citrix server farm with the name PegaRuntime.
 Note: This property refers to the name of the Citrix Published Application, which runs on the Citrix server.
- Set the that are required after local testing has been completed and are used for testing through the Citrix access point.
Note: Developers do not need to fill in this login information unless the robotic solution requires specific user credentials for all users. Without this information, pass-through authentication is used.
- Domain – Set this property explicitly within a Citrix testing environment. For a production setting, you typically have pass-through identification set up.
- Login – Set this property with the username required for the Citrix access point.
- Password – Set this property with the password required for the Citrix access point.
- Show Password Dialog – Setting this property to False forces the system to use pass-through authentication for the Login and Password properties automatically.

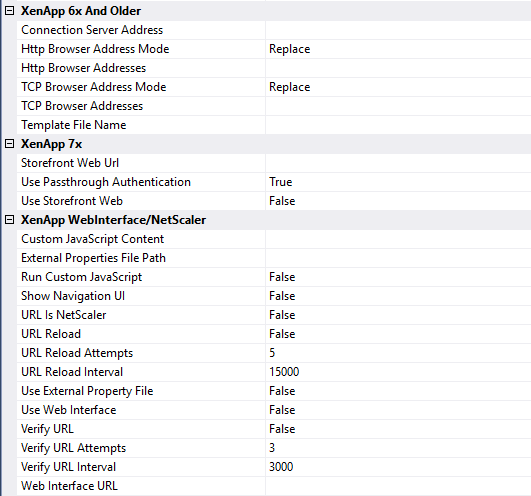
Using Citrix-specific properties
The following describes the server-specific properties for robotic solutions that are dependent on the version of Citrix your client is using. For additional information on how to customize Citrix version-specific properties, see the help topic Citrix Context Properties.
Note: You must know the version of Citrix you are using before you attempt to update these settings. For example, enter only values for the XenApp 7x section if you are using version 7 and storefront is enabled for both the and XenApp 6x and older section and the XenApp WebInterface/NetScaler section.
Using optional settings
For more information about how to properly configure the Dismissal options, see Windows Logon form dismissal.

Use the optional properties to customize your Citrix context further. For additional information on how you can use these properties, the help topic Citrix Context Properties.

This Topic is available in the following Module:
If you are having problems with your training, please review the Pega Academy Support FAQs.
Want to help us improve this content?