Workflows basierend auf dem Business-Kontext steuern
3 Aufgaben
10 Min.
Szenario
Wenn Kunden bei InsCorp um Pannenhilfe bitten, überprüft ein Kundenbetreuer manuell, ob der Kunde berechtigt ist, Pannenhilfe in Anspruch zu nehmen oder nicht. Um die Effizienz zu verbessern, entscheiden die Beteiligten bei InsCorp, dass dieser Schritt automatisiert werden sollte. Ersetzen Sie den vorhandenen Step „Approve/Reject“ für Genehmigungen oder Ablehnungen durch eine automatisierte Entscheidung.
In der folgenden Tabelle finden Sie die Anmeldedaten, die Sie zur Durchführung der Challenge benötigen.
| Rolle | Operator ID | Kennwort |
|---|---|---|
| Application Developer | author@gogoroad | pega123! |
Challenge-Schritte
Genaue Übungsschritte
1 Add a decision shape to the Validate request process
- In the App Studio navigation pane, click Case types > Assistance Request to open the Assistance Request case type.
- Hover over the Validate request process and click Configure process to open the process modeler.
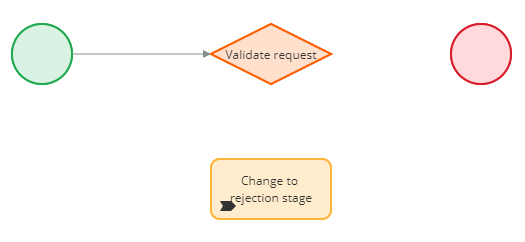
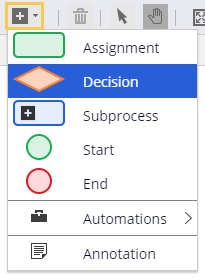
- Click Add a flow shape > Decision to add a decision shape.
- Rename the decision shape Validate request.
- Click Add a flow shape > Automations > Change to a stage to add a change stage automation.
Hinweis: By default, flow shapes are added to the center of the process modeler and may overlap. Move shapes as necessary to make the process easier to interpret.
- Rename the Change to a specific stage automation Change to rejection stage.
- In the properties pane of the Change to rejection stage shape, in the Stage drop-down, select Approval Rejection.
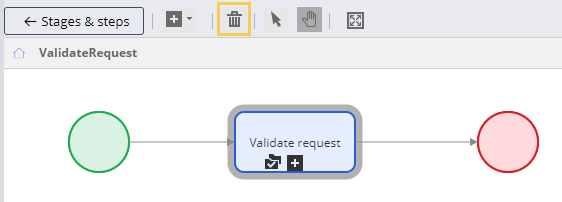
- Click the Validate request Approve/Reject shape, and then click the Trash icon in the process modeler toolbar to delete the shape.
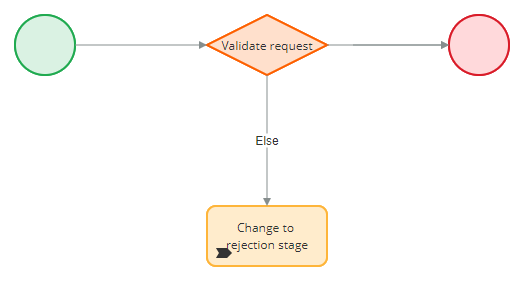
- Drag the connector from the start shape to the Validate request decision shape.
- Delete the connector to the end shape.
2 Configure the Validate request decision shape
- In the properties pane of the Validate request decision shape, in the When drop down, ensure that Custom condition is selected.
- To the right of Custom condition, click the Gear icon to open the Configure condition dialog box.
- In the first drop-down list, select the Enrollment field in the Customer ID data object. The second drop-down list defaults to is true.
- Click Submit.
- In the Go to drop-down, select [End].
- In the Otherwise go to drop-down, select Change to rejection stage.
- Click Save to apply the changes.
3 Confirm your work
- In the Assistance Request case type, click Save and run to run a new instance of the Assistance Request case type.
- Advance the case past the Create view.
- In the Enter customer information view, select the account ID of a customer that is not enrolled in roadside assistance coverage.
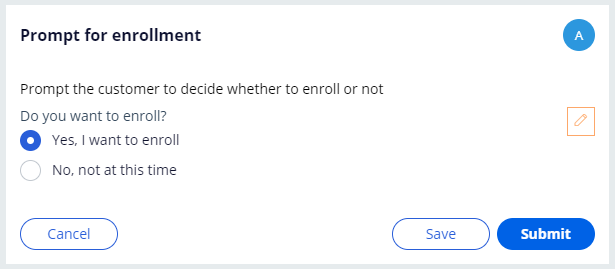
- Advance the case past the Enter payment information view. The Prompt for enrollment view is displayed.
- Create a second Assistance Request case instance.
- In the Enter customer information view, select the account ID of a customer that is enrolled in roadside assistance coverage.
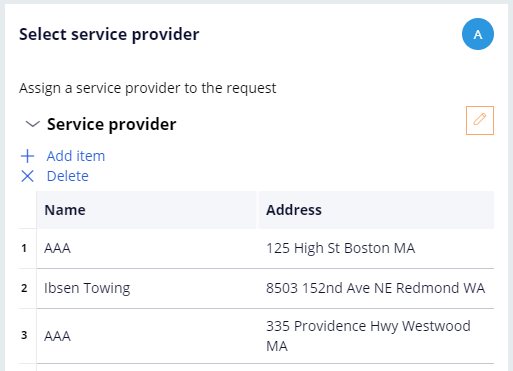
- Advance the case past the Enter payment information view. The Select service provider view is displayed.
In der folgenden Mission verfügbar:
If you are having problems with your training, please review the Pega Academy Support FAQs.
Möchten Sie uns dabei helfen, diesen Inhalt zu verbessern?

