実行時のビューのカスタマイズ
Archived
3 タスク
5 分
シナリオ
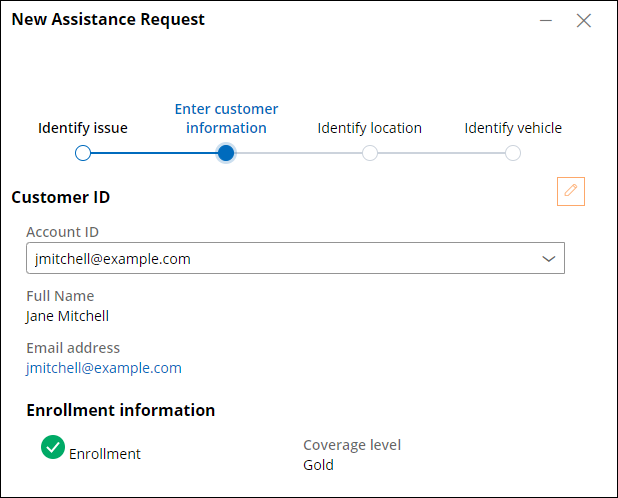
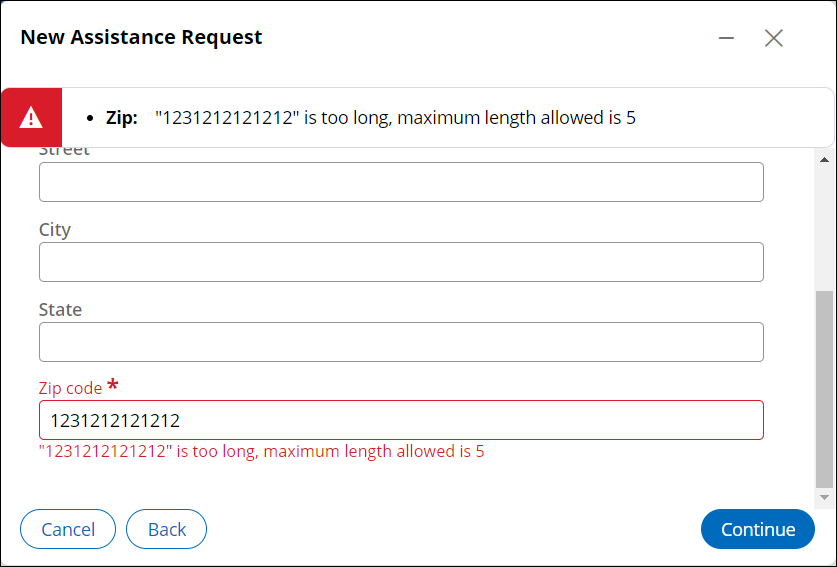
GoGoRoadの関係者は、「Enter customer information」ビューと「Identify Location」ビューで、適切な検証を行った上で関連情報のみを表示するように簡素化したいと考えています。 このリクエストに対応するには、「Enter customer information」ビューをカバーする情報を2列レイアウトに変更し、「Identify Location」ビューにZIPコードプロパティを必要なバリデーションを付けて追加します。
以下の表は、チャレンジに必要なログイン情報をまとめたものです。
| ロール | ユーザー名 | パスワード |
|---|---|---|
| アプリケーションデベロッパー | author@gogoroad | pega123! |
補足: 練習環境では、複数のチャレンジの完了をサポートする場合があります。 その結果、チャレンジのウォークスルーに表示される設定は、お客様の環境と完全に一致しない場合があります。
チャレンジ ウォークスルー
詳細なタスク
1 データタイプにプロパティを追加する
- App Studioのナビゲーションペインで次のアイコンをクリックします ⇒ Data.
- 「Data objects and integrations」ランディングページで、Service addressをクリックして「Service address」データオブジェクトを開きます。
- Add fieldをクリックして、「Service address」データオブジェクトに新しいフィールドを追加します。
- Field nameフィールドに、「Zip」を入力します。
- Type リストでText (single line)を選択します。
- Advanced をクリックしてオプションを展開します
- Max lengthフィールドに、「5」と入力します。
- Submit をクリックして変更を保存します。
2 テンプレートを2列のレイアウトに変更する
- App Studioのナビゲーションペインで、Case types > Assistance Requestをクリックして、「Assistance Request」ケースタイプを開きます。
- Save and runをクリックして、ケースインスタンスを作成します。
- 「Create view」の先に進みます。
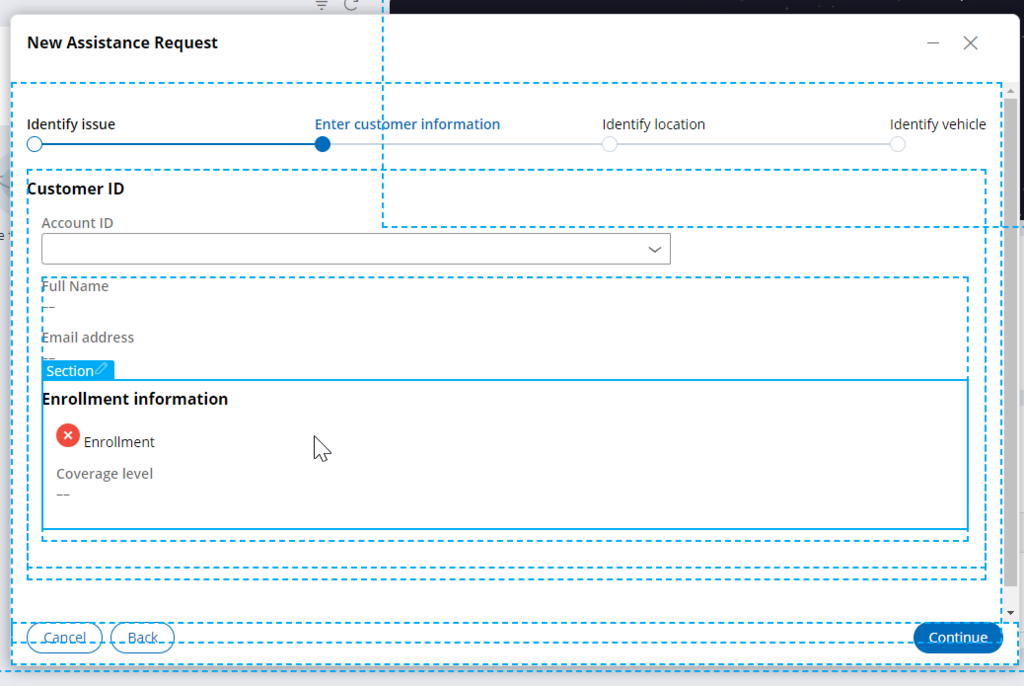
- 「Enter customer information」ビューで、Designモードを切り替えます。
- 「Enrollment information」セクションにカーソルを合わせてクリックし、Edit this section「Enrollment information」ペインを開きます。
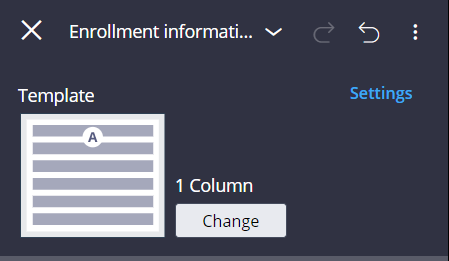
- 「Enrollment information」パネルで、「Template」の右側にある「Change」をクリックして、テンプレートを変更します。
- Select a templateウィンドウで、「2 Column」をクリックします。
- 「Enrollment information」ペインで、「Coverage level」にカーソルを合わせてクリックし、Column Bにドラッグします。
- 「Close」をクリックして、「Enrollment information」パネルを閉じます。
- Designモードを切り替えます。
3 コントロール値の設定
- 「Continue」をクリックして、ケースを「Identify location」ステップに進みます。
- 「Design」モードを切り替えます。
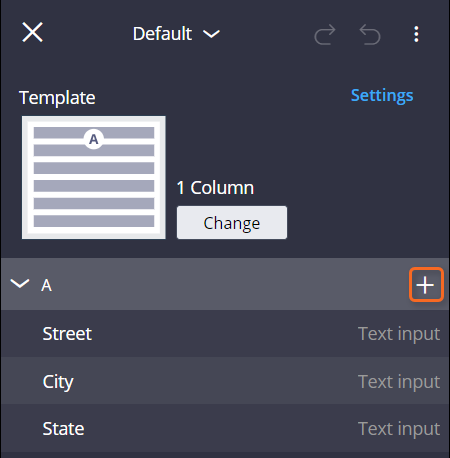
- 「Service address」アドレスセクションにカーソルを合わせて、Edit this sectionをクリックします。
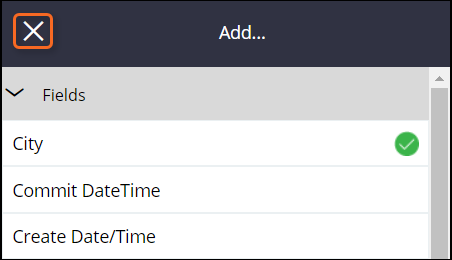
- 右側のペインで「Add」をクリックします。
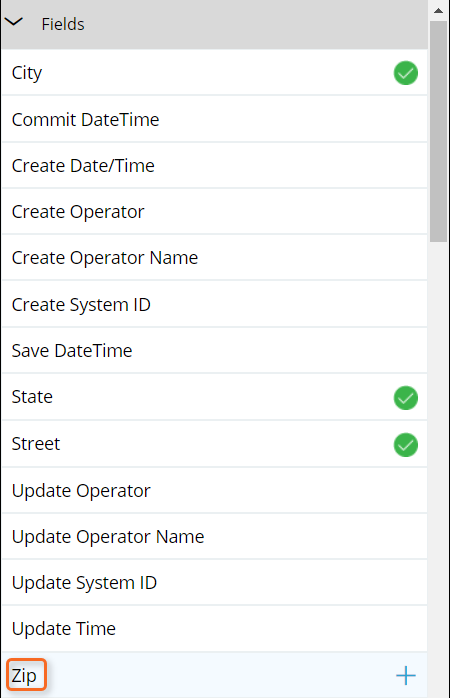
- Fields セクションで、「Zip」フィールドにカーソルを置き、Add to viewをクリックします。
- 「Close」をクリックして前のペインに戻ります。
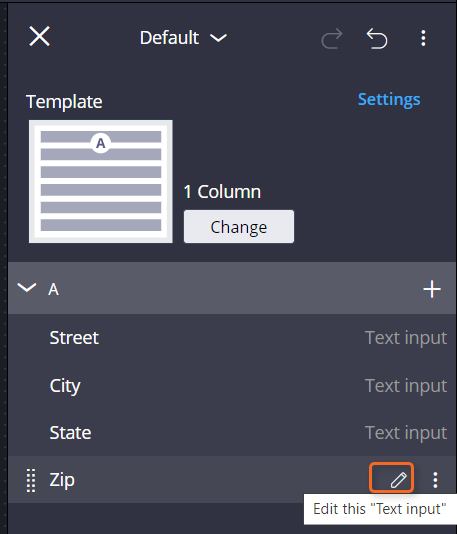
- 右側のペインで、Zipにカーソルを合わせ、「Edit this "Text input"」をクリックします。
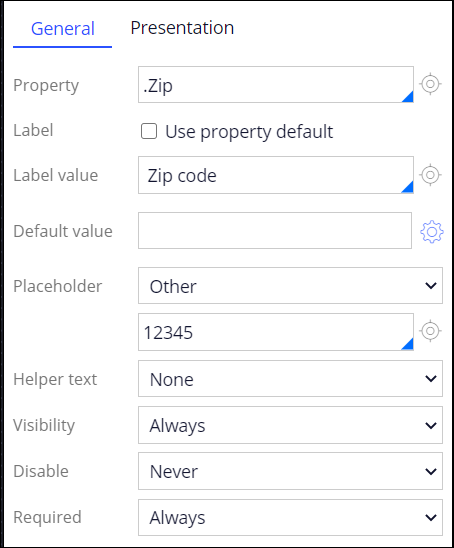
- 「Use property default」チェックボックスの選択を解除します。
- 「Label value」フィールドに「Zip code」を入力します。
- 「Placeholder」リストでOtherを選択します。
- 「Placeholder」リストの下のフィールドで、プレースホルダーの値として「12345」を入力します。
- 「Required」リストで、「Always」を選択します。
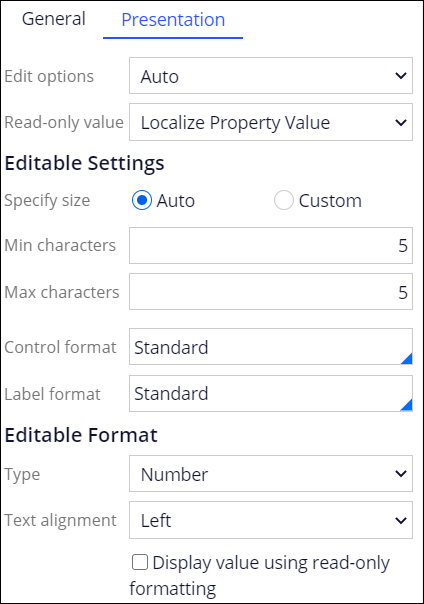
- 「Presentation」タブをクリックします。
- 「Editable Settings」セクションで、「Min characters」フィールドに「5」と入力します。
- 「Max characters」フィールドでも手順14を繰り返します。
- 「Editable Format」セクション、「Type」リストで、「Number」を選択します。
- 「Text alignment」リストで、「Left」を選択します。
- 「Display value using read-only formatting」チェックボックスの選択を解除します。
- 「Apply」をクリックして、変更を保存します。
- Closeをクリックして、前のペインに戻ります。
- Closeをクリックして、セクションペインを閉じます。
- 「Design」モードを切り替えます。
作業の確認
- マルチステップのナビゲーションメニューで、Enter customer informationをクリックすると前のステップに戻ります。
- 「Account ID」リストで、登録済みの顧客を選択し、2番目の列に「Coverage level」が表示されることを確認します。
- 「Continue」をクリックして、ケースを「Identify location」ステップに移動します。
- 「Identify location」ビューで、「Zip code」フィールドに数字のみを入力できることを確認します。
- Zip codeフィールドに6桁以上の数値を入力してContinueをクリックします。
- Zip codeの長さが6桁以上の場合、エラーメッセージが表示されることを確認します。
- Zip codeフィールドに5桁未満の数値を入力してContinueをクリックします。
- Zip codeの長さが5桁未満の場合、エラーメッセージが表示されることを確認します。
- Zip codeフィールドに5桁の数値を入力してContinueをクリックします。
- ケースが「Identify vehicle」ステップに進むことを確認します。


