
Configuring a Portal
1 Task
10 mins
Beginner
User Experience
English
Scenario
GoGoRoad provides roadside assistance services through contracted vendors. To ensure customer satisfaction and service consistency across vendors, auditors review common service requests (including vehicle unlock, tire repair, and battery charge). The new auditor role requires a unique interface. As the Director of Vendor Management, create a new Auditor portal and add an existing landing page to view recent Assistance Request cases.
Note: Before you begin, generate 5-10 case instances with varying service types.
The following table provides the credentials you need to complete the challenge.
| Role | User name | Password |
|---|---|---|
| Application Developer | author@gogoroad | pega123! |
Note: Your practice environment may support the completion of multiple challenges. As a result, the configuration shown in the challenge walkthrough may not match your environment exactly.
Challenge Walkthrough
Detailed Tasks
1 Create a channel interface for the auditor
- In the Pega instance for the challenge, enter the following credentials:
- In the User name field, enter author@gogoroad.
- In the Password field, enter pega123!.
- In the App Studio navigation pane, click Channels to display the current channel interfaces.
- In the Create new channel interface section, click Portal to display the New portal dialog box.
- In the Name field, enter Auditor.
- In the Description field, enter Custom portal for the GoGoRoad auditor.
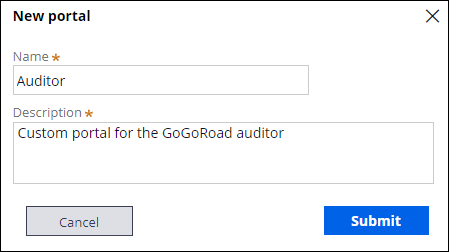
- In the New portal dialog box, click Submit.
- On the Content tab, in the Main navigation's Landing pages section, click Add separator.
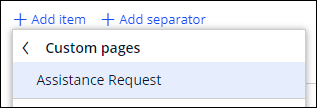
- Click Add item > Custom Pages > Assistance Request to add the Assistance Request landing page to the Navigation menu on the left side of the Auditor portal.
- Repeat step 8 to add the Pulse and Teams items to the Navigation menu.
- To the right of the Home item, click the Trash can icon to remove the item from the Navigation menu.
- Repeat step 10 to remove the Explore Data item from the Navigation menu.
- In the Navigation menu section, click and drag the items to match the following order.

- Click the Configuration tab.
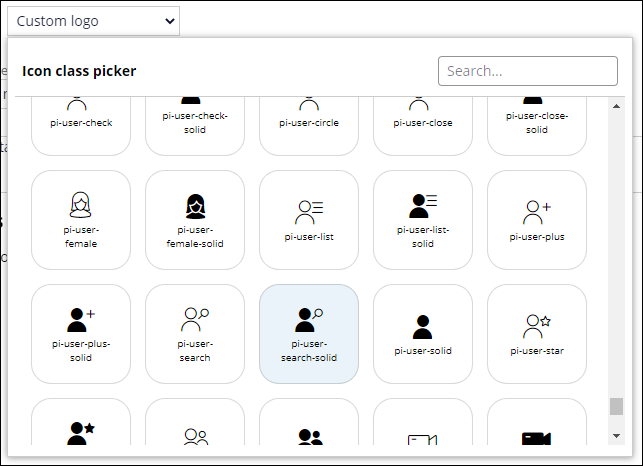
- In the Logo dropdown, select Custom logo.
- In the Icon class picker, select the pi-user-search-solid icon.
Tip: You can use the search bar to locate the appropriate icon.
- In the Channel header list, select Application name + Channel name.
- Click Save.
This Challenge is to practice what you learned in the following Module:
If you are having problems with your training, please review the Pega Academy Support FAQs.
Want to help us improve this content?