Designing a Case Life Cycle
Archived
9 Tasks
30 mins
Beginner
Case Management
English
Scenario
The mayor of MyTown wants to increase resident engagement and improve the town’s responsiveness to issues raised by residents.
To achieve this goal, the services coordinator wants residents to submit service requests that available city services can resolve. To begin the process, the mayor and the services coordinator have outlined a workflow for submitting, reviewing, and resolving service requests and want to design a case type to manage such requests.
In MLP1, residents create service requests from the user portal, service coordinators review the requests from the user portal, and department managers and service coordinators resolve the requests from the user portal. In MLP2, residents, services coordinators, and department managers have the option to interact with service request cases from the mobile channel.
The following table provides the credentials you need to complete the challenge.
| Role | User name | Password |
|---|---|---|
| Application Developer | author@mytown | pega123! |
Challenge Walkthrough
Detailed Tasks
1 Create a Service Request case type
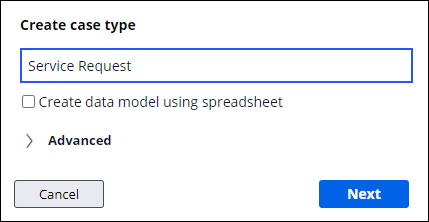
- In the window, click Create case type to display the Create case type dialog box.
- In the Create case type dialog box, in the Case type name field, enter Service Request.
- Click Next.
- On the Workflow tab, in the upper-right, click the configuration issues icon to display the Draft process warnings dialog box.
 Note: The dialog displays a warning for each step with an incomplete configuration in the workflow. The number of warnings varies as you configure the case life cycle.
 - Click Close to return to the case life cycle.
- Under Case life cycle, click the View: Steps, Personas, Data, Releases menu to display a list of check box items.
 Note: As a best practice, first define the case life cycle at a high level to help you determine the personas, channels, and data objects. Hide Personas and Data for now.
 - Clear the Personas check box to hide the Personas & Channels section in the case life cycle.
- Clear the Data check box to hide the Data & Interfaces section in the case life cycle and automatically clear the Releases check box.
- Click outside the menu to hide the View: Steps, Personas, Data, Releases menu.
2 Add the Review and Resolution stages
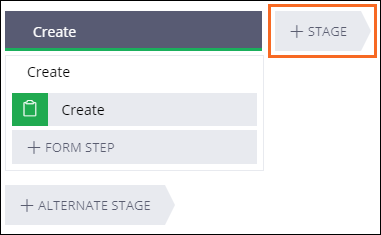
- To the right of the Create stage, click Stage to add a second stage.
- In the text box that is displayed, enter Review to add the second stage name and display the contextual property pane on the right.
- In the General tab of the contextual property pane, select Automatically move to next stage to enable the case to advance automatically when the Review stage is complete.

- To the right of the Review stage, click Stage to add a third stage.
- In the text box that is displayed, enter Resolution to add the third stage name and display the contextual property pane on the right.
- In the General tab of the contextual property pane, select to resolve the case automatically when the Resolution stage is complete.
3 Build the Create stage
- On the Workflow tab, in the Create stage, in the Create process, click Create to rename the first step of the Create process.
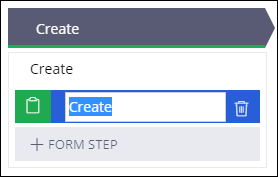
- In the field that is displayed, enter Report problem.
- Click Form Step to add a step to the multi-step form.
- In the field that is displayed, enter Identify location.
- Click Form Step to add a step to the multi-step form.
- In the field that is displayed, enter Request updates.
- Click the Create process to display the contextual property pane on the right.
- In the contextual property pane, under Horizontal navigation, click Change to select the navigation template.

- In the Select a template window, click Vertical navigation to display the navigation menu vertically.
4 Build the Review stage
- Under the Review stage, hover over Process, and then click Step to choose a step type.
- Click Collect information to add a step that collects user input.
- In the Collect information field, enter Schedule repair to name the step.
- Click the Review process and enter Review submission to replace the process label.
Note: When a new process is created, Pega Platform™ automatically assigns the process name based on the stage name. You can change the default process name after creating the first step in that process.

5 Build the Resolution stage
- In the Resolution stage, hover over Process, and then click Step to choose a step type.
- Click Collect information to add a step that collects user input.
- In the Collect information field, enter Perform repair to name the step.
- Click the Resolution process and enter Resolve issue to replace the process label.
- Click Step > Approve/Reject to add a decisioning task to display an Approve/Reject step under Perform repair and add an alternate stage to the case life cycle.

- In the Approve/Reject field, enter Review repair to name the step.
- Click Step to add the third step to the Resolution stage.
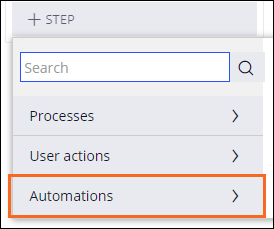
- Click More to display three step type categories: Processes, User actions, and Automations.
- Click Automations to display steps that are automatically performed or processed by the system.
- Click Send email > Select to add a step that automatically sends preconfigured emails.
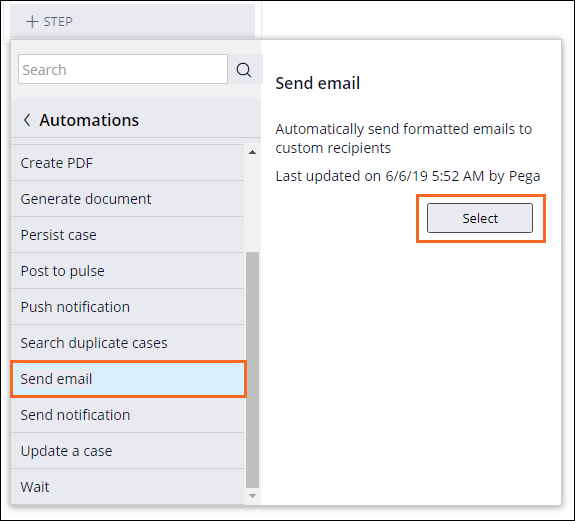
- In the Send email field, enter Send repair confirmation to name the step.
- In the upper right, click Save. The Service Request case life cycle is displayed with the stages and steps created.
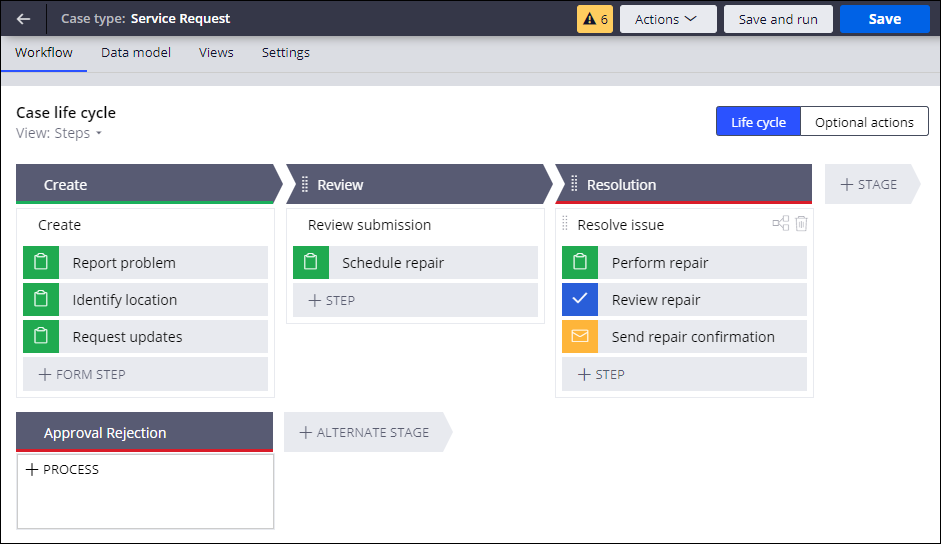
Note: The number of warnings increases to 6 due to incomplete configuration of the Collect information steps and Send email step. Disregard the warnings, as these issues are addressed in subsequent challenges.
6 Identify the personas and channels for MLP 1
- In the upper-left corner of the case life cycle, click the View: Steps menu to display a list of check box items.
- Select the Personas and Releases check boxes to display the Personas & Channels section in the case life cycle.
- In the Personas & Channels section, in the Create stage, click Persona > New persona to display the New persona dialog box.

- In the Persona name field, enter Resident.
- Click Submit to dismiss the New persona dialog box and display the Resident persona and User Portal channel, which is added by default.
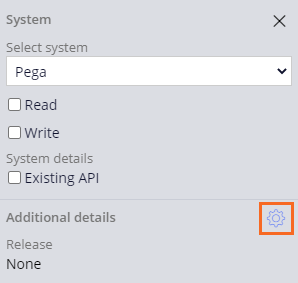
- Click the User Portal channel to display the configuration pane on the right.
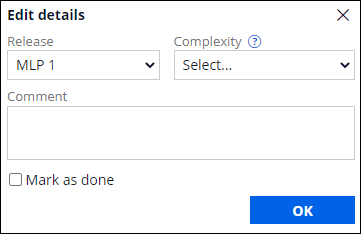
- In the configuration pane, to the right of Additional details, click Configure release to display the Edit details window.
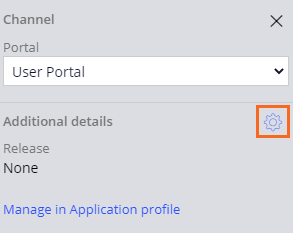
- In the Release list, select MLP 1, and then click OK to dismiss the Edit details window. The MLP 1 tag is displayed on the User Portal channel in the Case Designer.
- Repeat steps 3-8 to add a new persona named Services coordinator to the Review stage and tag the User Portal with MLP 1.
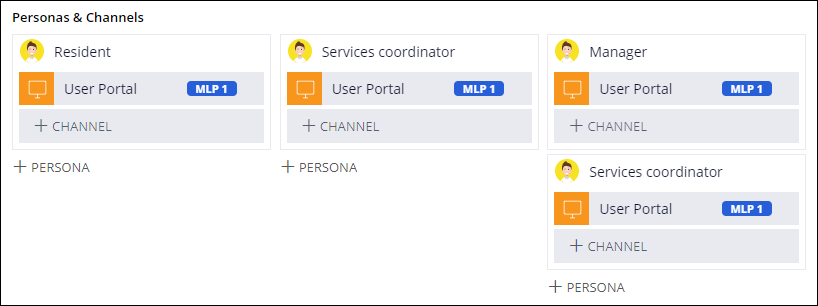
- In the Resolution stage, click Persona > Manager to add the Manager persona.
- Repeat steps 6-8 to tag the Manager User Portal channel with MLP 1.
- In the Resolution stage, click Persona > Services coordinator to add the Services coordinator persona.
- Repeat steps 6-8 to tag the Services coordinator User Portal channel with MLP 1.
7 Identify the personas and channels for MLP 2
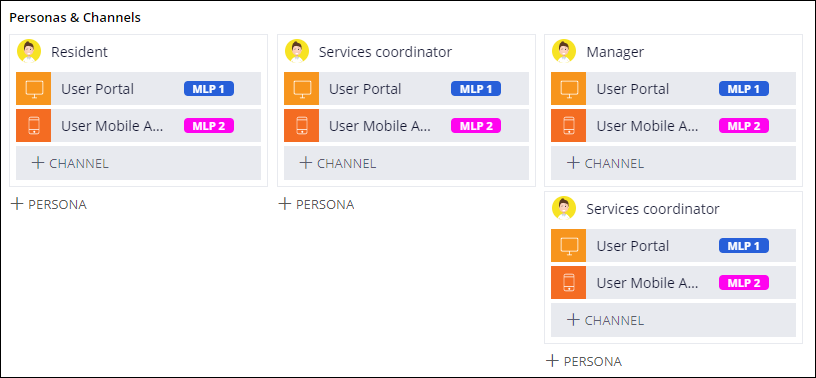
- In the Create stage, in the Resident persona, click Channel > Mobile to add the mobile channel to the Resident persona.
- With the User Mobile App channel selected, in the configuration pane, to the right of Additional details, click Configure release to display the Edit details window.
- In the Release list, select MLP 2, and then click OK to dismiss the Edit details window.
- Repeat steps 1-3 to add and tag the mobile channel for each persona with MLP 2.
8 Identify the data objects for MLP 1
- In the upper-left corner of the case life cycle, click the View: Steps, Personas, Releases menu to display a list of check box items.
- In the list, select the Data check box to display the Data & Interfaces section in the case life cycle.
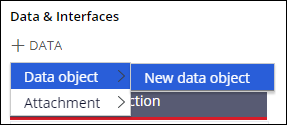
- In the Data & Interfaces section, in the Create stage, click Data > Data object > New data object to display the New data object dialog box.
- In the Name field, enter Request type.
- Click Submit to dismiss the New data object dialog box and display the Request type data object and Pega system of record, which is added by default.
- Click Pega to display the configuration pane on the right.
- In the configuration pane, to the right of Additional details, click Configure release to display the Edit details window.
- In the Release list, select MLP 1, and then click OK to dismiss the Edit details window.
- Repeat steps 3-8 to add the Submitter information and Previous issues at this location data objects to the Create stage with the MLP 1 tag.

9 Confirm your work (section not graded)
- On the Workflow tab, in the upper right, click to save changes and create a new Service Request case type instance.
- In the Report problem view, click Advance this case to proceed to the next view.
Note: Views in the Create process are displayed as a modal.
 Note: App Studio prompts you to configure views for each step in the case life cycle because you have not yet configured views. Disregard the message.
 - On the Identify location step, click Advance this case.
- On the Request updates step, click Advance this case.
- In the To do section of the case, to the right of Schedule repair, click Go to display the Schedule repair view.
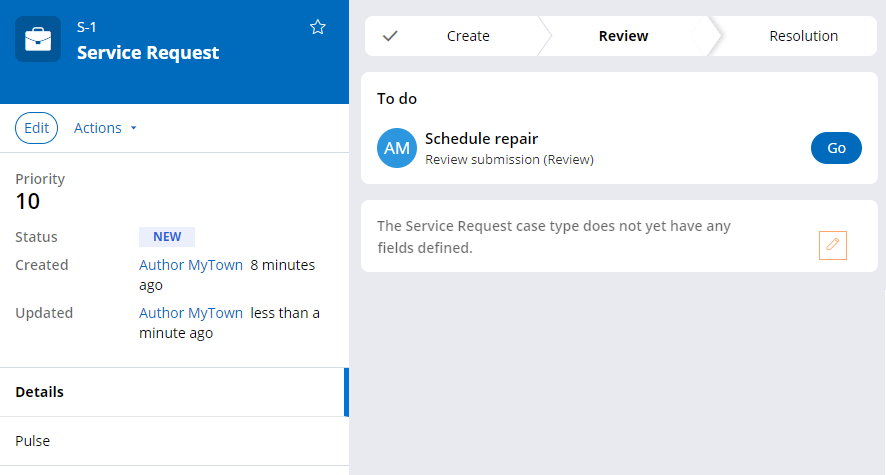
- On the Schedule repair view, click No, advance the case.
- On the Perform repair view, click No, advance the case.
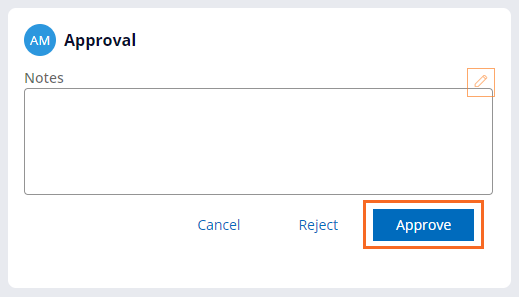
- On the Approval step, click Approve to complete the case.