Control the workflow based on business context
Archived
4 タスク
10 分
シナリオ
When customers submit a request for roadside assistance, a customer service representative (CSR) manually validates whether the customer is enrolled in roadside assistance coverage. To improve efficiency, stakeholders want to automate this step. Replace the existing Approve/Reject step with an automated decision that sends the case to the Approval Rejection stage if the customer is unenrolled.
The following table provides the credentials you need to complete the challenge.
| Role | User name | Password |
|---|---|---|
| Application Developer | author@gogoroad | pega123! |
補足: Your practice environment may support the completion of multiple challenges. As a result, the configuration shown in the challenge walkthrough may not match your environment exactly.
チャレンジ ウォークスルー
詳細なタスク
1 Remove the CSR persona from the Validation stage
- In the navigation pane of App Studio, click Case types > Assistance Request to open the Assistance Request case type.
補足: Ensure you click Life cycle to display the Assistance Request case life cycle.
- In the Validation stage, to the right of the CSR persona, click the Delete icon to remove the persona.
補足: Because the manual decision to approve the case is being automated, a persona is inapplicable to the stage.
- Click Save to apply the changes.
2 Add a Decision shape and Change to a stage to the Validate request process
- Hover over the Validate request process, and then click Configure process to open the process modeler.
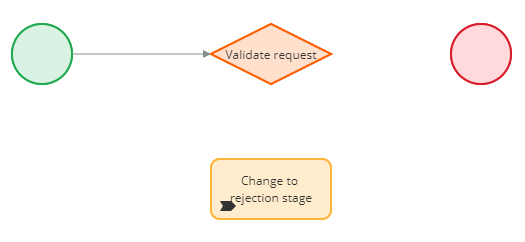
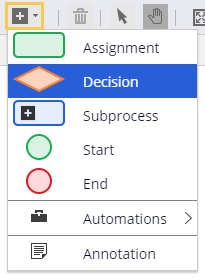
- Click Add a flow shape > Decision to add a decision shape.
- In the Decision shape, click the label, and then enter Validate request to replace the default label.
- Click Add a flow shape > Automations > Change to a stage to add a change stage automation.
補足: By default, flow shapes are added to the center of the process modeler and may overlap. Move shapes as necessary to make the process easier to interpret.
- In the Change to a specific stage automation shape, click the label, and then enter Change to rejection stage.
- On the right, in the properties pane of the Change to rejection stage shape, in the Stage list, select Approval Rejection.
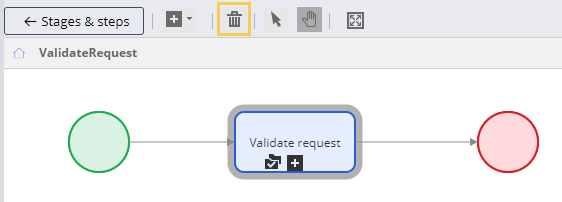
- On the canvas, click the Validate request Approve/Reject shape, and then click the Delete icon in the process modeler toolbar to delete the shape.
- Drag the connector from the starting shape to the Validate request decision shape.
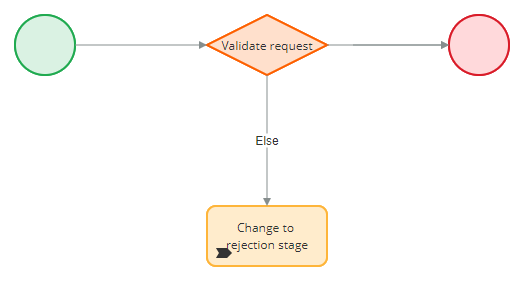
- Delete the connector that points to the ending shape.
3 Configure the Validate request decision shape
- On the canvas, click the Validate request decision shape to open the properties pane on the right.
- In the properties pane of the Validate request decision shape, in the When list, ensure that Custom condition is selected.
- To the right of the When list, click the Gear icon to open the Configure condition dialog box.
- In the first drop-down list, click Customer ID > Enrollment. The value of the second drop-down list defaults to is true.
- Click Submit.
- In the properties pane of the Validate request decision shape, in the Go to list, select [End].
- In the Otherwise go to list, select Change to rejection stage.
- In the upper right, click Save to apply the changes.
- In the header of the canvas, click Stages & steps to return to the case life cycle.
4 Confirm your work (section not graded)
- In the Assistance Request case type, click Save and run to create a new Assistance Request case.
- Advance the case past the Identify issue view.
- In the Enter customer information view, select the account ID of a customer that is not enrolled in roadside assistance coverage.
- Advance the case past the Enter payment information view to display the Prompt for enrollment view.
- Create a second Assistance Request case.
- In the Enter customer information view, select the account ID of a customer that is enrolled in roadside assistance coverage.
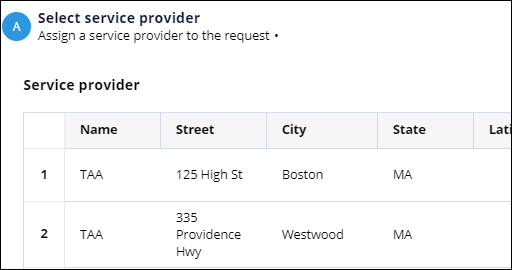
- Advance the case past the Enter payment information view to display the Select service provider view.
補足: The content of the list of service providers depends on the location that is entered in the Identify location view. If you did not enter a location, the list of providers is empty.

