子ケースの作成
2 タスク
10 分
初級
ケースマネジメント
Constellation
日本語
シナリオ
InsCorpでは、自動車保険契約のオプションとしてロードサイドアシスタンスサービスを開始しています。 Assistance Requestケースタイプを設定し、ServiceステージでServiceケースを作成して、選択されたサービスを実行します。
補足: このチャレンジのフレームワークでは、Pega Platform™のConstellationアーキテクチャを使用します。 従来のUIアーキテクチャでこのチャレンジを実践するには、バージョン8.8のチャレンジの「Creating a child case」を参照してください。
以下の表は、チャレンジに必要なログイン情報をまとめたものです。
| ロール | ユーザー名 | パスワード |
|---|---|---|
| アプリケーションデベロッパー | author@gogoroad | pega123! |
補足: 練習環境では、複数のチャレンジの完了をサポートする場合があります。 その結果、チャレンジのウォークスルーに表示される設定は、お客様の環境と完全に一致しない場合があります。
チャレンジ ウォークスルー
詳細なタスク
1 サービスケースを子ケースとして作成する
- チャレンジのPegaインスタンスに、以下のログイン情報を入力します。
- User nameフィールドに「author@gogoroad」と入力します。
- Password フィールドに「pega123!」と入力します。
- App Studioで、ナビゲーションパネルから「Case types」 > 「Assistance Request」をクリックして、Assistance Requestケースタイプを開きます。
- Serviceステージにカーソルを合わせ、次に「More」 > 「Add process」 > 「New process」をクリックします。

- 新しい「Process」フィールドに、「Create Service Case」と入力します。
- Create Service caseプロセスの下で、「Step」をクリックしてステージに新しいステップを作成します。
- 「More」 > 「Automations」 > 「Create Case」をクリックし、次に「Select」をクリックして、Create Caseステップをプロセスに追加します。

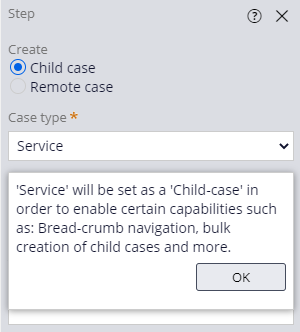
- Create Caseステップで、「Create Service Case」ケースと入力してデフォルトのテキストを置き換えます。
- 右側のコンテキスチャルプロパティパネルのCase TypeリストでService を選択し、サービスケースを作成してOKをクリックします。
- Transfer information to new Caseをクリックして、Transfer informationウィンドウを表示します。
- 「Customer ID, Service address, Vehicle information」を選択します。
- 「Add mapped fields to 'Assistance Request Info' View (in 'Service' Case Type)」チェックボックスが選択されていることを確認します。
- OK をクリックして、Transfer informationウィンドウを閉じます。
- Service (1)ステップで、削除アイコンをクリックしてステップを削除します。 Serviceステージが、以下の画像のようになっていることを確認します。

- 「Save」をクリックして、Assistance Requestケースライフサイクルを保存します。
2 Serviceケースタイプの設定
- App Studioのナビゲーションパネルで、「Case types」 > 「Service」をクリックしてServiceケースタイプを開きます。
- Confirm request detailsをクリックし、右のコンテキスチャルプロパティパネルでConfigure Viewをクリックします。
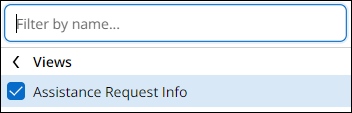
- 「Fields」セクションで、Add > Viewsをクリックしてビューのリストを表示します。
- 「Assistance Request Info」をクリックし、「Add」をクリックします。
- Submit をクリックして、「Confirm request details」ビューに変更を送信します。
- Settings タブをクリックして、Serviceケースタイププロパティを開きます。
- General セクションのAvailabilityの下で、「Create」メニューでServiceケースの作成を無効にするには、Make available for adding to create menu チェックボックスがオフになっていることを確認してください。

- Save をクリックしてServiceケースタイプを保存します。
このチャレンジは、下記のモジュールで学習したことを実践するための内容です。
- 子ケースの作成 v6
このモジュールは、下記のミッションにも含まれています。
トレーニングを実施中に問題が発生した場合は、Pega Academy Support FAQsをご確認ください。